Image via Blizzard Entertainment
A game like Diablo 4 is all about blasting through demons and grinding for loot. But along with those, it’s a game that is deeply rooted in the idea of class fantasy and builds.
Builds are what make your character yours, and using a combination of all the game’s features, you combine Skills, gear, effects, and everything in between to create your hero, and that can be a daunting task.
Where do you start? What should I consider when making a build? Do I need to plan out certain details? All of these have crossed my mind at some point. So, I figured, why not write a guide and help others through the process?
In essence, this guide is a step-by-step walkthrough on how to create your own builds in Diablo 4, where I’ll explain each step, give some insight, and do it in a way that’s both informative and as digestible as possible.
What do you want to play?
The first thing you need to know before playing Diablo 4 is what you want to play, which I believe starts with two main factors: your class and playstyle.
First, let’s cover the game’s classes with a few details on what they can do and what kinds of gameplay they offer.
Every class has a unique mechanic or feature that gives them their flavor, whether that affects certain abilities or their weapons. The idea is that these play a part in how the class feels to play and contribute to some of the decisions you’ll make when making your build.
Classes
Barbarian
Druid
Necromancer
Rogue
Sorcerer/Sorceress
Spiritborn

The bulky fighter of the groups, Barbarians are the heavy hitter melee option for players who want to get up close and personal. They have many abilities and options that are about dealing out a lot of melee damage, while also mitigating the damage they take.
Barbarians have the unique ability to wield four weapons, including two one-handed weapons, one two-handed slashing weapon, and one two-handed bludgeoning weapon. With that, certain skills require certain weapons, such as Hammer of the Ancients, which, unsurprising, requires a two-handed bludgeoning weapon.
Along with this, they have Weapon Expertise, which sees Barbarians gain experience with their weapon types. As they level up, you unlock buff to using that weapon, such as Critical Hit Chance, and the option to have one be permanently applied, even if you aren’t using that weapon type. They also can use Berserking, a buff that increases their movement speed and damage for a limited time.
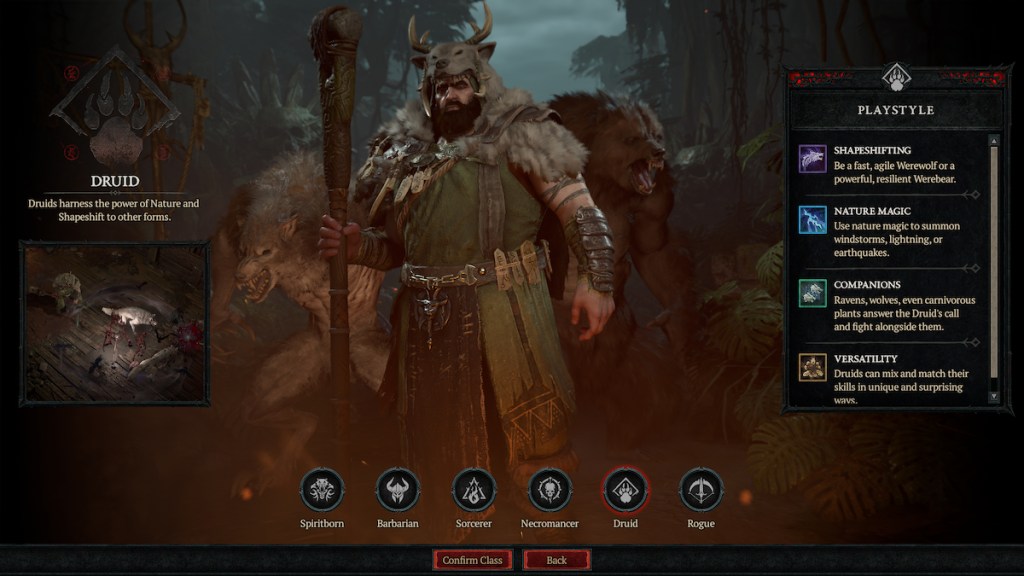
Druids are a class that can have many flavors, with the ability to shapeshift into a Werewolf or Werebear for a fast-paced or tanky playstyle, or use Storm and Earth magic to attack and hinder their foes. Or in some cases, use a bit of the two.
The Druid’s unique feature is its Spirit Boons, which give players passive buffs to their character, with each Spirit offering four boons each. You select one to have active from each, and then when you unlock Spirit Bonding, you can choose an additional boon from your bonded animal for a total of five buffs. These Spirits include the Deer with more defensive options, The Eagle for Critical Strike Chance and Damage, The Wolf for its Companion skill and Ultiity, and the Snake, which is for Hybrid builds.
Druids also are one of the two classes that have Companions, with the ability to summon Ravens, Wolfs, and Vines to aid them in battle with their own advantages, and are one of the more versatile classes in the game.
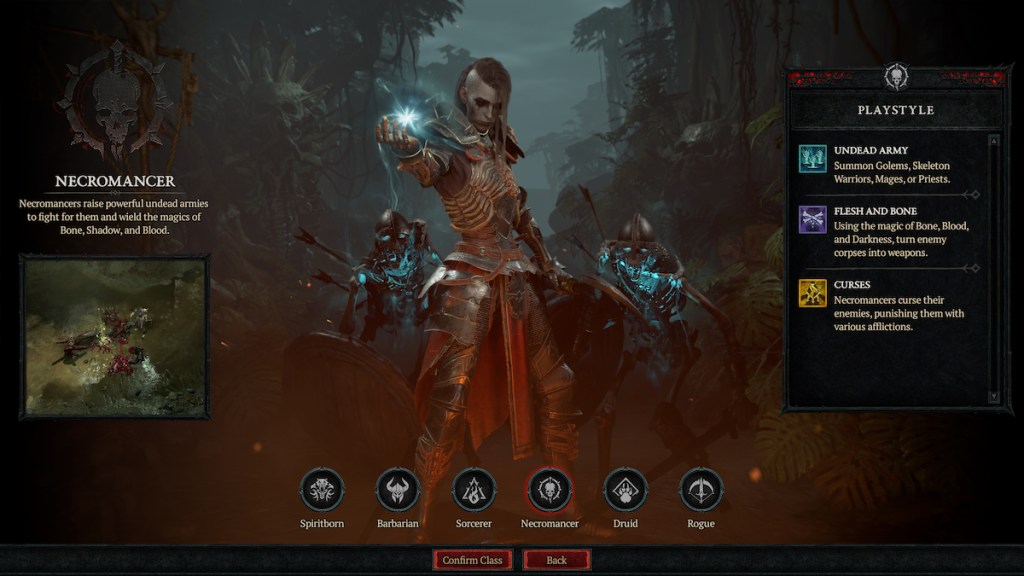
The Necromancer is a damage-dealing spellcaster who uses blood, bones, and darkness to destroy their enemies. They are primarily a ranged spellcaster, but also use an army of undead minions to do their dirty work.
Necromancers unique feature is the Book of the Dead, which allows them to customize their undead army with different units, each with various advantages. This can include making your warriors into Defenders, or sacrificing summoning minions for permanent buff instead. They can summon Skeletal Warriors, Mages, and a Golem to add them.
Additionally, they use Corpses alongside their primary resource. These are left behind upon killing enemies and are used for certain abilities like Corpse Explosion for damage, crowd control, and buffs.
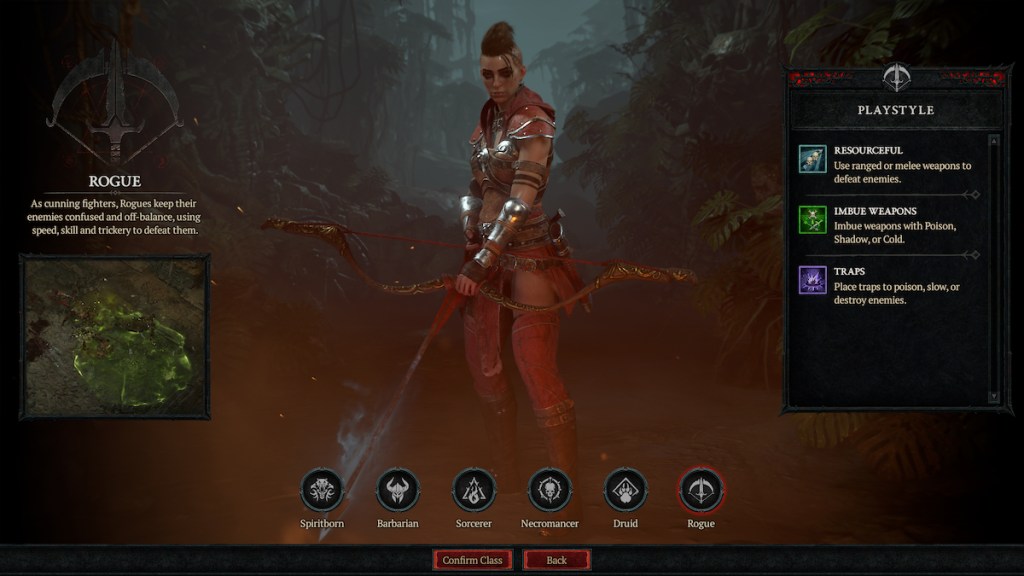
The Rogue is a crafty class that uses traps, stealth, mobility, and other tools to control the battlefield and lay waste to enemies. They can fight at range using bows and crossbows, as well as up close with dual wield blades, along with multiple different tools in their arsenal, such as Stun Grenades and Caltrops.
Rogue’s unique feature is Specialization, which allows them to empower themselves with certain gameplay aspects in mind. These include Combo Points, which increase the damage of certain moves with each point, Inner Sight, which gives you unlimited Energy after killing marked enemies, and Preparation, which helps lower your cooldown for Ultimate abilities.
They also use Imbuements, which apply a damage type, such as Poison, to certain attacks for different effects and uses, as well as Traps, which can be set and used to hinder or kill enemies. Then they can Stealth, so avoid enemies and move around into position with no trouble, making them great for players who like a little tactical element to their build.

The Sorcerer/Sorceress is your standard mage fantasy, able to wield Fire, Cold, and Lighting magic to obliterate enemies with their magical prowess. They often stand back and blast enemies, since they are very squishy and often need distance to avoid being overwhelmed.
Sorcerer/Sorceress’s unique feature is Enchantments, which let you enhance your abilities by using other abilities, so long as you have a point in them on your Skill tree. For example, if you have Fireball, and apply that to one of your two Enchantment slots, then when you kill an enemy, they explode for 50% of the damage. You can also slot spells you actively use, so the options are massive.
Along with that, they have several unique elements depending on their spell school, giving players a lot of options in how their fling their magic.

The Spiritborn class is only available to players who have the Vessel of Hatred expansion.
The Spiritborn is the martial arts class that uses their bodies and the aid of Spirits to combat the enemies of Sanctuary. They are the most versatile class in the game. Spiritborn use the Spirits Guardians to aid them in combat, and depending on which are used, will have different playstyles and uses.
Their unique feature is the Spirit Hall. This allows them to select two of the four Spirit Guardians and get benefits depending on their choices. The Primary choice will provide buffs as well as turn all Skill into Skill that match the Guardian, so selecting Eagle will make your Skill Eagle etc, which opens up a ton of options to the classes and how skills interact. The second provides an additional passive buff and can be the same or different from the primary option.
The class also has unique features depending on your choices, such as the Gorilla Skills, which give you resolve to decrease damage taken, or the Eagles Feathers, which can be utilized for damage and buffs.
Style of Play and Content
Now you’ve had a chance to see what the classes can do, you’ll want to think about what kind of playstyle you want and enjoy.
What I mean by this is, what exactly do you want to be doing with your build? Do you want to be a ranged glass cannon who kills everything in a single spell? Or do you prefer something a bit more brutish and want to get stuck in and smash hordes of enemies in red mist?
Having an idea of what kind of fantasy or theme you want to explore can be a big help when making a build; I mean, if you have to play and look at your character for hours, you want it to be a cool one, right?
Additionally, considering what content you want to play can also influence certain decisions. If you plan battling hordes of enemies, an AoE-focused build would make more sense. Perhaps you want to nuke bosses, so you lean toward that aspect of a class. Or maybe you want a bit of both. My point is, there is a lot of content in Diablo 4, so have a little think about what it is you want to be doing and getting out of your build.
There are a few things to consider with this step, such as Skills, Stats, Affixes, and Legendary Aspects, as well as several more. Some of that might have sounded like gibberish, but don’t worry, I’m going to cover each of the important steps in making your build below, and by the end of this guide, you should be able to create a build that feels fun and effective to you.
Building Your Build
Now you have a class and a vague idea of what you want to be doing with your build; it’s time to start putting it together.
Here, we are going to cover the key parts of making a build, which entails your Skills, Aspects, and all the other core parts. All of these are important, so be sure to consider each based on what you want to play and how you plan to play it.
Skills
These are the literal backbone of your class, since they are the buttons you will be pressing and the passives that will make up the bulk of your class.
Players choose their Skills from the Skill tree, which separates each section for easier navigation, starting with Basic Attacks, then moving to Core Skills, which use your primary resource, such as Fury or Energy. After that, classes will have different sections that fit their fantasy and playstyles, such as the Rogue’s Agility choices, or the Druid and Barbarians Defensive options.
There are two Skill types for you to utilize:
Active Skills
Passive Skills
Active – These are the skills you use when you press buttons, or are sometimes triggered by other means. These will be your main offensive, defensive, and utility actions. Players can have six of these in their action bar.
Active Skills have five ranks you can invest in, and three additional nodes that buff the Skill. The first is a set option, and the second and third split, giving you a choice of one or the other. Ultimate Skills are the exception to this.

Passive – These work in the background and contribute to your Skill power or add some extra spice and flavor to your build, such as enhancing your defensive capabilities after using a certain skill, or enhancing a debuff you are using.
Passive Skills have three ranks you can invest in, increasing their power with each.
Unlocking sections of the Skill Tree requires you to invest a certain amount of points in the sections before, so you might not be able to unlock certain Skill till you have spent say six Skill Points in the other sections and nodes.
Players have at maximum 71 points to spend on the Skill tree, with 61 coming from leveling up to level 60, and the others coming from leveling Renown in each of the base games region. You can do this by completing Strongholds, Quests, discovering locations, and generally playing the game in those areas. The extra Skill points come at level 3 Renown.
Synergy and Keywords
When it comes to Skills, it is always a good idea to focus on one or two as your primary Skills, which will be the focus of your build. You can make those your main damage dealers, and focus all your other choices on making them better. Going beyond one or two can lead to an underwhelming build, so it’s usually a good rule of thumb to approach building a build with this in mind.
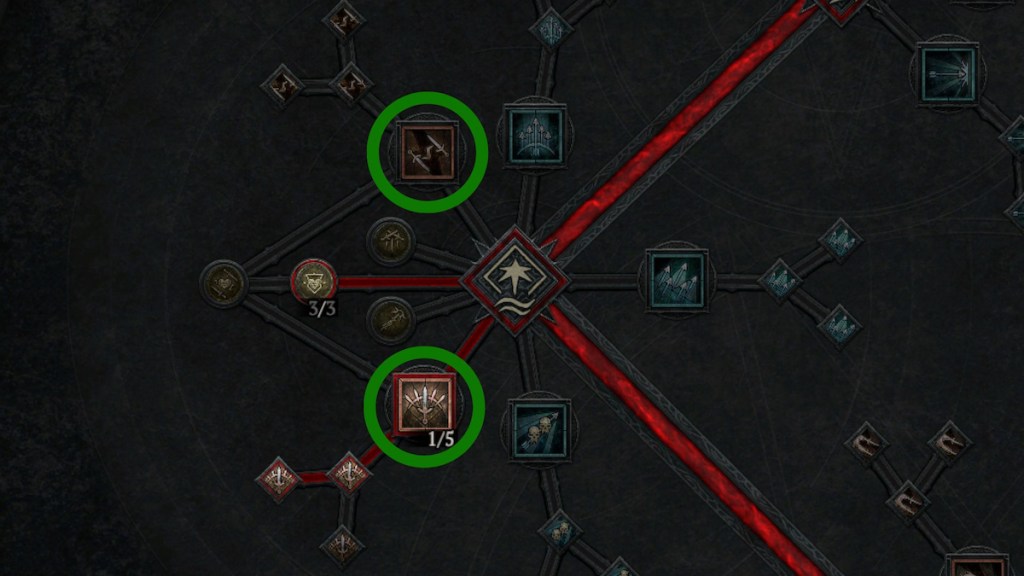
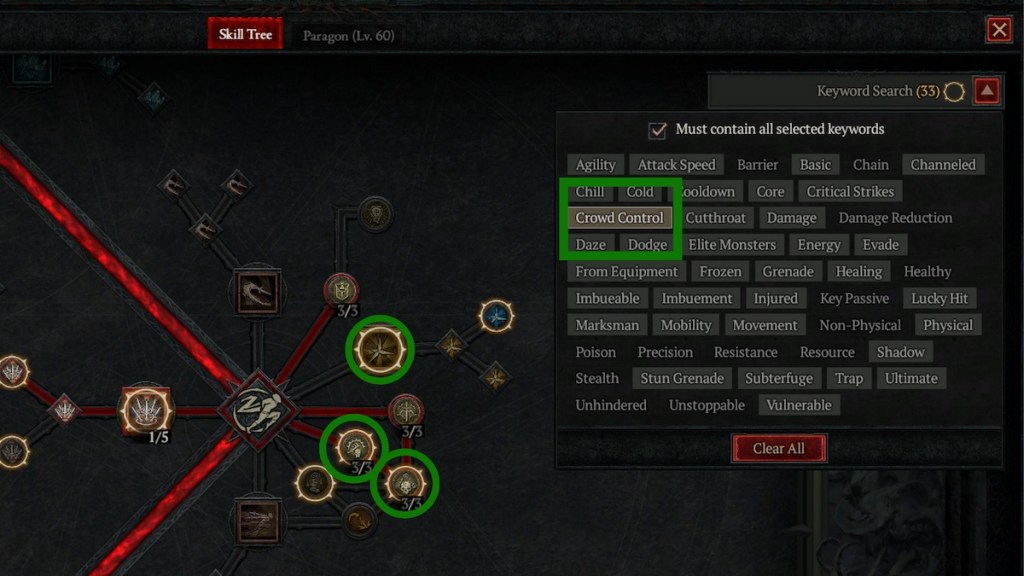
A good way to do this is with Keywords. Every Skill in your Skill tree will have certain words that are considered Keywords, which are often underlined, bold, or under the name of the Skill. This includes things like Agility, Eagle, Imbuable, Defensive, and so on. These can help you find skills that blend well together or what Passive nodes can buff the effectiveness of your Skills.
For example, The Rogue has the Unstable Elixirs Passive, which lets you drink Healing Potions at any time, and stuns enemies around you while also giving you a damage buff.
After that node, there is a Passive called Trick Attacks, which gives you increased Critical Strike Chance and Damage when you Daze or Stun an enemy. The two work well together, so it might be worthwhile to use them both. Other Skills like Smoke Grenade dazes an enemy, which adds another way to get that effect. So, by searching the Keyword Crowd Control or Daze on your Skill Tree, you’ll see all the moves that inflict or utilize that effect for buffs, and choose which work for your build.
It’s all about focusing on a few key aspects of a build that work together well, which often gives you the best results.
Stats and Affixes
Along with Skills, you’ll need to consider your Stats since these can both improve the strength of your build and also refine it and provide some extra needed power, defense, or utility.
Primary Stats
There are four main stats in Diablo: Strength, Dexterity, Willpower, and intelligence. Each of these has an inherent bonus that every class gets per point, which are as follows.
- Strength – Armor
- Dexterity – Dodge Chance
- Willpower – Healing Received and Overpower Damage
- Intelligence – All Resistance

Additionally, these will provide different bonuses depending on the class, so different classes and builds will favor different stats. These are as follows:
Barbarian
- Skill Damage per point of Strength
- Resource Generation per point of Willpower
- Critical Strike Chance per point of Dexterity
Druid
- Skill Damage per point of Willpower
- Resource Generation per point of Intelligence
- Critical Strike Chance per point of Dexterity
Rogue
- Skill Damage per point of Dexterity
- Resource Generation per point of Strength
- Critical Strike Chance per point of Intelligence
Sorcerer and Necromancer
- Skill Damage per point of Intelligence
- Resource Generation per point of Willpower
- Critical Strike Chance per point of Dexterity
Spiritborn
- Skill Damage per point of Willpower
- Resource Generation per point of Intelligence
- Critical Strike Chance per point of Strength
Secondary Stats/Affixes
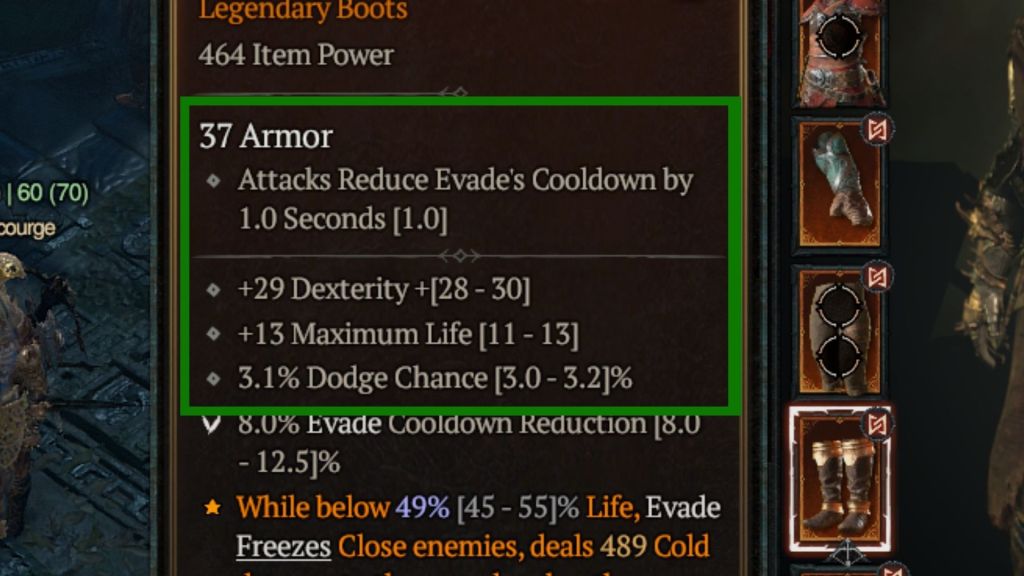
Along with these main stats, there are several others to consider, which arguably have more of an effect on your build. These secondary stats, or Affixes, provide additional benefits that vary depending on the weapon type, class, and armor type.

These can range from increasing Attack Speed, Critical Strike Damage, and Damage to Close or Distant enemies, as well as defensive uses, such as increasing your Maximum Life, providing Damage Reduction, increasing Healing received, and more. There are also Utility-based Affixes, such as Cooldown Reduction, Skill Ranks, Lucky Hit Chance, Movement Speed, and Resource Generation, to name a few.
Depending on the gear rarity, you’ll find a different amount of these Affixes, which are listed below.
- Magic – 1/2 Affixes
- Rare – 3/4 Affixes
- Legendary – 3 Affixes + Legendary Aspect
- Unique/Mythic Unique – 4 Affixes + Unique Effect
By the time you are approaching the endgame, you will only have items from the last three rarities, Legendary, Unique, and Mythic Unique, since these are required for certain features I’ll touch on later.
Gear will have set Inherent Affixes they can have, meaning you can expect certain ones to be on certain items. For example, Boots will have the Evade-focused Affixes, which provide increased Movement Speed or Uses, or Daggers, which have Damage to Close Enemies.
Can you Reroll Affixes in Diablo 4?
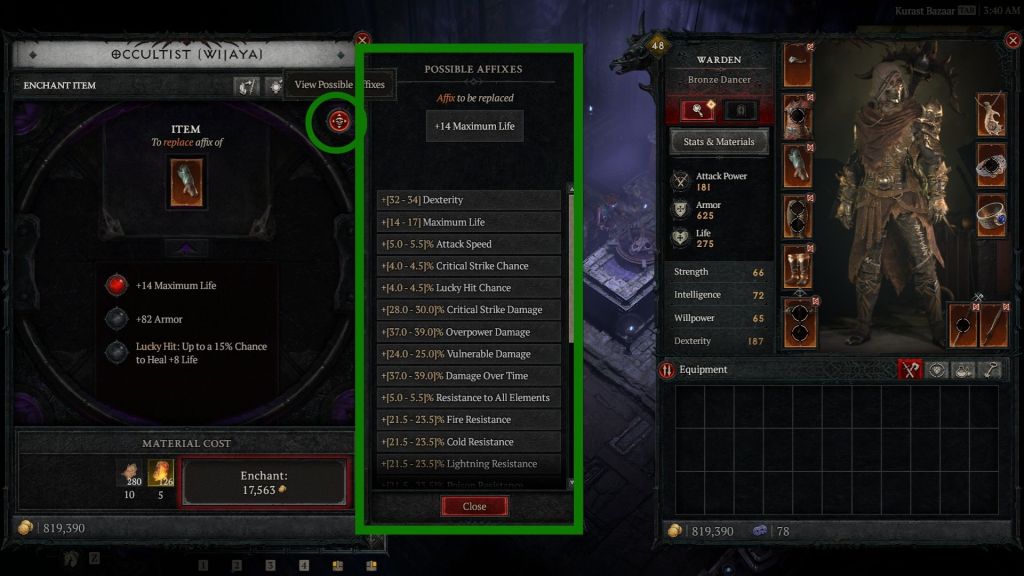
It is possible to reroll Affixes to ones your items can roll when dropped. Visit the Occultist, and they can show you what Affixes you could get and let you reroll a single Affixes on an item. The green circle will bring up the Possibles Affixes your gear can get.
The idea with these stats is to enhance and add to what your class and build does, so if you are looking to use Lucky Hit, you’ll want to try and invest in Lucky Hit Affixes to get the most out of certain abilities and Skills.
Reading your Skills, alongside seeing what Affixes work with your build, will help with power, survivability, and overall gameplay, so be sure to take a moment to see what your gear’s stats are doing for you.
Legendary Aspects and Uniques
So, you got your Skills, and you know your Affxies. What’s next? Now, we move on to Legendary Aspects and Uniques.
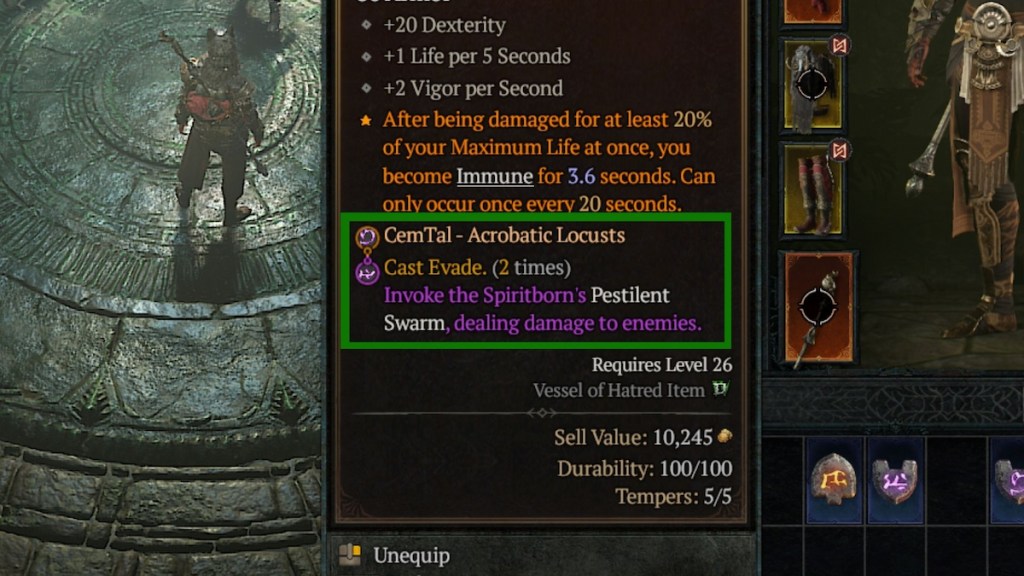
Legendary Aspects are essentially enhancements and additional effects you apply to your gear, which can alter how certain abilities work, provide additional effects, or improve a skill’s utility. This is the orange, peach, and purple text under the item’s stats.

These are found in two ways: Dungeons or salvaging Legendary items. Doing these adds them to your Codex of Power, which you then use at the Occultist to apply these effects to your gear. As you find better versions, you can salvage them to improve the version in your Codex so you always have the best one you have obtained. These can be applied to Rare or Legendary rarity gear.
Unique items are similar, but unlike Legendary Aspects, which can be salvaged, reused, and improved, these are set items with the same Affixes and effects. What drops is what you get; if you want a better version, you’ll need to farm it. Think of these as nice bonuses to a build, and should never be the defining factor since they have very low drop rates.
There are also Class-specific Aspects, which are unique to said Class, and Universal Aspects, which can be used by any Class.

There are five categories of Legendary Aspect, which can be applied to certain gear types. To make it easy to understand, we have a table here that has each Aspect’s gear slots listed.
| Weapon | Defensive | Offensive | Resource | Utility | Mobility |
|---|---|---|---|---|---|
| One-Handed Weapon | X | ||||
| Two-Handed Weapon (Doubles Affixes’ Power) | X | ||||
| Off-Hand | X | X | |||
| Helm | X | X | |||
| Chest | X | X | |||
| Pants | X | X | |||
| Boots | X | X | |||
| Gloves | X | X | |||
| Amulet (50% Affix Power increase) | X | X | X | X | X |
| Rings | X | X |
You can search and see what Aspects you can use in the Codex of Power, and see which are available from Dungeons, which should be your first choice, since these are much easier to get. These also feature Keywords, so checking what Keywords are in Aspects can also inform what you use, and how they interact with your Skills and build.
Often, having a few you can earn early on, such as a Rogues Trickmaster Aspect for a Penerating Shot build, can help get your build going sooner, as well as some planning on where you plan to slot each Aspects, since you have limited options and gear they can go onto. Once you have these, your build will start to take shape pretty quickly and you will see a noticeable increase in power.
Paragon
It’s onto the late-game progression now with the most intimidating part of creating a build, at least in my opinion.
The Paragon Boards.

These boards are a late-game progression system, which involves spending Paragon points to unlock a series of nodes, and as you unlock them, you form a path through the board and then unlock a new board and continue the process. Doing this increases stats, provides certain Affixes, and gets you Legendary nodes, which are essentially additional Aspects for your class. You begin to unlock these points at level 60. There are 300 Paragon levels in Diablo 4.
There are 328 Paragon points players can earn. 300 from leveling, 24 from Renown, similar to the extra Skill points, and 4 from Altars of Lilith, a collectible found in the world.
Paragon boards work like this: Everyone starts with their intro board, which is tailored to your class. As you level up and earn points, you unlock nodes and will end up making a path towards a Board Attachment Gate, which looks like a small gate icon. Upon reaching this, you then pick one of several boards, each with various benefits, to attach to your board. You then rotate it to one of its four gates and progress through that board like you did the intro board. From there, you simply pick you path through a board, and continue unlocking new nodes to empower your build.
There are four node types in the Paragon Board, which are as follows:
- Normal – +5 to listed stat
- Magic – +7 to listed stat or conditional effect (i.e., Health on Kill)
- Rare – Powerful buff and bonus effects when conditions are met (i.e., stat threshold). Magic nodes always surround these nodes
- Legendary – Powerful Aspect effects, one is found on every board
As a general rule, you want to find a path that gives you the best bonuses while getting you to a board gate quickly, that way, you can snag more of the Legendary nodes, and make use of multiple boards tailored nodes that fit your build better.
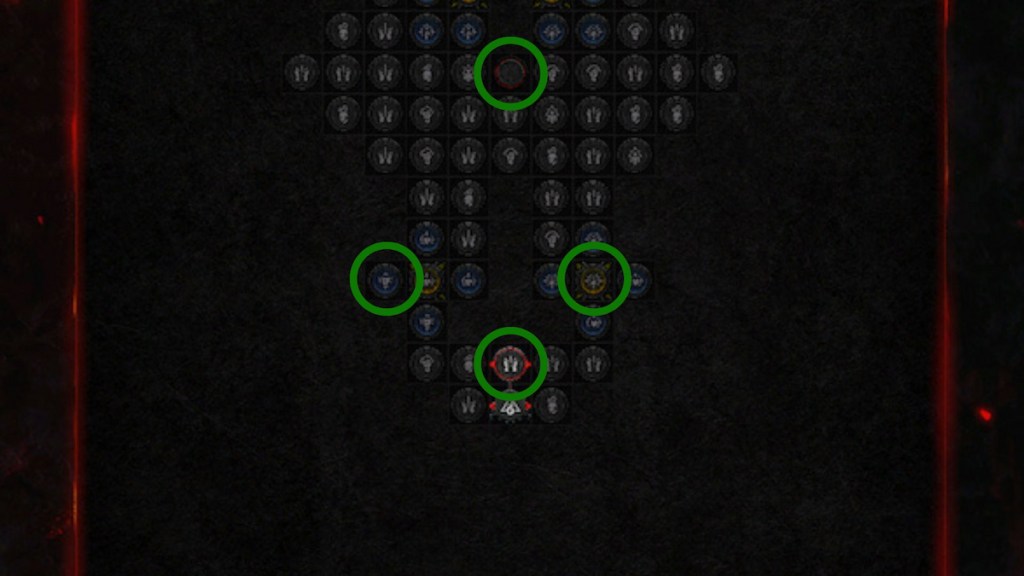
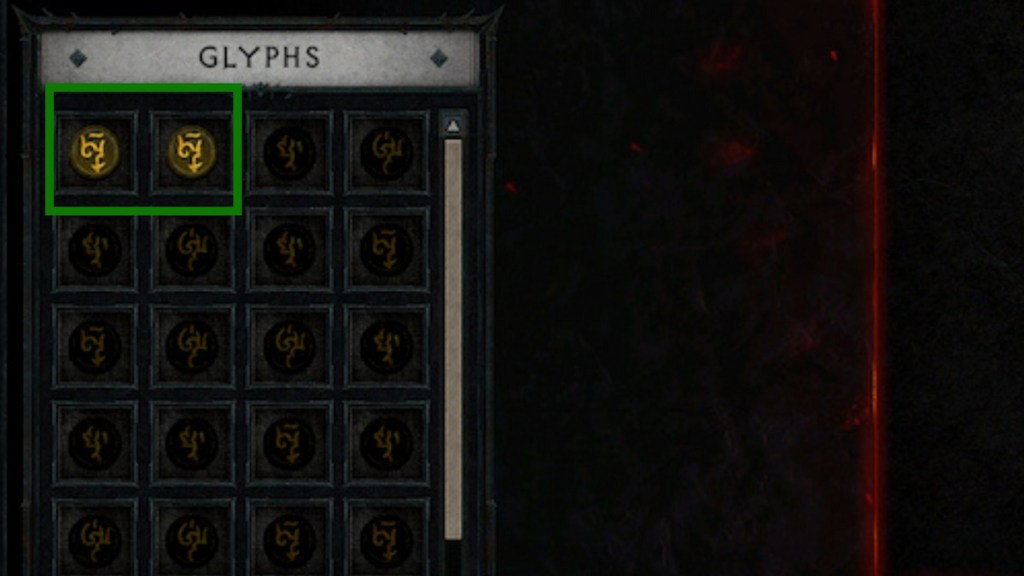
Glyphs and Sockets
Along with these nodes, there is a special addition called a Socket, which allows you to place a Glyph, an item found during activities and as rewards.
These Glyphs will often empower surrounding nodes in a certain radius and get additional benefits when conditions are met, such as having enough nodes of a certain stat in range. These can then be leveled up for increased potency and radius. They are upgraded by completing runs of the Pit of Artificer, an endgame activity.
At first, Paragon boards may look a bit scary, but once you get to grips with them and have an idea of how you will use them, they can become an extremely satisfying addition to a build, offering that number crunchy, gritty progression a game like Diablo 4 is made for.
I recommend previewing each board and seeing what’s included. That way, you can plan your route in advance and know what you want, when, and how to get it to get those improvements sooner.
Mercenaries
Mercenaries are only available to players who have the Vessel of Hatred expansion.
Mercenaries are the NPC companions players can recruit to aid them in their adventures, providing additional support through their own Skills and unique features that add an extra layer to builds.
How to Get Mercenaries
These are unlocked during the Vessel of Hatred campaign, and once you unlock the first, there are several quests to recruit the remaining Mercenaries. There are four Mercenaries to choose from, each with different perks, Skills, and Passives to aid you. These are listed below.
Raheir
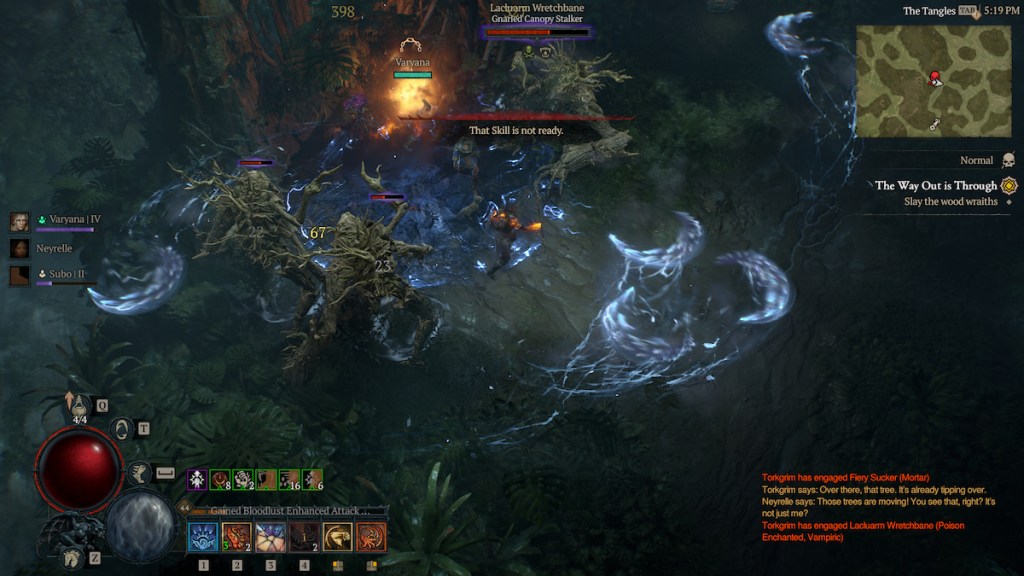
Varyana
Aldkin
Subo
Role: Tank
Raheir is your tanky option, using abilities that Taunt and Crowd Control enemies to help you survive and handle the large swarms of enemies that come your way. He also has Passives that increase your Armor, slows enemies, and Heals you.
Perk: Valiance – When you are damaged for at least 15% of your current life in one hit, the damage is negated, Close enemies are Knocked Down, and you are Unstoppable for 0.5 seconds.
Cooldown: 30 seconds.
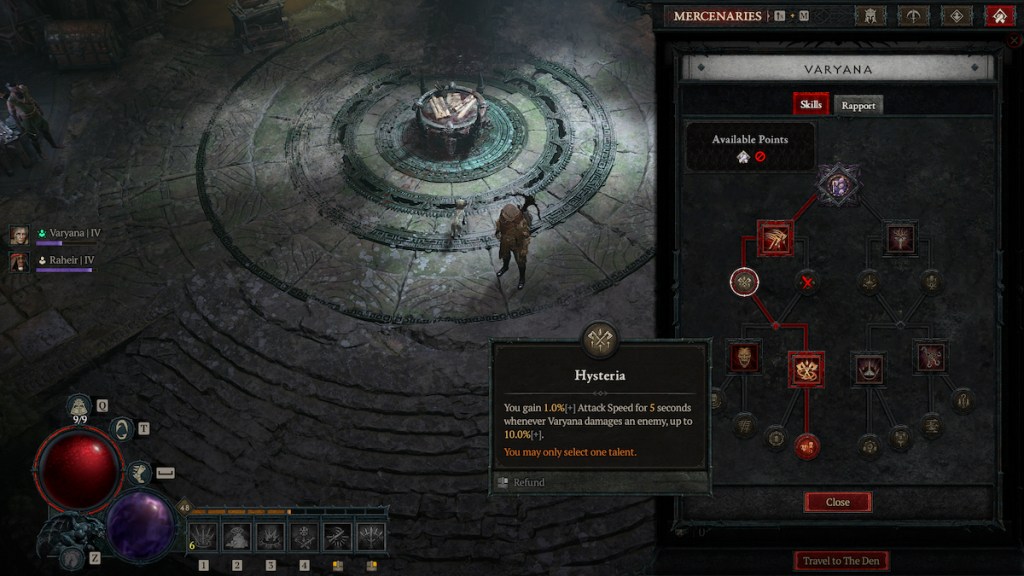
Role: Melee DPS
Varyana is a Berserker who uses their axe and hammer to pummel and slash enemies into red mist. Their Skills include inflicting Bleeds, buffing your Attack Speed, and applying Crowd Control effects. Their Passive revolve around Attack Speed and Status Effects, as well as Healing through her Bleeds.
Perk: Massacre – As you kill enemies, you build a killstreak, which increases your Movement Speed and certain stack thresholds, which are 10, 25, 50, and 100.
Cooldown: Fades after 7 seconds of not killing.
Role: Spellcaster
Aldkin is a half-demon child who, by shapeshifting, can unleash powerful Shadow and Fire damage, specifically, AoE-focused damage. He has Skills that apply Status Effects, Damage Increases, and DoTs. For Passives, they involve additional buffs to your damage and having Aldkin deal damage faster.
Perk: Blasphemous Fire – Aldkin will occasionally lose control and transform into a demon for 22 seconds. This grants him powerful new abilities at the cost of a curse that affects you and Aldkin, depending on your Core Skill choice for Aldkin. These are listed below:
- Curse of Darkness – You and nearby enemies become Vulnerable.
- Curse of Flames – Your direct damage Burns enemies for 30% of the damage for 3 seconds, but you lose 10% of your Maximum Resource per second.
Role: Ranged DPS
Subo is your Rogue stand-in and uses Traps, Arrows, and Equipment to aid you in combat, as well as having a help perk for surveying the map. Their Skills involve using Molotovs, Traps, and powerful ranged attacks to hinder and damage enemies. Passives involve Crowd Control, DoTs, and buffs to damage.
Perk: Seeker – This Perk has two parts, a Passive, and Active component.
Passive: Reveals all enemies and materials in the area, shown on the minimap.
Active: Subo marks an enemy of 10 seconds. Killing that enemy restores 50% of your Maximum resource and Reduces the cooldown of Seeker by 10 seconds.
Cooldown: 20 seconds.
Mercenary Types in Diablo 4
There are two types of Mercenaries: Primary and Reinforcement.
Primary is your main Mercenary, which will accompany you while playing solo. These have all your chosen Skills available to them and utilize their full capabilities, and are always with you while you aren’t in a party.
Reinforcement Mercenaries act as support and will appear at certain moments determined by players set up. What I mean by this is players can choose which Skill their Reinforcement uses and when.
For example, you could have Raheir jump in and use Crater whenever you become Control Impaired, such as Stunned. Or, you might want Varyana to use her Ancient Harpoons to group enemies together when you use a certain skill to maximize its use.
Using a Mercenary earns Rapport, which is their expereince, and as you level them up, they unlock Skill points for their trees. Eventually, you get Bartering, a system that lets you use Pale Marks, a special currency, to purchase special caches and gear in the Mercenary Den.
I best describe these as fillers and are worth using to make up for where your build may be lacking. So, if you need a defensive boost, Rahier would be a worthwhile Primary, while having Sudo may be a good backup for Crowd Control. It may seem a bit unimportant, but trust me, a well-utilized Mercenary can be a major boon for your build.
Refining Your Build
By this point, you’ll have most of your build ready and prepped. You got your Skills, Aspects, Stats, Affixes, and everything else in order. Now, it’s time for a bit of refinement.
These elements are still an important part of making a build, but they will likely come into effect or be more of an investment later on in your gameplay, and might not need to be considered as much as the other areas we have covered.
That said, they still play a role in making your build the best it can be.
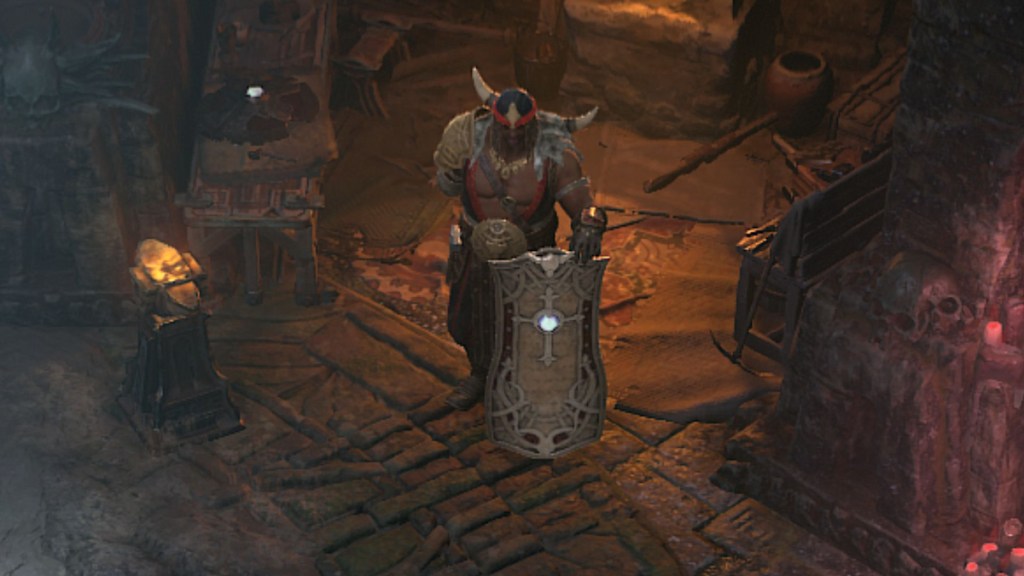
Tempering and Masterworking
Tempering and Masterworking are an important part of a build, in that they provide a way to gain additional Affixes to your gear, specifically tailored to your build’s needs, and often, can be a big boost to a build’s power and viability.
Both of these are done via the Blacksmith.
Tempering
Tempering is the first of these upgrades system you unlock, which allows you to add Affixes to your gear using Tempering Maunals, a reward round in Diablo 4‘s activities. These are like Aspects in that once you learn them, they are always learned and can be used unlimited times.
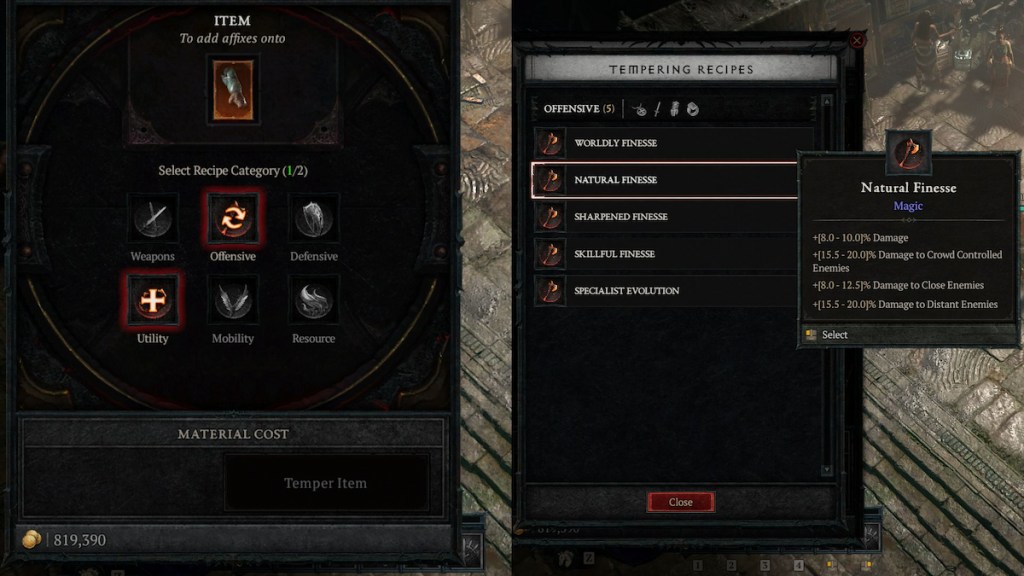
They have three rarities: Magic, Rare, and Legendary, and the higher tier of difficulty you play, the better the Affix ranges. Only Rare, Legendary, and Ancestral gear can be Tempered.
There are six categories of Tempering Affixes which are:
- Weapon
- Offensive
- Defensive
- Utility
- Mobility
- Resource
Like Aspects, only certain bits of gear can have certain Tempering Manuals used on them, which are listed below.
| Catorgy | Applies to |
|---|---|
| Weapon | Weapons |
| Offensive | Weapons, Amulets, Gloves, Rings |
| Defensive | Offhand, Helm, Chest, Pants, Amulet |
| Utility | Offhand, Helm, Chest, Pants, Amulet, Gloves, Boots |
| Mobility | Amulet, Boots |
| Resource | Amulet, Rings |
How to Get A Specific Affix with Tempering
Applying a Tempering Affix is done randomly from the listed Affixes of the Tempering Manual, so if you want a particular Affix, you might need to Temper your gear multiple times. However, gear has a limited to the number of times you can Temper it, which is listed at the bottom of the tooltip window for gear. It looks like a small anvil icon.
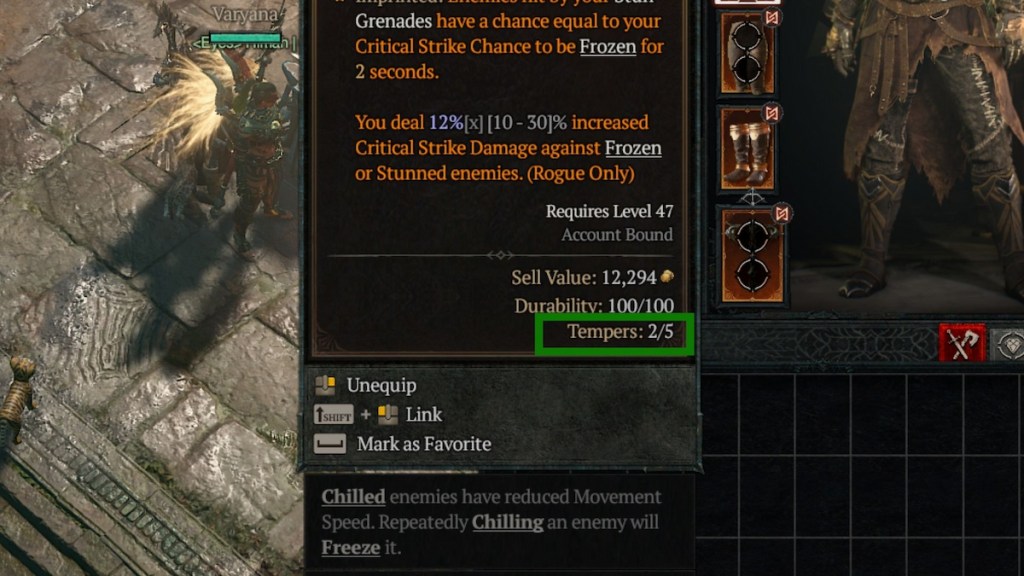
Ancestral gear, which unlocks in the Torment difficulty tiers, can have two Affixes from this method, but the rerolls are shared, so if you use them all on one Affix reroll, you cannot on the other roll, and will have to accept what you are given.
Once all the Tempering uses are expended, the item is “bricked,” and you cannot reroll an Affix. The only way to undo this is by getting a Scroll of Restoration from Infernal Hordes and the Dark Citadel. These will restore four Temper charges, so you can reroll the item.
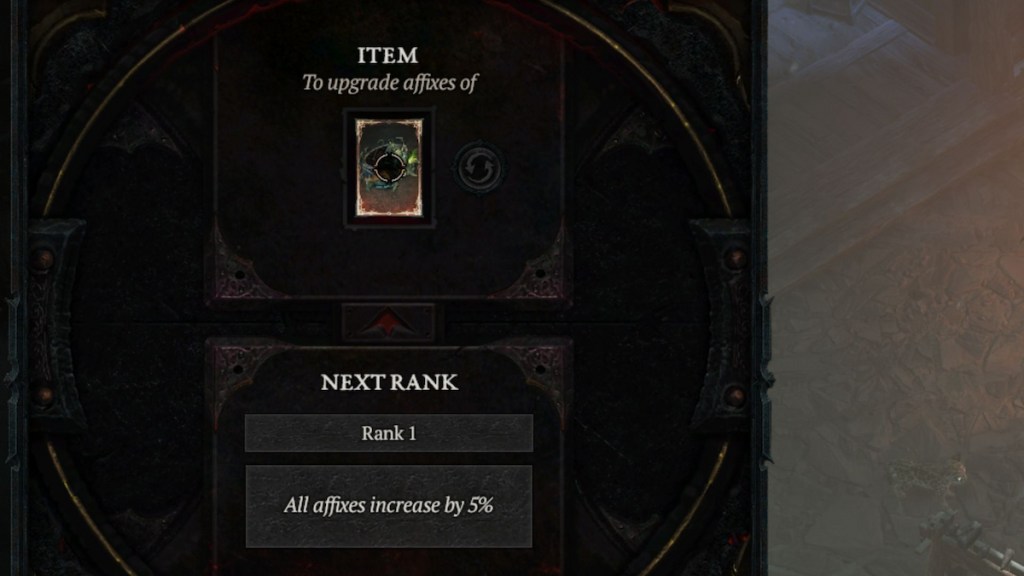
Masterworking
Masterworking is similar to Tempering, but is specifically for the endgame and is a little less complicated and straightforward, but provides some massive boons.
Available from Torment 1 difficulty, Masterworking can only be done on Ancestral items with two Tempered Affixes, Unique, and Mythic Unique items. Items below 800 item power can only be Masterworked four times.
Masterworking is a way to buff your gear’s Affixes, with each rank boosting one by 5%. Every fourth rank increase – these being 4, 8, and 12 – a single Affixes will get a 25% boost.
How to Masterwork in Diablo 4
Masterworking requires an item called Obducite, which is earned through Nightmare Dungeons, Infernal Hordes, or the Undercity. It is possible to reset Masterwork ranks, but this will go down to zero and costs a lot of resources and Gold.
Think of these as mods to your gear, and using them, you’ll be able to improve and add Affixes to suit your needs. Tempering early on can be a bit tedious since you’ll likely be swapping out gear regularly, but using it can make leveling a bit easier, and get you used to the concept for when you begin really honing and refining your equipment in the later levels.
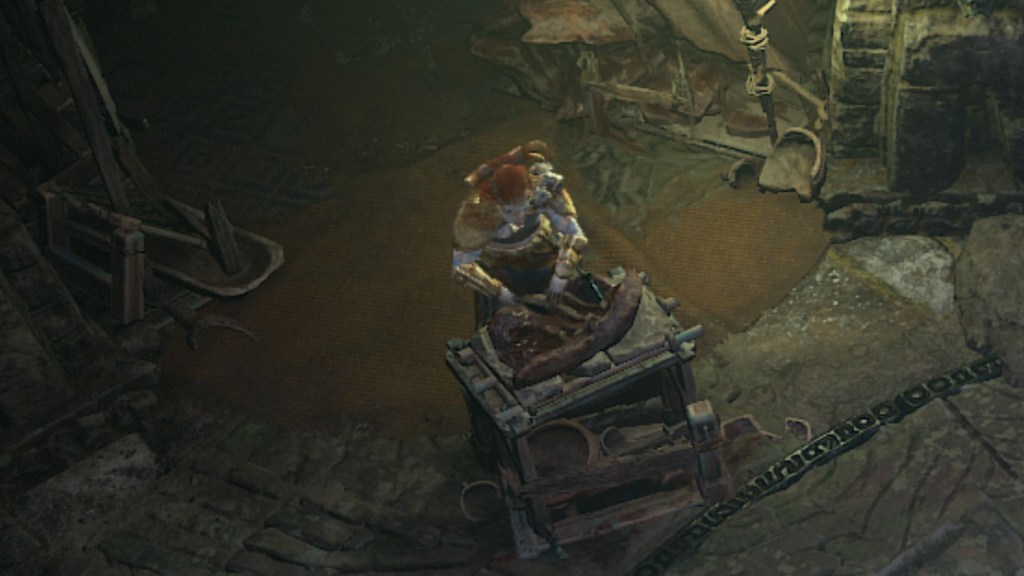
Gem and Runewords
Gems and Runewords add a little extra oomph to your build through increasing stats or providing additional benefits, and both are pretty simple to implement and use.
Gems
Gems are pretty straightforward in Diablo 4. Your gear is able to have slots, which you can insert Gems into for different effects, and depending on what Gem you place in what gear type, you will get a different bonus. Helms, Chests, Pants, Bows, and Two-Handed Weapons can have two sockets, while all other gear can have one.
There are seven Gem types, which are listed below, with what benefits they provide in their respective gear slots.
Amethyst
- Weapon – +% Damage Over Time
- Armor – +Strength
- Jewelry – +% Shadow Resistance
Emerald
- Weapon – +% Critical Strike Damage
- Armor – +Dexterity
- Jewelry – +% Poison Resistance
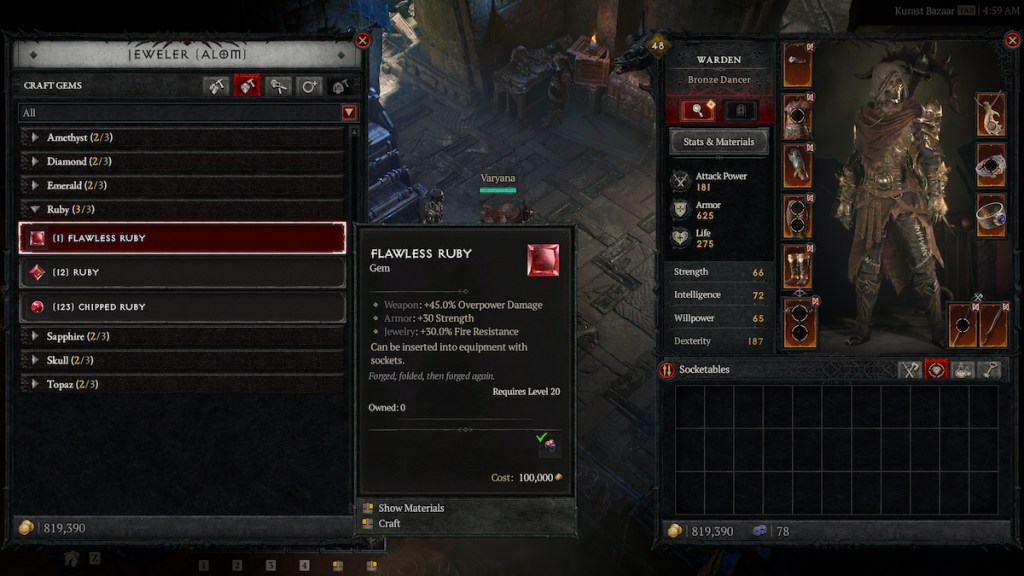
Ruby
- Weapon – +% Overpower Damage
- Armor – % Maximum Life
- Jewelry – +% Fire Resistance
Topaz
- Weapon – +% Basic Damage
- Armor – +Intelligence
- Jewelry – +% Lighting Resistance
Sapphire
- Weapon – +% Vulnerable Damage
- Armor – +Willpower
- Jewelry – +% Cold Resistance
Diamond
- Weapon – +% Ultimate Damage
- Armor – +% Barrier Generation
- Jewelry – +% All Elements Resistance
Skull
- Weapon – + Life on Kills
- Armor – +% Healing Received
- Jewelry – +Armor
Along with this, Gem has five versions, each better than the last. These are Chipped, Standard, Flawless, Royal, and Grand. To make them, you’ll use Gem Fragments you find from activities and earn as rewards, each corresponding to a different color. By visiting the Jeweler, you can craft, socket, and unsocket Gems to your gear.
Additionally, adding a socket to your gear costs Gold, but for Ancestral gear, you’ll need a Scattered Prism, which drops from many of the games activities as rewards.
Runewords
**Runewords are only available to players who have the Vessel of Hatred expansion.**
Runewords are another socketable item players can use for their builds, but they are much more potent and versatile, with the ability to buff players as well as give classes access to Skills from other Classes. You can only have two sets of Runewords equipped, and it requires a piece of gear with two sockets.
Runewords are made up of two pieces: the Rune of Ritual (top Rune) and The Rune of Invocation (bottom Rune), With the top Rune being a generator and the bottom Rune being a spender.
The top Rune generates a resource called Offering when certain actions or conditions are met. For example, the Rune Yul generates 50 Offering when you use a Skill with a Cooldown, so if you use three Skills, that’s 150 Offering.
The bottom Rune will have an ability or effect that triggers when it has enough Offering, such as Jah, which requires 500 Offering and replaces your next Evade with the Sorcerer’s Teleport Skill.
So, with the Runes mentioned, once a player has used five Skills with a cooldown, their next Evade will be a Teleport instead.
If you overspend and generate more Offering than needed, you’ll get an Overflow, which will increase the potency or reduce the cooldown till you can next use it, as well as some other benefits.
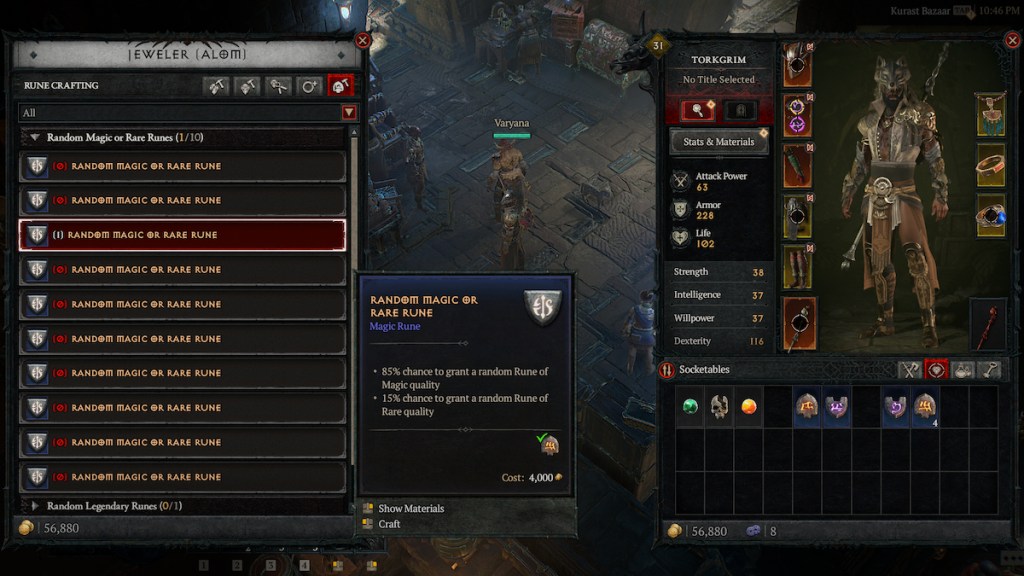
These can be rewards, or you can craft them at the Jeweler by combining three of the same Runes and getting a new one.
These are a great way to get a little extra power with very little effort needed, since they tend to work in the background while you are playing. Like with Affixes, these should be tailored to your build’s main schtick, or fill in a gap. So, if you need an extra Stun, having a Runeword that will trigger the Druid’s Petrify Skill might be a good option.
They are a great way to iron out a kink or two in your build, or enhance whats already great about them.
Consumables

Consumables aren’t too important to a build, but they are another source of power, so naturally, they are worth a mention. These provide temporary buff and EXP gains that can aid you and other players as you fight the hordes of hell.
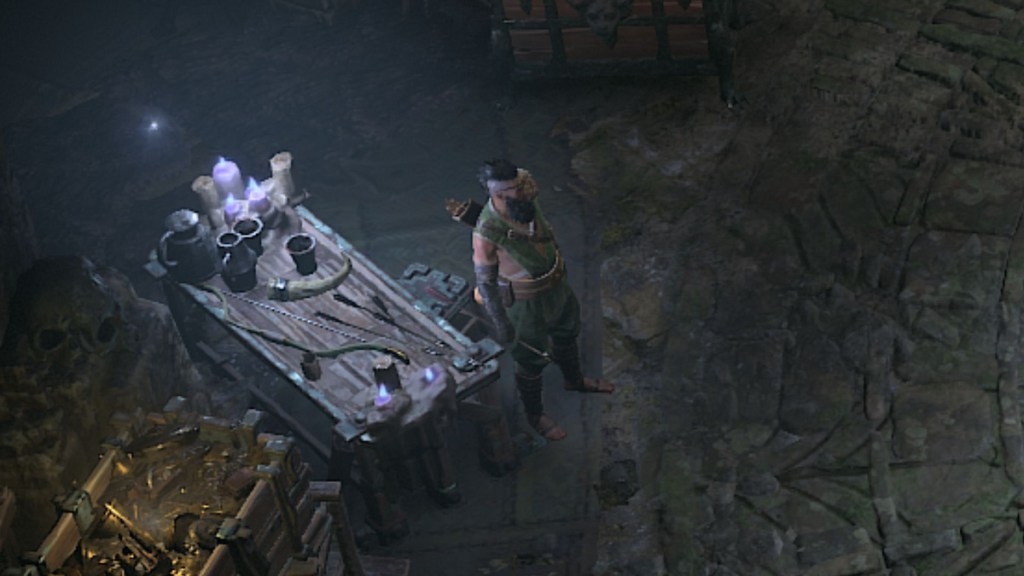
All of these can be made and upgraded at the Alchemist.
Potions
You need this to stay alive, so its worth a mention. At certain levels, you will be able to upgrade your Healing Potion: You should do this as soon as possible.
If you don’t, you’ll find them to be less effective, and after a while you be dying more than you’d like, do be sure to stay on top of upgrading this.
Elixirs
Elixirs provide temporary buff, such as Armor or Critical Strike Damage, for 30 minutes, as well as an EXP boost, so you get a little extra speed to leveling. You’ll usually have one of these active at all times.
Incense
Incense are group-based items, as it’s benefits apply to yourself and nearby players, such as EXP buffs, and increases to stats or Resistances.
Closing Thoughts
Hopefully, by this point, I have provided some level of aid in helping you craft your own build in Diablo 4. It’s a lot of information and naturally can be a bit daunting, but my hope is that by laying out everything I could in detail, you have a clear idea of the what, why, and how that goes into builds and finding your preferred playstyle.
Of course, I am always open to suggestions or ways to improve this guide, as I hope players will use this now or in the future when diving into Diablo 4’s wealth of content. So, please leave a comment with anything you can think of, and I’ll see you in Sanctuary.
If you want to know our thoughts on the most recent Diablo 4 expansion, check out our review for Vessel of Hatred. Or, if you want a different way of dealing with demons, check out our Bloomtown Walkthrough.
About the Author
Discover more from Bonus Action
Subscribe to get the latest posts sent to your email.