Image by Bonus Action
It’s no secret that Infinity Nikki is a gacha game that wants you to spend money on it. While it’s not as heinous as other similar titles, it definitely does a good job of instilling that sense of FOMO and making you want to buy pulls for banners so you don’t miss a single outfit.
That’s why we’ve put together this Infinity Nikki spending guide to help you get the most for your money. You’ll find a few helpful tips about everything you might want to spend cash on in the game here, so have a look and see if there’s any advice that’s useful to you. We recently updated this guide for Version 1.4 Revelry Season, the latest version of the game.
Before we dive right in, I want to be clear that we’re not saying you should or shouldn’t spend money on the game. It’s free-to-play and you don’t have to spend a penny if you don’t want to. This guide just explains how to get as much as possible when you do spend.
Update for Version 1.4: I’ve added the mid-season update Outfit banners, so now you’ve got the complete picture when it comes to spending!
Table of contents
Version 1.4 Free Outfits
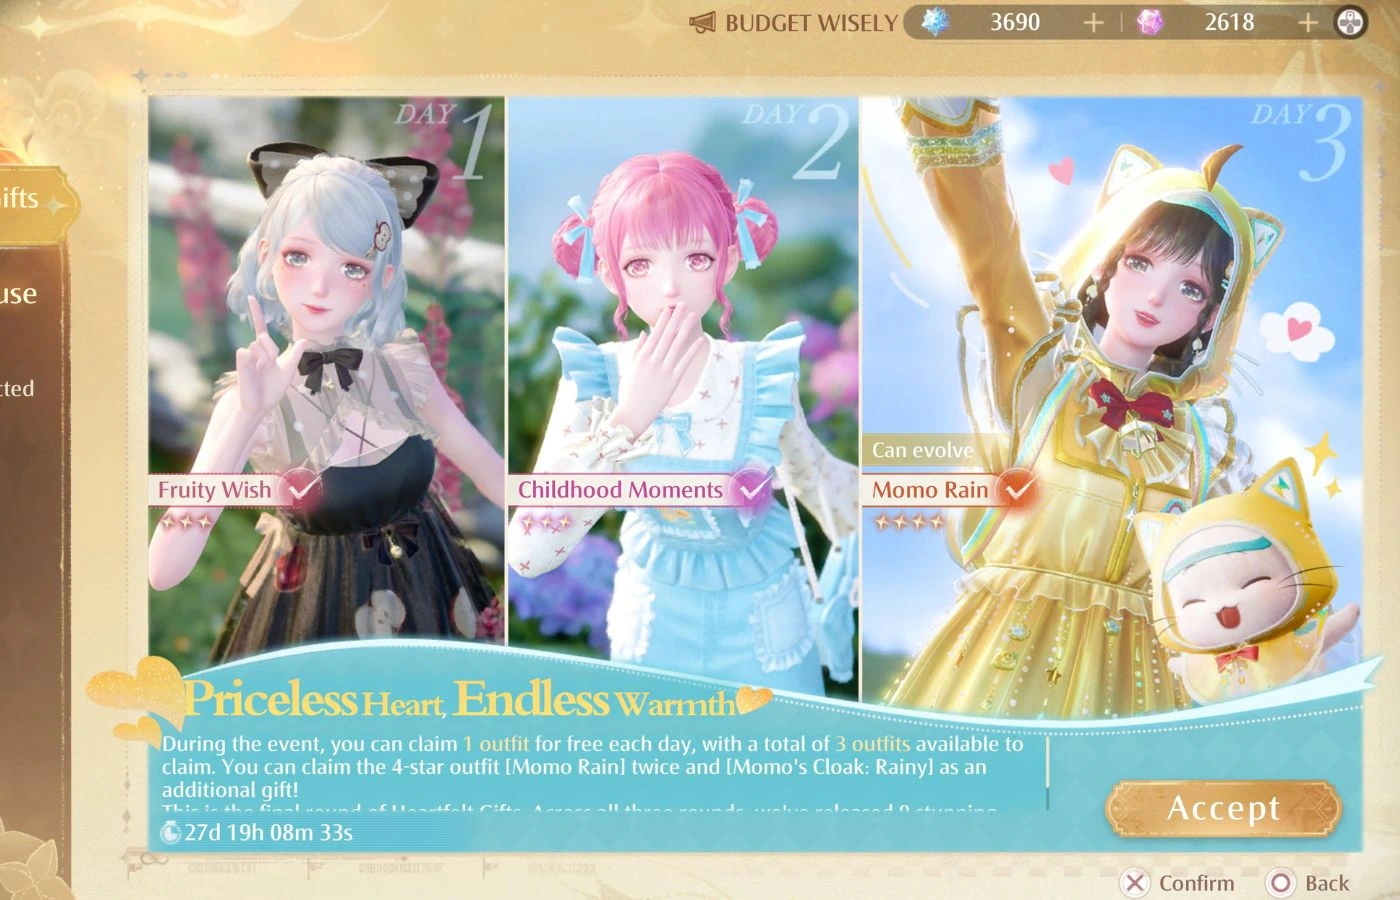
Version 1.4 has a selection of free outfits for us to claim in Infinity Nikki. This is a continuation of the “thank you” from developer Infold for supporting the game so well since launch. This will continue until Version 1.5. See each outfit and how to claim them below.
All of these outfits will award you 10 Diamonds from your Compendium, so they’re well worth claiming both to build up a collection of clothes and the benefits of Resonance pulls.
Fruity Wish

Claim the appple-themed three-star outfit Fruity Wish from the Heartfelt Gifts section of the store. You get this on the first day you log in after the season begins.
Childhood Moments

This toddler-themed outfit is the second free Heartfelt Gifts item you’ll get for logging in on the second day of the season.
Momo Rain (Includes a Momo Cloak)
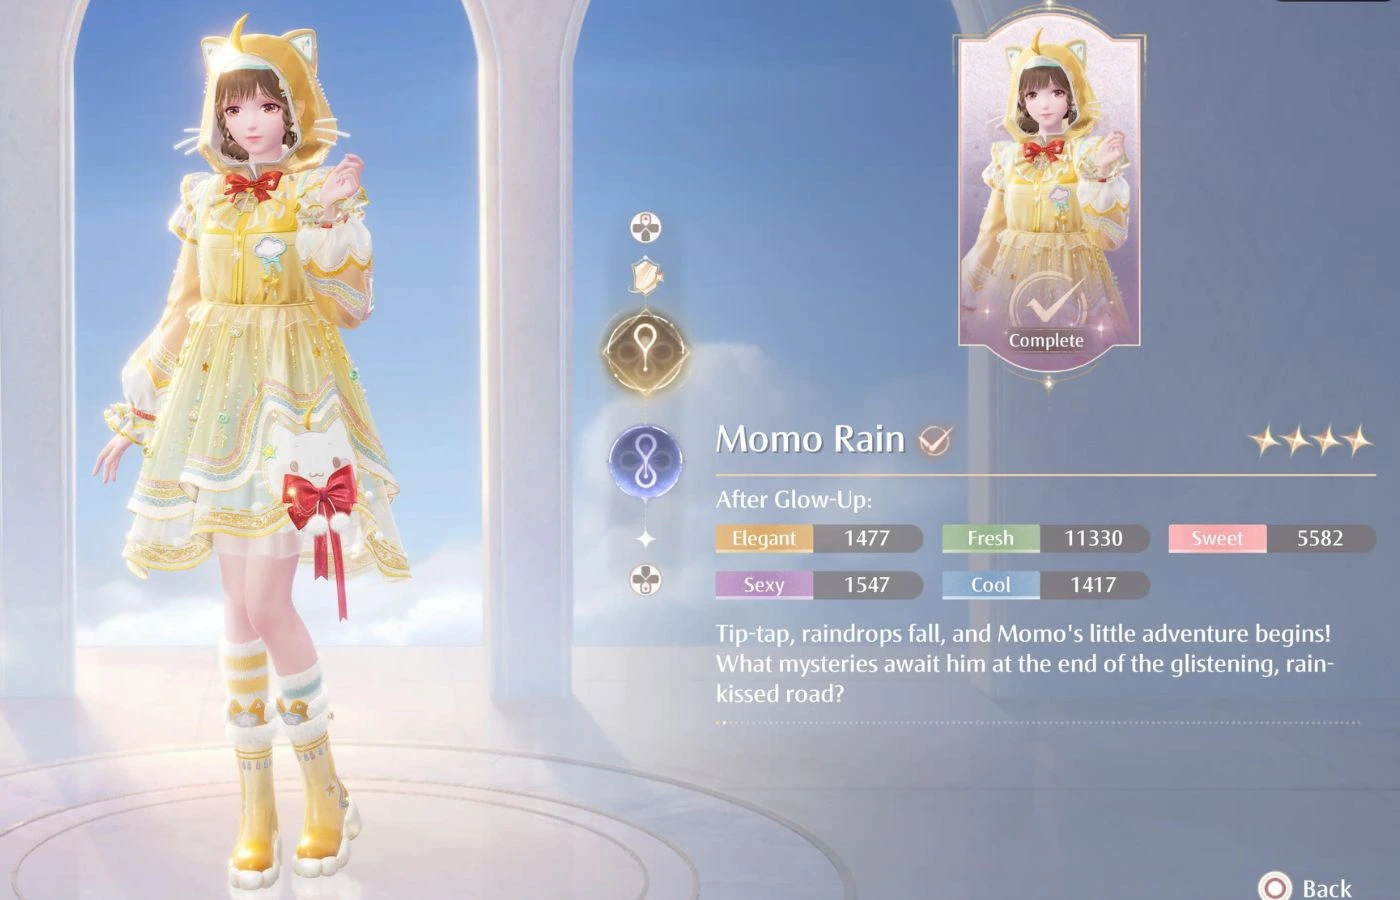
This Momo raincoat outfit is your third and final Heartfelt Gifts item for the season. Claim it on the third day you login, and don’t forget about its evolution! It also includes a new Cloak for Momo, so that’s pretty cool.
Fields of Vernal Bloom

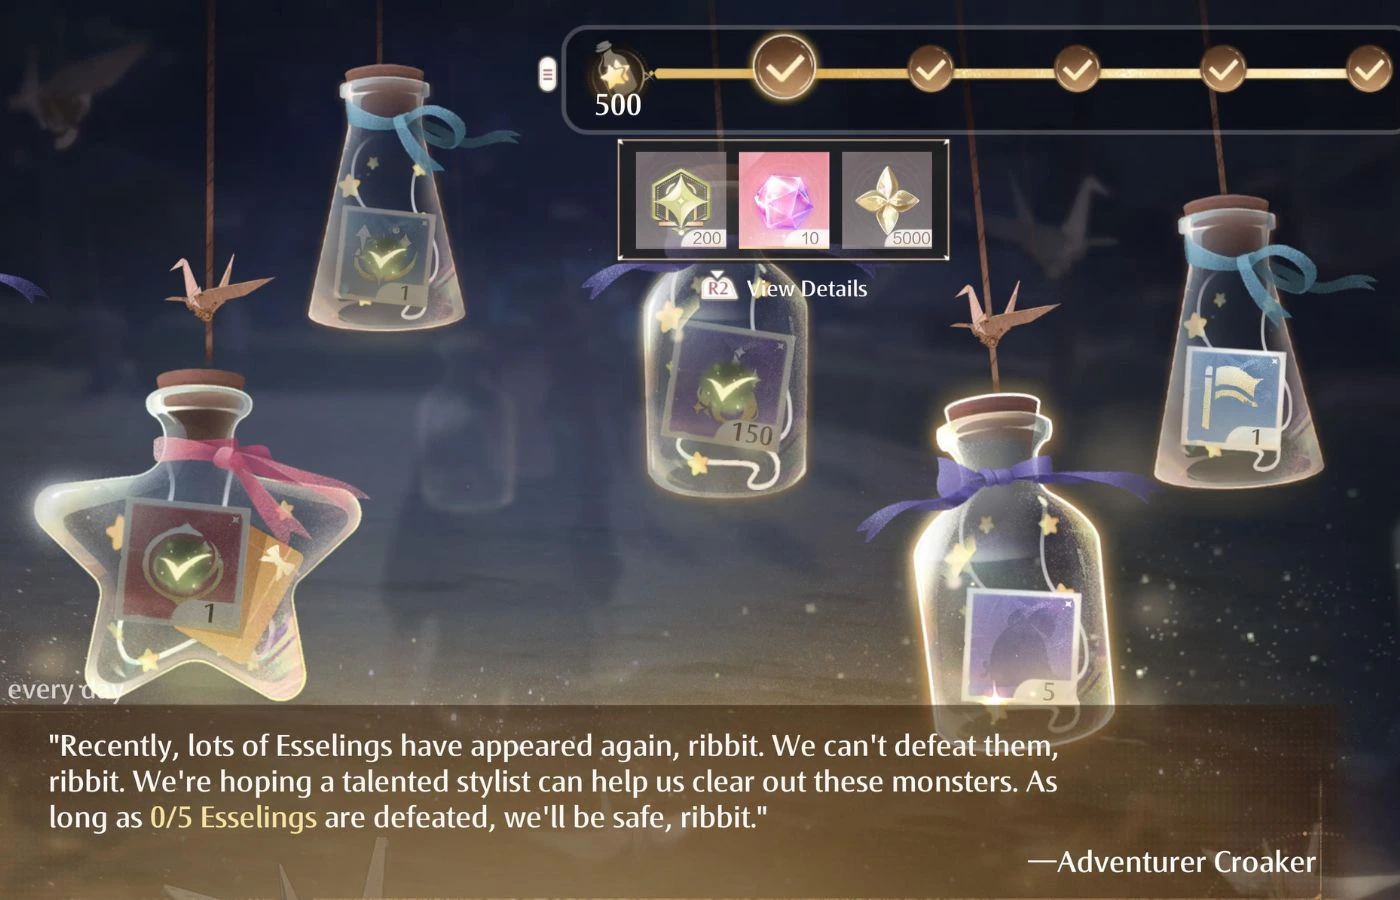
Fields of Vernal Bloom is the fourth free outfit for Revelry Season. However, unlike the Heartfelt Gifts ones, you’ve got to put in the work to complete tasks in the Fields of Vernal Bloom challenge to unlock the entire outfit. It’s still free, but it’ll take a bit of work.
I’ve almost knocked it out within the first five days, so as long as you play and complete the new content for the season, you shouldn’t have anything to worry about.
Version 1.4 Paid Outfits

Of course, every Version of Infinity Nikki brings with it two paid outfits in the store. They’re always featured, so you know what’s new and what you’re getting. I tend to always go for the one that costs 60 Stellarite because they’re so cheap, but you’ll need to judge what you buy based on budget.
In Version 1.4, we have All-Night Party, which costs 300 Stellarite, and Sweet Diagnosis for 60 Stellarite. Sweet Diagnosis is brilliant, gorgeous, and cheap, so buy it. As the name suggests, it’s main attribute is Sweet, perfect for certain Stylist Battles.
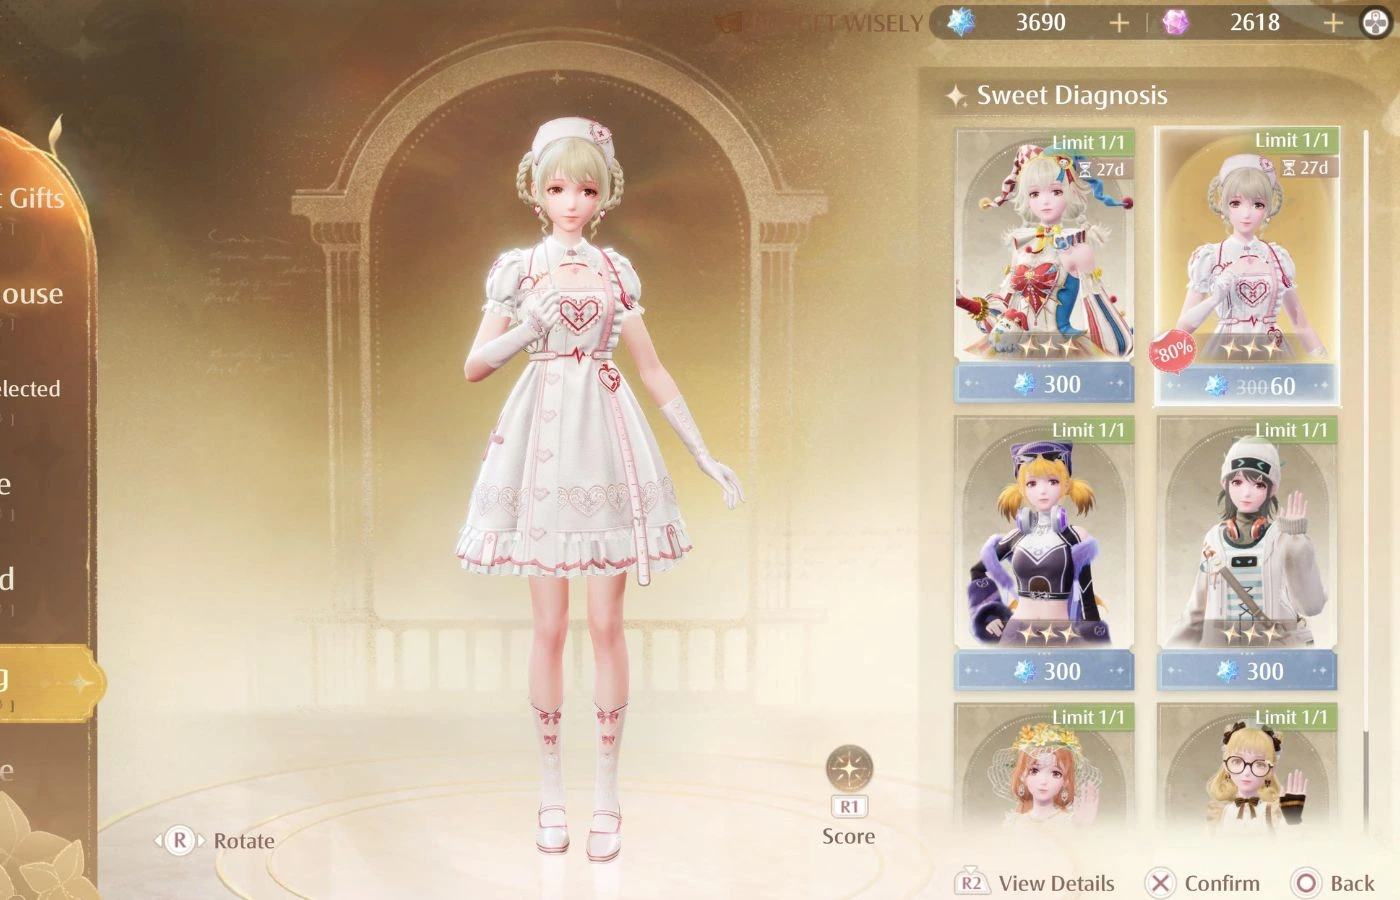
All-Night Party is a clown-themed outfit, so an immediate no for some players. If you don’t mind clowns, it’s an okay Cool Outfit, but it’s really the aesthetics you’re buying it for. This won’t win any Stylist Battles, but it should for the price. I’d only get this if I had the Stellarites to spare and like the look of it, which I do, so I’ll be getting it, but you work it out for yourself based on your tastes.
Banners
Below, we’ll walk you through all the current banners in Infinity Nikki and explain our logic for spending on them or not. We’ll also offer advice as to which banner you should spend on if you want to put some cash down for a particular outfit.
Permanent Banners
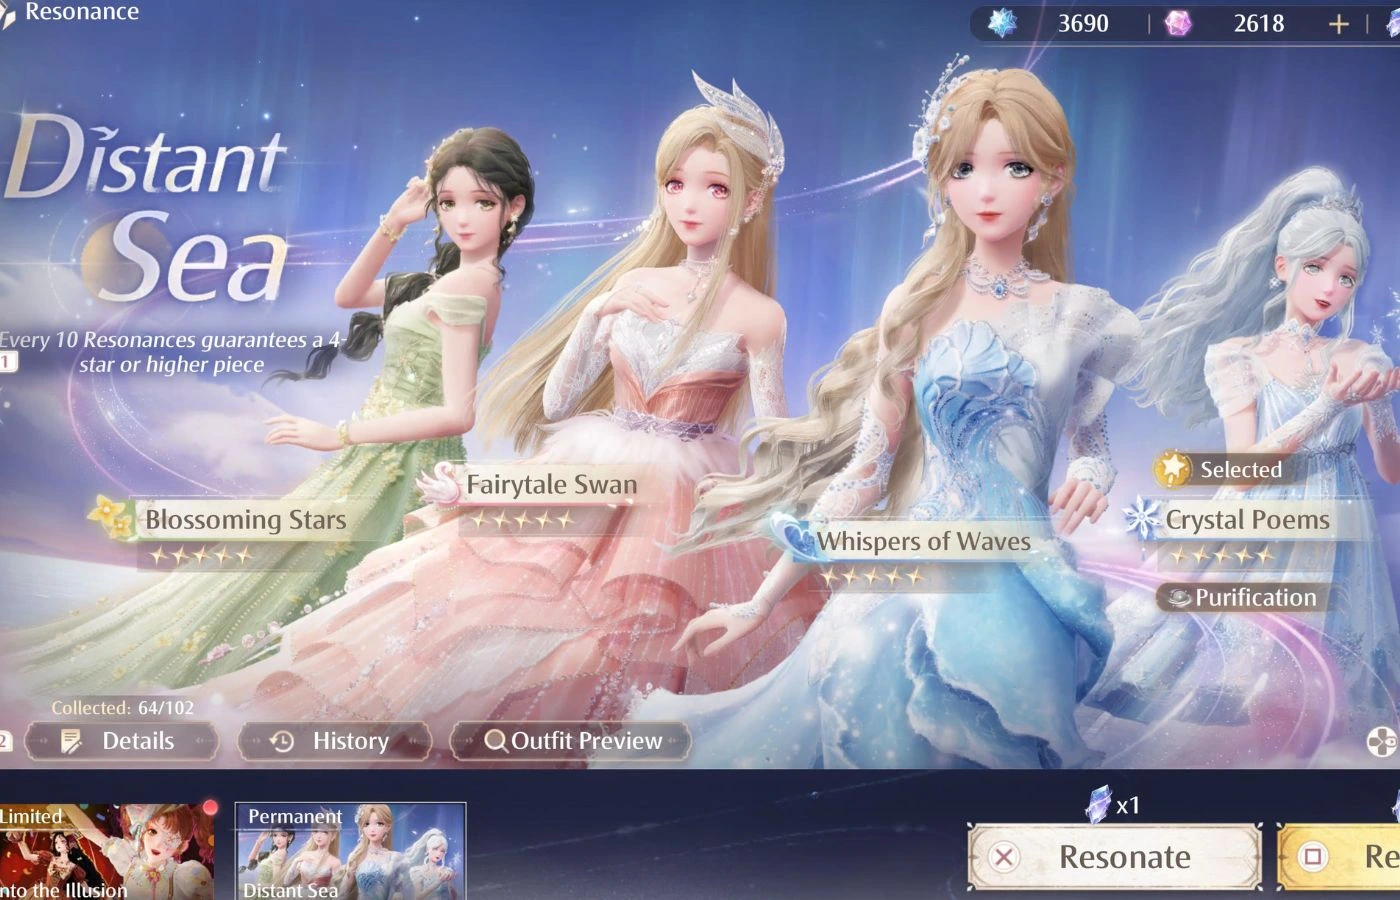
Let’s get this out of the way right now: you should never spend money on the permanent banners. These use Resonite Crystals, which you’ll pick up throughout the game’s story and update chapters at no cost.
The outfits you can get from this permanent banner have four evolutions, but you’ll get all of them pretty easily over time. This is the banner to put Resonite Crystals into over months and years.
You could spend Diamonds to top up your Resonite Crystals if you want to get a cheeky pull of 10 clothing items, but you shouldn’t. Since these banners are permanent and will, therefore, always be around, you don’t need to waste cash, Stellarite, or Diamonds on them. We’ll update this section of the guide if the permanent banner looks set to change, but we don’t see this happening any time soon.
Version 1.4 Limited Time Banners
At the time of writing, we’ve only got one time-limited banner for Revelry Season in Infinity Nikki. If the season plays out how the last few have, we’ll get another one or two in mid-April 2025. These will be for one outfit each, unlike the main banner for the season, Into the Illusion.
Into the Illusion: Crimson Rhapsody and Art of Tailoring

Into the Illusion is the main banner for Version 1.4 Revelry Season, and packs in the headline five and four-star outfits. The five-star outfit is Crimson Rhapsody, which is a beautiful carnival dress that has four possible evolutions. The four-star outfit is called Art of Tailoring, has two evolutions, and is the one you’ll see Nikki dancing in as you launch the game this season.
The main banner for any season is always the best value for money/Crystals. Though that’s only the case if you manage to reach a full 230 draws. The Deep Echoes for the banner offers a new Cloak for Momo, two Growth Materials for Crimson Rhapsody, and the Shadowed Reminiscience photo item.
A new Cloak for Momo is great, but it’s the photo item you should care about here. That’s the point at which you want to reach in Deep Echoes to make the banner worthwhile, requiring 160 pulls in total. Once you reach that point, you may as well go for the full 230 to get two guaranteed evolutions for the five-star outfit, because you almost certainly won’t unlock them from pulls alone.
Here’s the thing with every main banner, it’s designed to make you hit the maximum pulls. The five-star outfits have 10 pieces, so you’ll need around 200 pulls just to guarantee you get the entire outfit once. Trust me, I have an incomplete five-star with only one piece of clothing missing, I know.
To make the grind feel easier, you’ll unlock both evolutions of the four-star outfit within 160 pulls. This isn’t terrible value for in-game currency, but I wouldn’t spend cash on it unless you’re getting close to the end of the season and only have one or two Deep Echoes rewards to go.
The best advice I have for you is to hold onto your Crystals until the mid-season banners drop. Once they do, you’ll know which Outfits you like the most and can pull for them. Keep earning as many Diamonds. and Crystals as you can, but save them up to spend in the last 10 to 15 days of the season.
Version 1.4 Mid-Season Banners: Dancing Shepherdess and Magical Scribbles
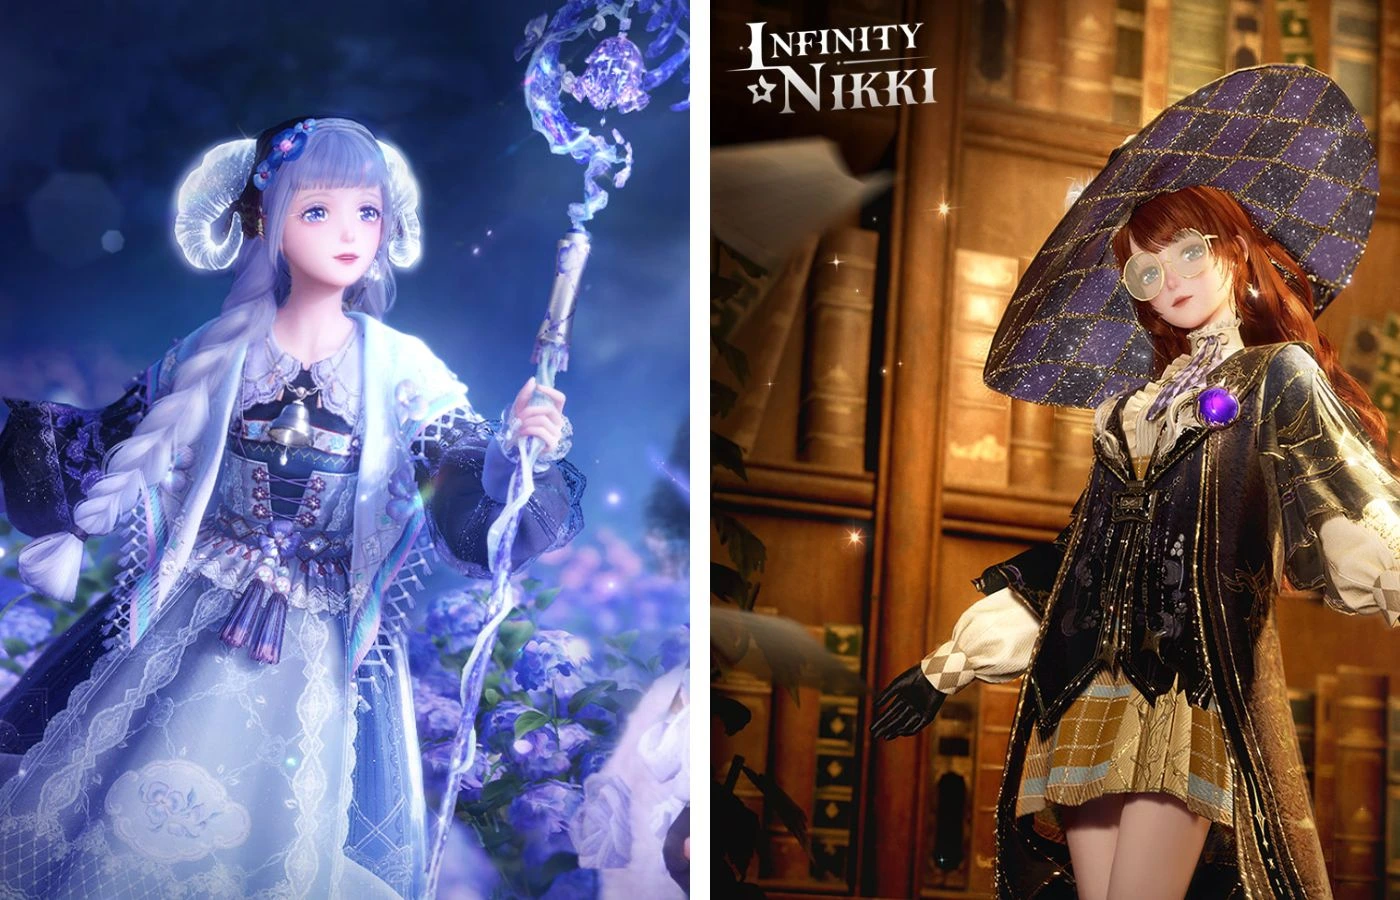
The mid-season banners for Version 1.4 have arrived and, as predicted, they’re way better than the main five-star banners. Dancing Shepherdess is a shepherdess Outfit that allows you to summon ethereal sheep. It’s a fantastic Outfit because it packs ghostly horns and a big old staff.
However, it’s Magical Scribbles that’s my favorite for this mid-season update. It’s a witchy Outfit with a massive had and a Whimsicality that allows Nikki to summon magical symbols while writing in a notebook. I bloody love it, which is why it’s my top priority to get it.
The evolutions of both Outfits are phenomenal, but it’s Dancing Shepherdess that takes it here. If I get to th epoint where I can grind for more pieces, it’s that sheepish Outfit I want to be able to evolve.
What’s John doing? – Well, I said I’d wait for those new banners to arrive, and wait I have! I’ve already been spending my Diamonds on pulls for the Magical Scribbles banner and have unlocked the base Outfit. I’m currently working on the Dancing Sheperdess banner because I want both before going for evolutions.
This is all I’ll be doing, though, since there just isn’t enough time in the day to grind out the Diamonds necessary for me to get the five-star Outfit this season.
Whim House
The Whim House is each season’s showcase storefront for items you can buy that won’t be back again anytime soon. There’s usually a good mix of items costing Diamonds and Stellarite, most of which are usually cheap enough that they’re worth grabbing. Of course, you shouldn’t spend money you don’t have, so that means ignoring the Stellarite items if you’re not buying.
The Queen’s Move

You can purchase The Queen’s Move, a four-star outfit, and it’s evolution, The Queen’s Move: Endgame, for 680 Stellarive. That’s about $5/£5, which I honestly don’t think is worth it unles syou’ve already got some bonus Stellarite to burn. That currency could be used for better outfits than this, which I feel is a rip off of The Queen’s Gambit. It’s a good rip-off, but don’t be fooled.
Fools’ Funhouse
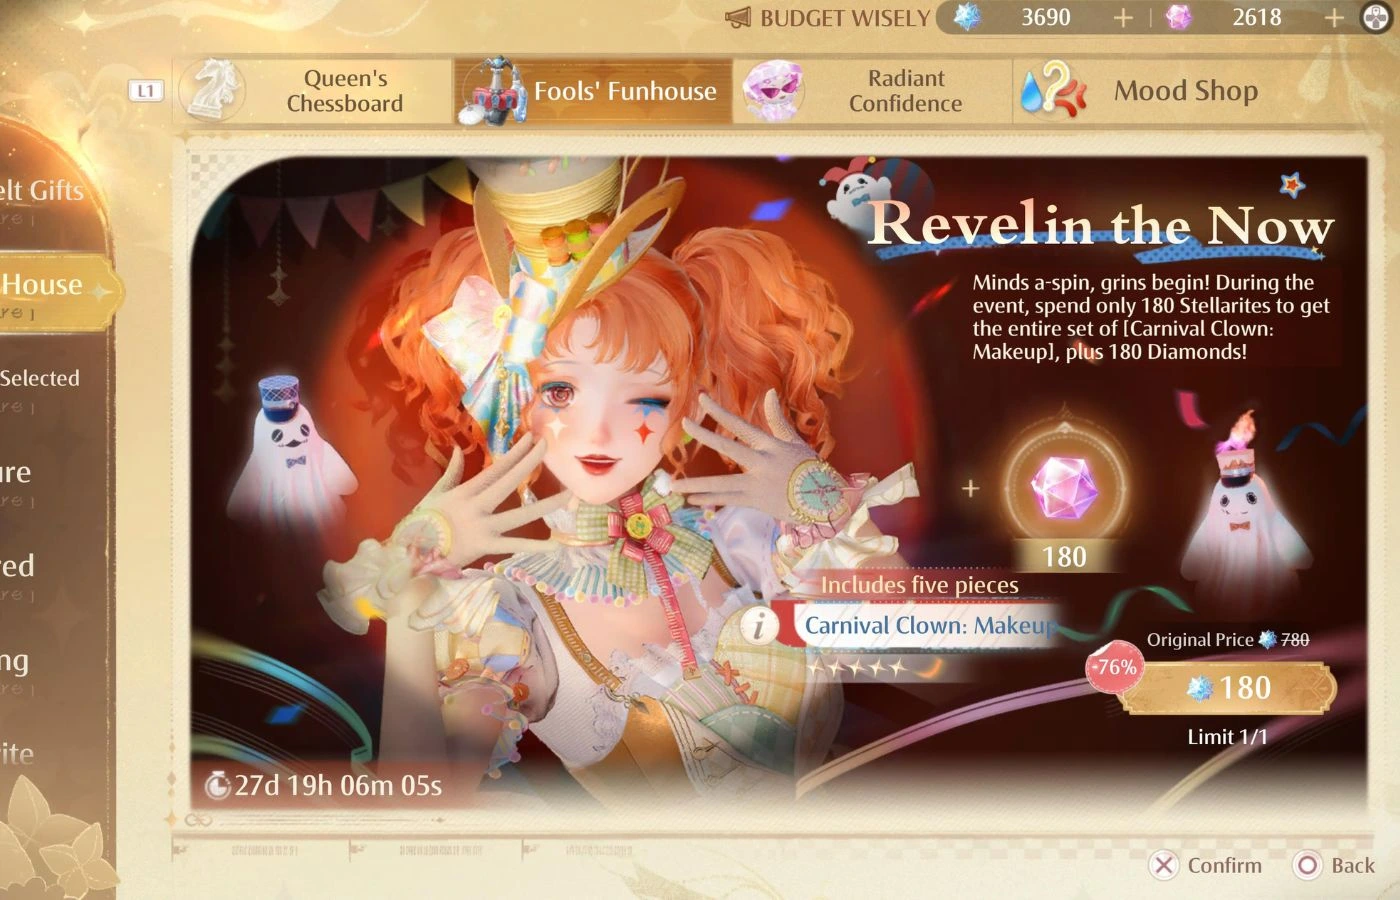
Fools’ Funhouse costs 180 Stellarite and nets you five pieces of five-star makeup as well as 180 Diamonds. This is a must-buy. That’s $2/£2 for a handful of five-star pieces that look incredible, plus some Diamonds for the inconvenience of paying. It’s effectively just converting you money into Diamonds, which can then fuel more outfits. A no-brianer.
Radiant Confidence
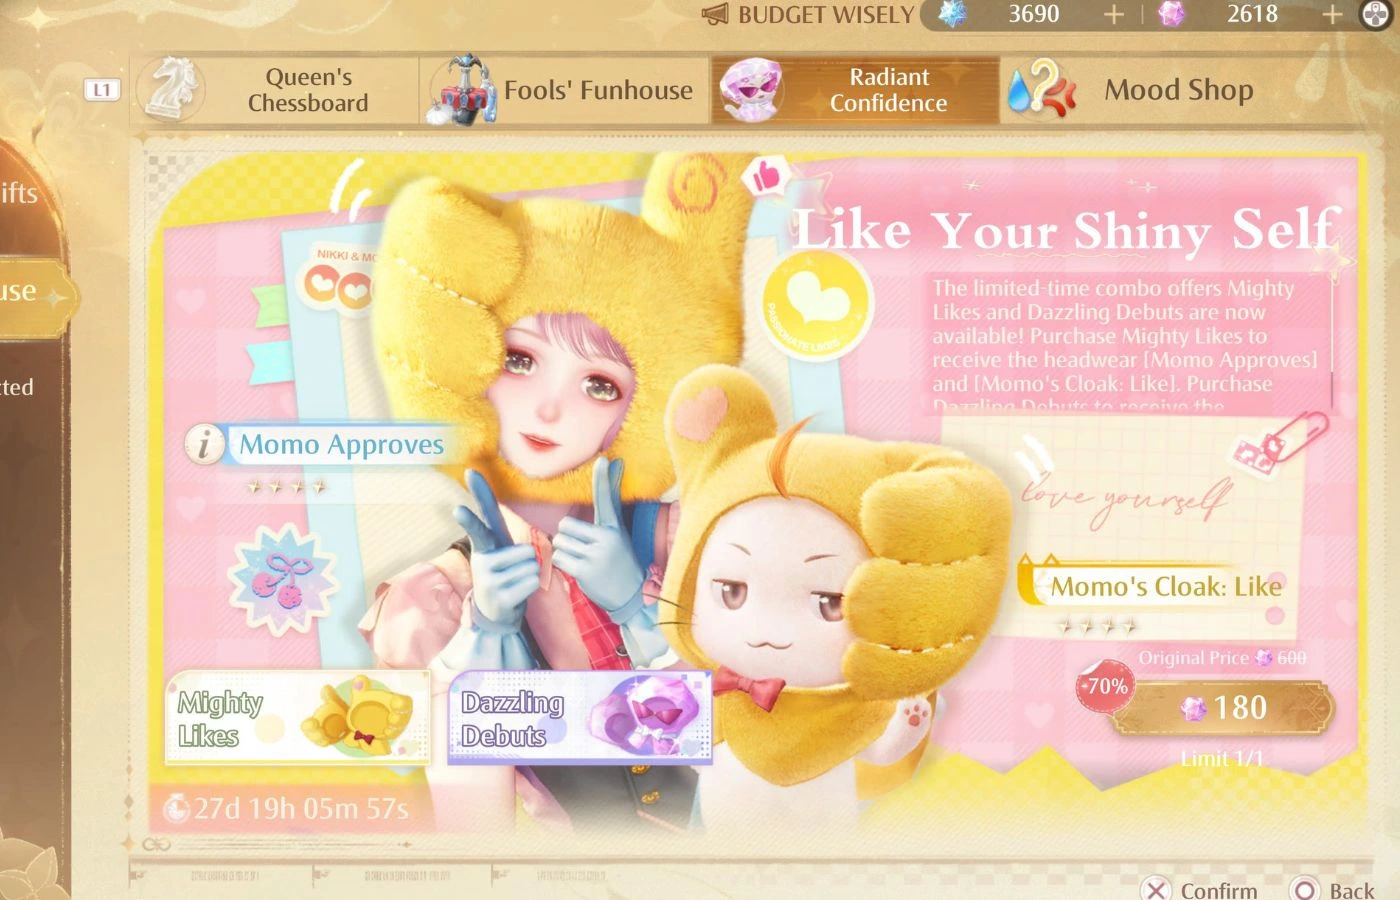
I despise the Mighty Likes hats for Momo and Nikki, but I like the Dazzling Debuts ones. Unfortunately, Mighty Likes costs 180 Diamonds, so it’s worth going for since it’ll cost you a single daily login with Monthly Gifts and the Daily Wishes rewards.
Dazzling Debuts looks slighly better, but it costs 120 Stellarite. The saving grace for each of these is a new Momo Cloak, which will net you new Diamonds from your Compendium. It’s worth buying both if you can, but don’t put yourself out if you haven’t got the cash. Stick to the Diamond costs only if you haven’t got change to spare.
Mood Shop

Mood Shop offers you three emoji hair accessories for Nikki for 60 Diamonds. Don’t even question this. It’s less than your Daily Wishes rewards, just buy them and thank me later. If you don’t want them, you’re absolutely bonkers.
How to get more Diamonds quickly
To get more Diamonds relatively quickly, you need to log in every day and complete your Daily Wishes. That’s 90 free Diamonds for barely any work. You can also buy the Monthly Gifts Diamond pass to get 2700 Diamonds in packages of 80 per day as long as you log into the game every day. This will also get you 300 Stellarite as a bonus, which is brilliant.
The most obvious way to boost Diamonds for free is to simply play. Complete quests, open chests, and hit every activity you can, like Mini-Games and the Mira Crown.
If you’re a long-time player, you’ll know every season has more activities and quests for you, but they’re time-limited for the most part. Complete the main story chapters first, then dive into the side quests and activities, especially the platforming challenges and Mira Crown, and you’ll be rolling in Diamonds very qickly.
With these time-limited rewards out of the way, you can get back to grinding out everything else in the base game that awards Diamonds like your Compendium or all the quests you’re yet to complete.
Stellarite

If you’ve never purchased Stellarite before, you can get three times whatever amount you purchase the first time you buy it. Remember that, because it’ll be worth the double up as and when you have the cash you want to put into the game.
With Version 1.2, Papergames added a time-limited triple bonus for Stellarite. So, you could have purchased 1,280 Stellarite, which is roughly $20/£20, but get 3,840 Stellarite. That’s a ridiculous amount, and given that this is the first time we’ve seen a triple offer, something we might not see for another year, I thought it was a no-brainer and so bought it and have this glut of Stellarite to use. If you did the same, remember you’ve got this wallet to pull from.
To get even more, I suggest you purchase a Stellarite bundle with the first-time purchase double reward when you see a banner you’re desperate to pull from or an outfit you can’t live without. Don’t just buy the currency because you can. Wait for the right time, because Infold might well reward us with another triple bonus in the future.
You can use Stellarite to buy pulls on banners and other items. I just bank it right now until I see an outfit in the store worth buying. Considering there’s always one outfit every Version going for 60 Stellarite, you could massively increase your wardrobe with this.
I hope this spending guide helps you work out how to make the most of your money at this time in Infinity Nikki. If you’re feeling a little burned out by the game and want something with an endpoint, read our Afterlove EP review and see if it sounds like a game that will give you the short break you need.
At the time of writing, we’re fundraising for Bonus Action to try to give it a chance to have a full-time Editor-in-Chief for a decent chunk of time so that we can really get the ball rolling on some serious projects. Please check out our Go Fund Me and support us if you can! Join our Patreon if you’d like to help out on a more regular basis with some fun rewards as a thank you.
About the Author
Discover more from Bonus Action
Subscribe to get the latest posts sent to your email.