
Blue Prince doesn’t hold your hand, and that’s the point. You’re handed a key, a deadline, and a cryptic mansion full of delightful nonsense.
It’s brilliant. It’s maddening. And it will make you question your spatial awareness and life choices with its puzzles. That’s where this walkthrough comes in. I will yank you out of design paralysis, help you stop wasting precious minutes on dead ends, and maybe get you to the final room without sobbing into your blueprint.
Table of Contents
- All safe codes
- All Parlor box puzzle solutions
- How to solve the Billiard Room dart puzzle
- How to solve the two pictures puzzle
- How to solve the Observatory puzzle
- How to solve the Security Room puzzle
- How to solve the Boiler Room puzzle
- How to solve the Utility Room fusebox puzzle
- How to solve the Cloister puzzle
- How to activate all blue flames
- How to unlock the Reservoir boat & Safehouse
- How to solve the Music Sheet puzzle
- How to melt ice in the Freezer
- How to solve the Laboratory puzzle
- How to solve the Gallery puzzle
- How to solve the Tomb puzzle
- How to Solve the Chess Puzzle
- How to solve the Closed Exhibit puzzle
- How to Solve Room 8 puzzle
- How to solve the Secret Garden puzzle
- How to open the Ladyship Chamber Diary
- How to solve the Clocktower puzzle
- All Microchip hunt locations
- How to solve the Castle puzzle
- How to solve the Inner Sanctum puzzle
- How to solve the Eight Realms in Eight Months puzzle
- All Shrine blessings
- All Upgrade Disk locations
- All tools & what they do
- All Workshop item combinations
- All permanent upgrades
- All Classroom Exam answers
- How to solve A New Clue book puzzle
- How to solve the Atelier puzzle
All safe codes
Cheat table
| Room icon | Safe | Code |
|---|---|---|
 | Boudoir | 1225 or 2512 |
 | Office | 0303 |
 | Study | 0812 |
 | Drafting Studio | 1108 |
 | Drawing Room | 0415 |
 | Red Door | MAY8 |
 | Shelter | November 7 + day count |
How to get the Office code
Follow these steps to figure out the Office code on your own:

Enter the Office room and locate the desk with a slightly open drawer on the right side.

Interact with the open drawer to find a knob inside and twist it. Twisting the knob causes a large bust in the room to rise, revealing a hidden safe behind it.

On the desk, find a note addressed to Bridgette listing book titles.
Only March of the Count is not crossed out. “March” corresponds to the third month — that gives you the number 03.

Look around the room for small busts of Count Isaac Gates (ignore the large one above the safe). Count three small busts, which gives you another 03.
Combine the two clues to get the code 0303. Enter 0303 into the safe to unlock it and collect your rewards.
How to get the Boudoir code
Follow these steps to figure out the Boudoir code on your own:
Go to the Boudoir room and find the safe hidden behind a mirror or folding screen.

Look around the desk or dressing table for a photograph, either attached to the mirror or sitting on the surface.

Interact with the photo to examine it more closely. The photo shows a Christmas scene, hinting that the safe was a Christmas gift.

The clue suggests using Christmas Day as the code: December 25. Try entering 1225 (MMDD format) or 2512 (DDMM format) — both will work.
Inside, you’ll find a gem and a red letter.
How to get the Study code
Follow these steps to figure out the Study code on your own:

In the Study, find a table with a chessboard displaying a single black king on the D8 square.
Take note of the position: D8 is your clue. Interpret “D” as December (the only month starting with D) and “8” as the 8th day. This gives you the date December 8, which becomes the code 0812.

You’re safe to use 1208 to unlock the Study safe and grab the rewards — a red letter, a gem, and the Closed Exhibit blueprint.
How to get the Drafting Studio code
Follow these steps to figure out the Drafting Studio code on your own:

In the Drafting Studio, find a calendar on the wall displaying the month of November (month 11).

Nearby, locate a diorama or picture of the Apple Orchard.

Use a magnifying glass to inspect the orchard image closely. Count the number of gates in the image – there are 8.

Combine the clues: 11 (November) and 08 (gates) to form the code 1108. Enter 1108 into the safe in the Drafting Studio.
How to get the Drawing Room code
Follow these steps to figure out the Drawing Room code on your own:

Go to the Drawing Room and find the large central portrait of Herbert Sinclair. Notice the candelabra in the painting is bent, unlike the real ones.

Interact with the left candelabra on the mantle (the one that matches the painting). This reveals a hidden safe behind a wall portrait.

Look around the room and examine the paintings and drawings for clues.
Include the woman with a small gait (4 pictures) and the man with a small gait but ignore the animals.

Combine these numbers to form the code: 0415 (April 15). Enter 0415 into the safe to unlock it.
How to get the Red Door code
Follow these steps to figure out the Red Door code on your own:


First, make sure you’ve powered up the red generator/fusebox in the Boiler Room to unlock access to the Red Door in the Underpass.
Basically, rotate the red pipe on the floor until it drives power to the red box. Check on the panel upstairs to make sure it’s powered.
When you reach the Red Door, you’ll interact with a letter lock.
The lock requires you to select three letters and one number.
The only day available is “8”. The month that fits with the letter dials is “MAY”.

Enter M-A-Y-8 into the lock and press the button.
How to get the Shelter Time-Lock code
Follow these steps to figure out the Shelter code on your own:

Interact with the computer in the Shelter and select the “time-lock safe” option from the menu.

The game’s calendar begins on November 7 (that’s Day 1). Count how many in-game days have passed since then. Add that number to November 7 to get the current in-game date.
The next step is to pick an unlock time. The game always starts your day at 8:00 a.m., and time moves pretty fast.
Set the unlock time to at least one hour ahead of whatever the in-game time is. A safe option is to set it for around 10:00 a.m., just to be sure.

Once the date and time are set, you can either hang out in the Shelter or go explore. The safe will automatically open when the time hits.
You’ll have a four-hour in-game window to grab whatever’s inside before it locks again.
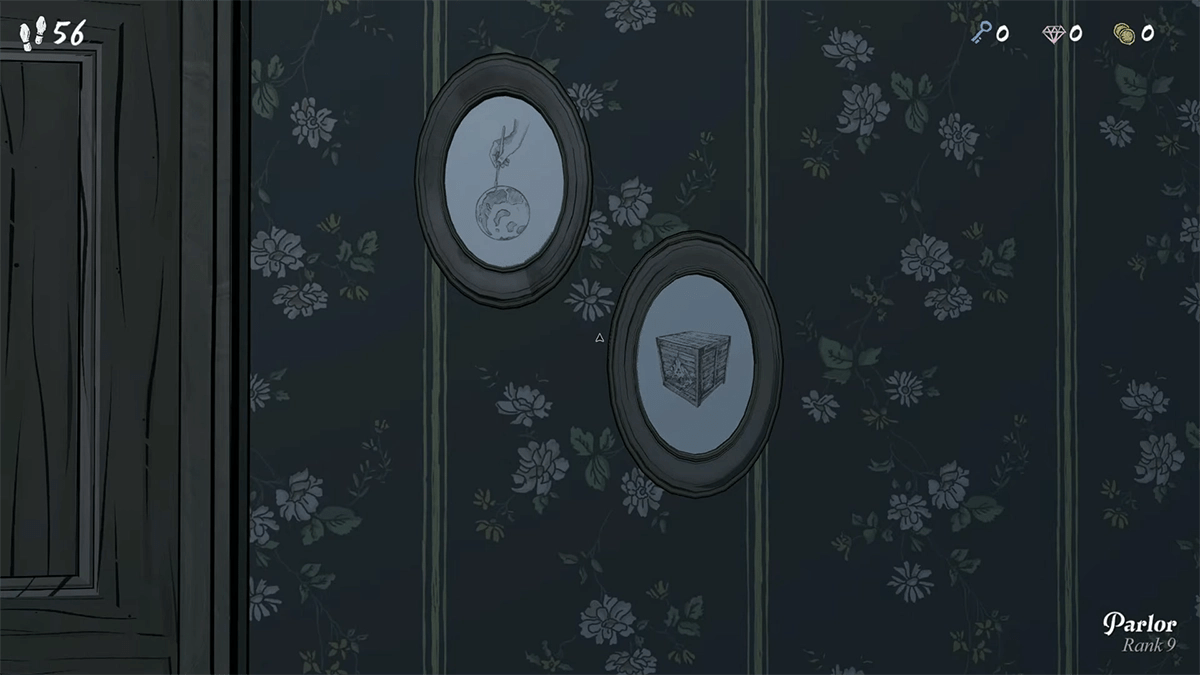
All Parlor box puzzle solutions
Below, you’ll find a table with all the statements in the boxes. The right one is marked with a ✓. Open it to get the gems.
BLUE BOX
WHITE BOX
BLACK BOX
The gems are in the white box ✓
A box with a false statement contains the gems
The statement on the white box is true
This box is empty
A box with a false statement is empty ✓
There are two false statements
There is only one true statement ✓
The gems are in a box with a false statement
There are two true statements
A box next to this box contains gems
Both boxes next to this box contain gems ✓
A box next to this box is true
Boxes next to this box contain gems
Boxes next to this box contain gems ✓
Boxes next to this box contain gems
Every box is black
Every box contains gems ✓
The statement on one of the other two boxes would be true if you replaced the word ‘every’ with the word ‘this’
This box is not blue
Every statement with the word blue is false ✓
The black box and the blue box are empty
Gems are in both the black box and the white box
Gems are in both the blue box and the black box
Gems are not in the white box or the blue box ✓
The gems are in the only box with a true statement ✓
One of the other boxes is true
The gems are in the only box with a false statement
Only one box is true
Only one box contains the gems ✓
The gems are in the white box
The gems are in the only true box ✓
Only one statement is true
The blue box contains the gems
Only one statement is false
Only one statement is true✓
The gems are in a box with a false statement
The gems are in the white box
Statements with the word “white” are always true ✓
The statement on the white box is true
Only one box is true
The black box contains the gems ✓
The blue box contains the gems
The black box is false ✓
The black box is true
A false box contains the gems
The black box is black
The black box is true.
The black box is empty ✓
The empty boxes both have true statements
The blue box has a true statement
This box contains the gems ✓
This statement appears on another box ✓
The blue box is empty
This statement appears on another box
The gems are in a box with a false statement
The blue box is false ✓
The white box is false
The gems are in a box with a statement containing the letter “B” ✓
The blue box is true
The gems are in a box with a statement containing the letter “U”
This is the blue box ✓
The blue box is true
The blue box is empty
The gems are not in this box
The blue box is true ✓
The gems are in this box
The gems are in this box
The gems are in a box next to this box
The gems are in the blue box ✓
The gems are in the false box
The gems are in the false box
Only one of the other boxes is false ✓
This box is the middle box
The gems are in the middle box ✓
This box is the middle box
This is the only true box
The gems are in the other box with a true statement
One of the other boxes is true ✓
The black box is true
The gems are in the true box ✓
The blue box is true
The gems are in the black box ✓
The gems are in the white box
Only one box displays a true statement
The gems are on the desk
The gems are in this box ✓
The gems are on the floor
The gems are not in the white box ✓
The gems are not in this box
The gems are in this box
The other two boxes are true
The other two boxes are blue
The other two boxes are empty ✓
The white box is true
The other two boxes are false
The other two boxes are empty ✓
The gems are in the white box
The other two statements are both true
The gems are not in the blue box ✓
The black box is not empty ✓
The statement in the black box is true
A box with a false statement contains the gems
A box with a false statement contains the gems
The statement in the blue box is true
The blue box contains the gems ✓
The gems are not in a box with a true statement
The statement on the blue box is true as is this statement ✓
The gems are not in a box with a true statement
The statement in this box is true
The statement in this box is true
Boxes that claim to be true contain gems ✓
The gems are in another box ✓
The truth is in another box
The words “another box” are on another box
There are two true boxes
There are two empty boxes
This box is empty ✓
The statement on the white box is true ✓
There is a second wind-up key in this room
This box and the white box are both empty
There are four boxes in this room
There is only one box in this room
The gems are in the true box ✓
This box and the white box are both empty
This box and the blue box are both empty
The other two statements have identical wording ✓
The black box contains the gems
This box and the blue box are empty
All three boxes are empty ✓
You are in the parlor
This box is empty ✓
The blue box is true
This box is empty
This box is empty
This puzzle is harder than it seems ✓
This box is the white box ✓
This box is the black box
The blue box contains the gems
This box is the black box ✓
This box is the blue box
The box that claims to be black has the gems
This is the black box
This is the black box
The black box is not empty ✓
There are two false statements
This is the only true statement ✓
The white box is empty
The gems are in the black box
This statement is of no help at all
This box and the blue box are both false ✓
The gems are in this box ✓
This statement is of no help of all
The gems are in the blue box
The gems are not in the box with a unique statement
This statement is unique ✓
The gems are not in the box with a unique statement
There are three boxes in this room
Two boxes in this room are empty
This box is one of the two empty boxes ✓
All three statements are false
Two statements are false ✓
The gems are in a box with a false statement
One of the other boxes is false
You will open this box and find it empty ✓
The blue box is true
One of the other two boxes is false
You will open this box and find it empty ✓
The blue box is true
The gems are in a box with a statement
(BLANK) ✓
The white box does not have a statement
The gems are in the black box ✓
(BLANK)
The gems are in a box with a statement
A box next to this box contains gems
(BLANK) ✓
A box next to this box displays a false statement
The gems are in the box with the word “blue” on it
(BLANK)
The gems are in a box that is actually blue ✓
How to solve the Billiard Room dart puzzle
This is a recurring math puzzle in the Billiard Room, using a colorful dartboard with numbered rings. Each ring has a number and a color, and each color = a math operation
To solve it, start with the center number as your starting value and move outward, applying the operation shown by each ring’s color to the number inside that ring. Click the number on the outer edge of the dartboard that matches your final result.
Here’s an example:
- Center: 8 (Pink – Multiply)
- Next ring: 3 (Blue – Add)
- Next ring: 5 (Yellow – Subtract)
- Outer ring: 2 (Purple – Divide)
I would solve this as follows:
→ Start with 8
→ Multiply by 1 (Pink ring says multiply, but there’s no number shown in center, so we just use 8 as-is)
→ Add 3 → 8 + 3 = 11
→ Subtract 5 → 11 – 5 = 6
→ Divide by 2 → 6 ÷ 2 = 3
Final answer: Click 3 on the outer ring to claim your reward.
Eventually, you’ll start seeing bullseye symbols and colors, as well as outer operators. Bullseye operators
Dartboard cheatsheet
Want help remembering the color meanings? Use the magnifying glass in the Nook room for clues. Or, just look at this table:
Center Operators

Blue: Addition

Yellow: Subtraction

Pink: Multiplication

Purple: Division

Fractional fill: Divide your result by the indicated number at that step
Bullseye Operators
Added to the total score after hitting a ring with a matching color. i.e. If blue, addition operations trigger the bullseye action)

Square: Square the result after the operation of the colored ring it appears on

Diamond: Reverse the digits of your result at the specified step

Squiggly line: Round your result at that step
Outer Operators
Applied to segment numbers before performing operations.

Red dots: Repeat the operation for that ring as many times as there are dots (up to four)

Red X: Skip that ring’s operation entirely

Red slash: Halve your result at that step
If you’re not great at maths, you can use this Dart Puzzle Solver.
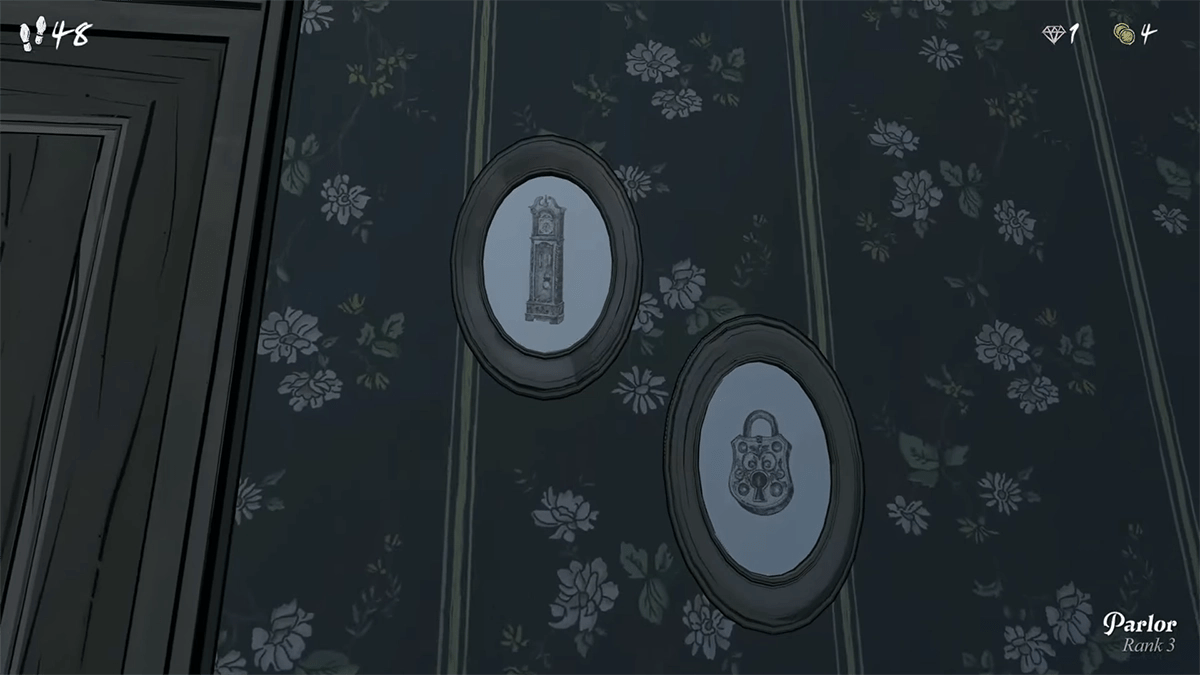
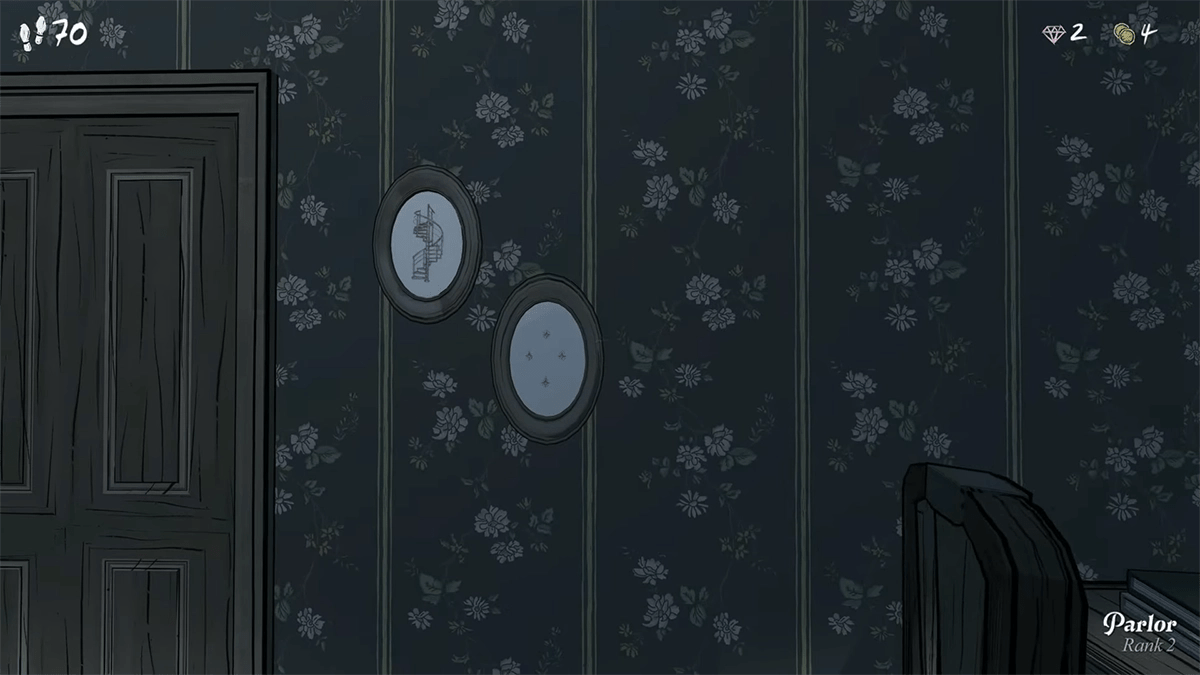
How to solve the two pictures puzzle
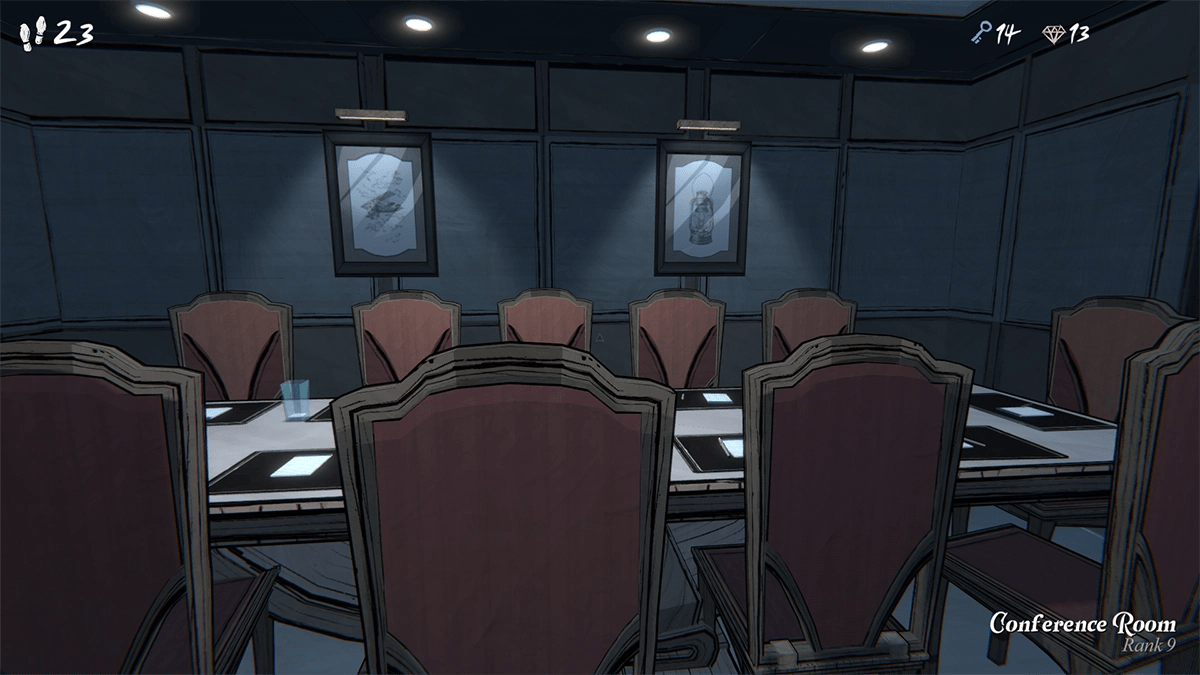
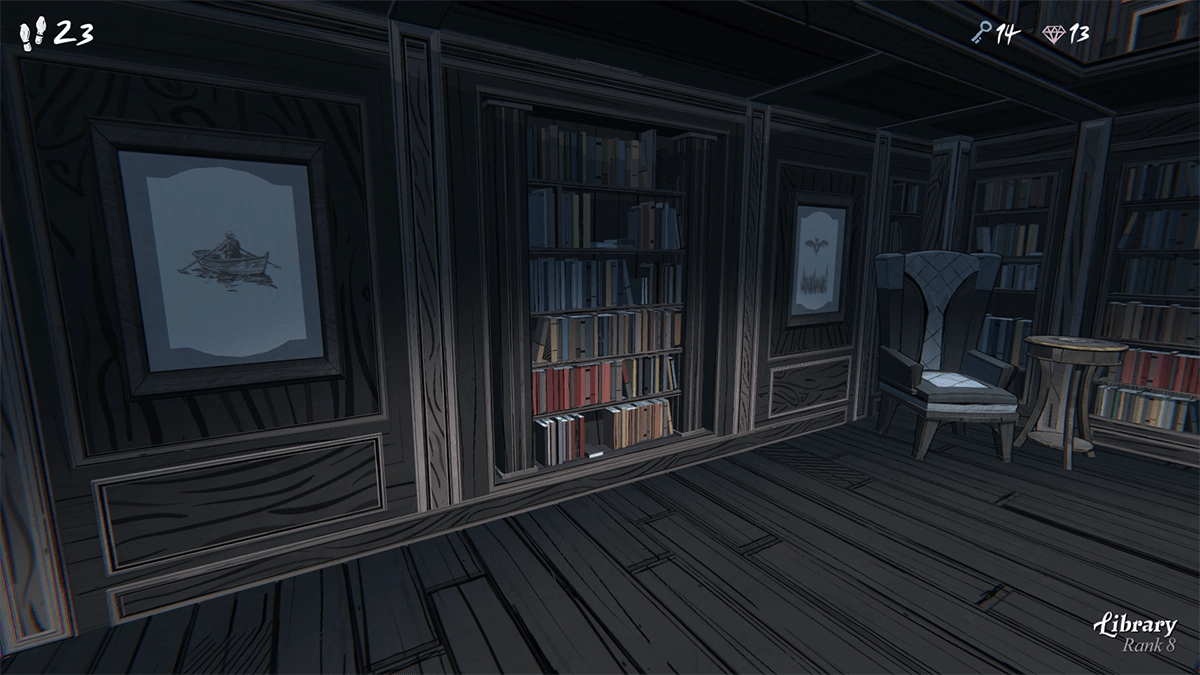
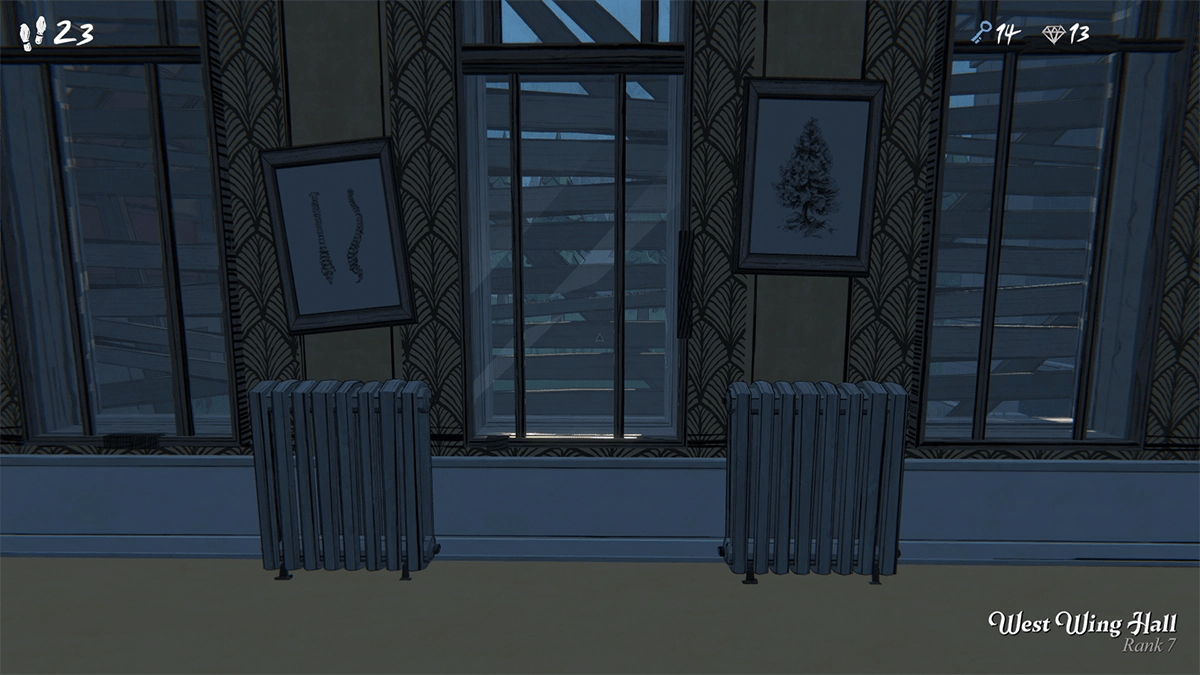
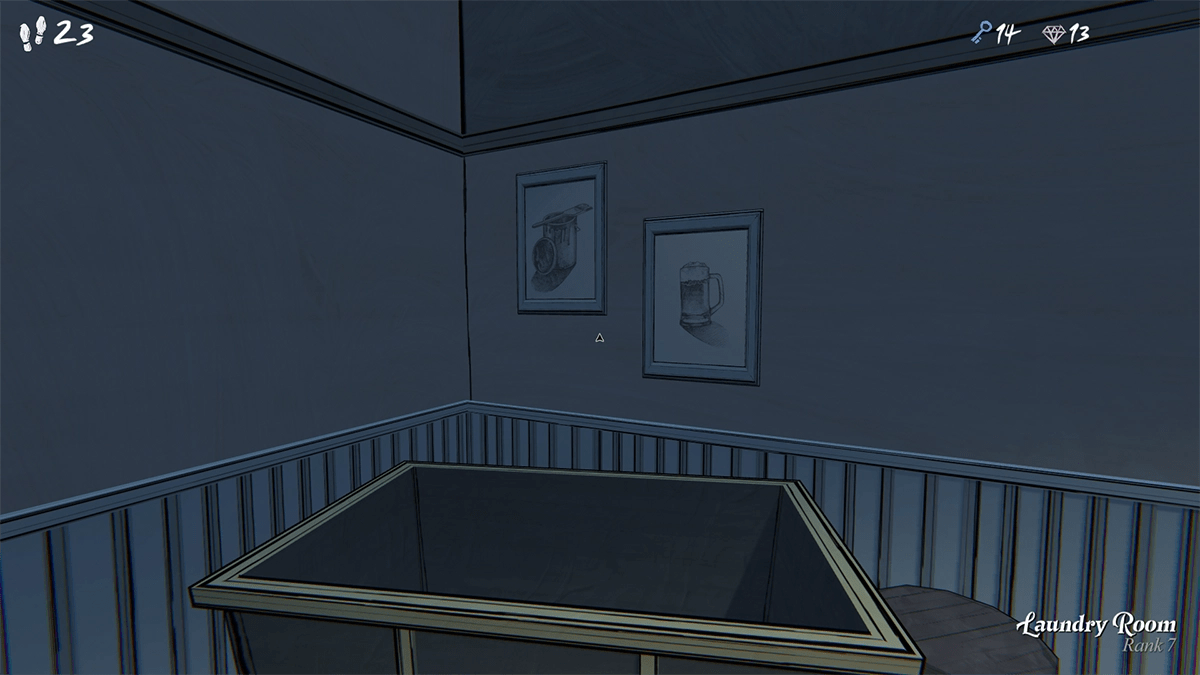
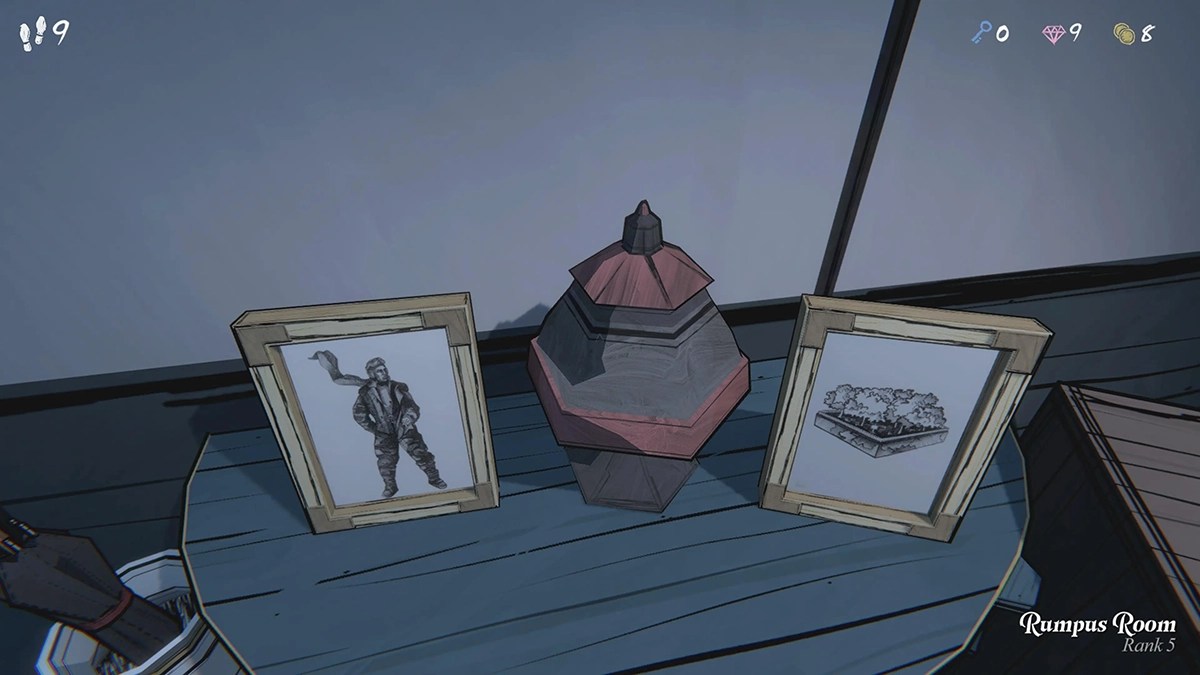
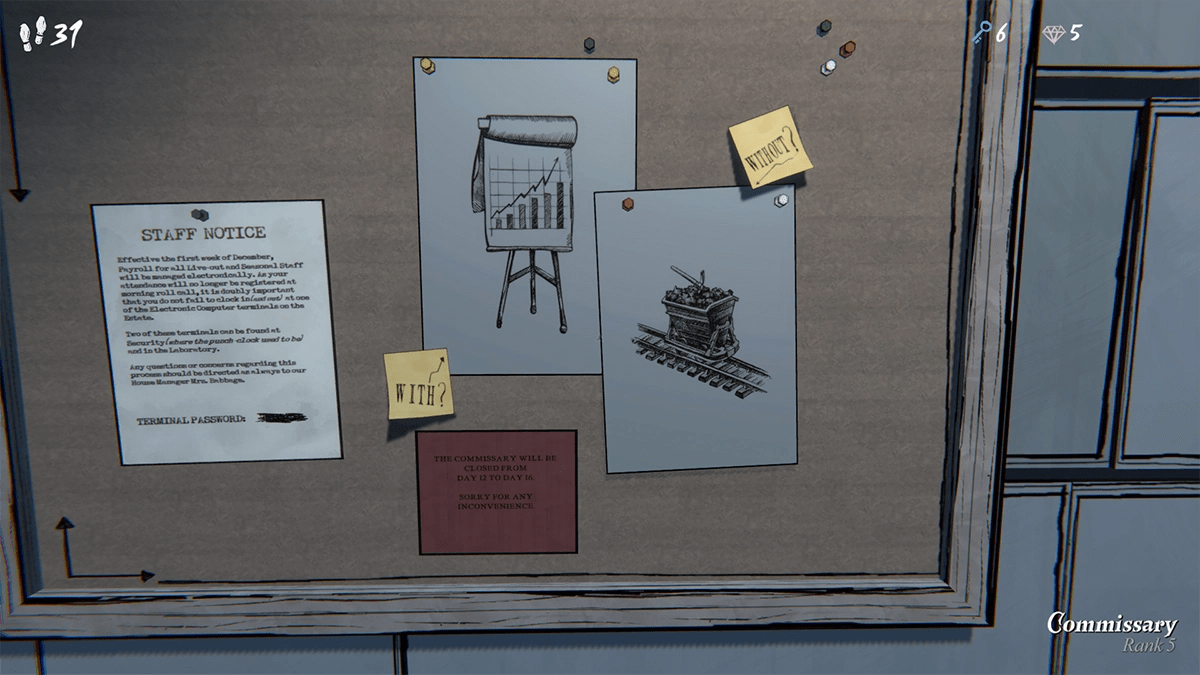
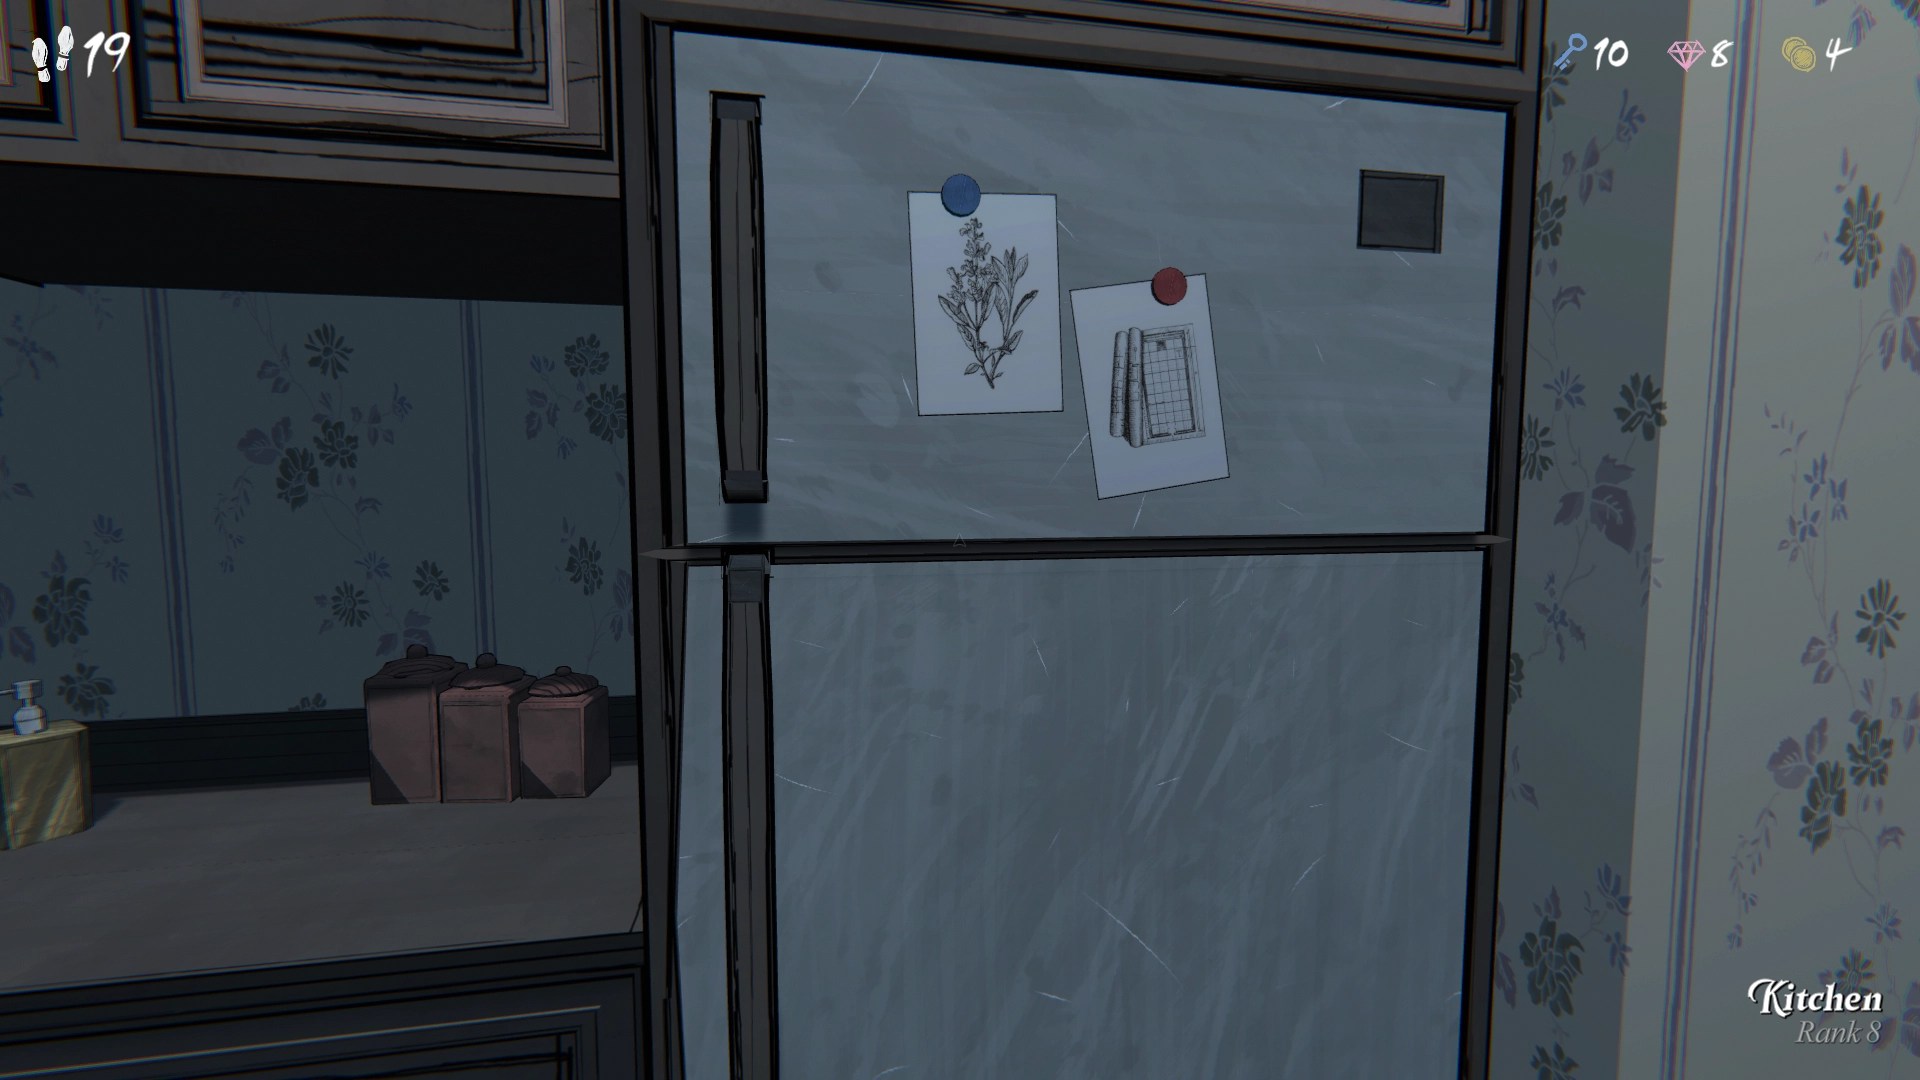
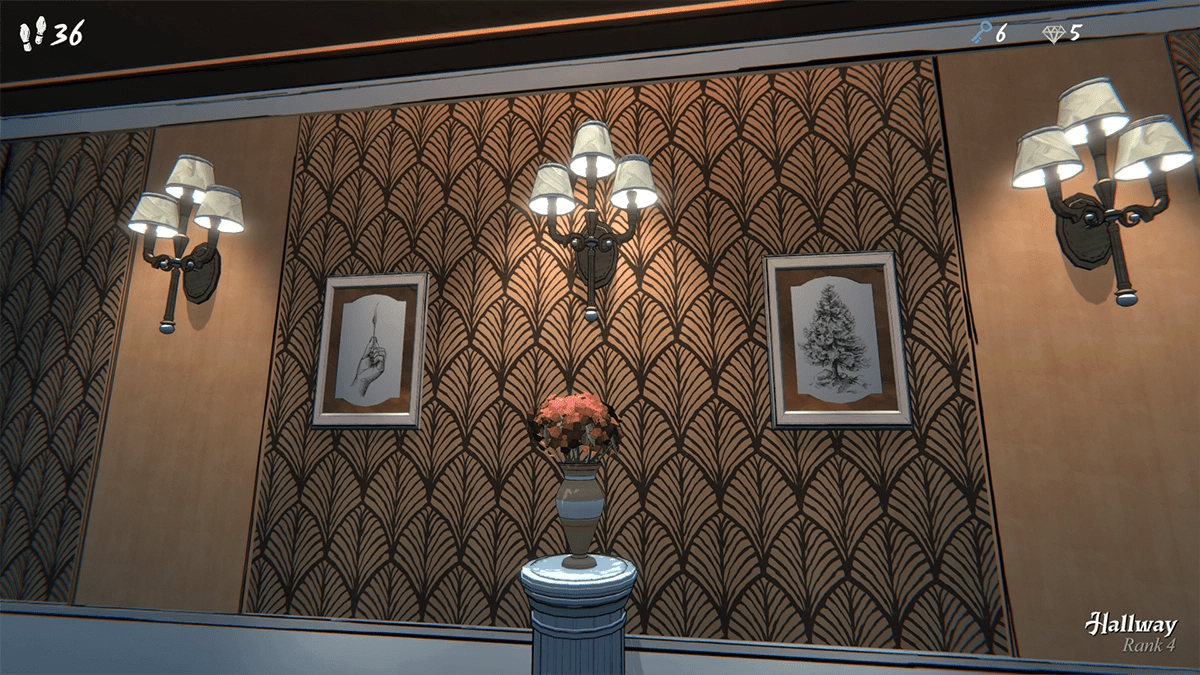
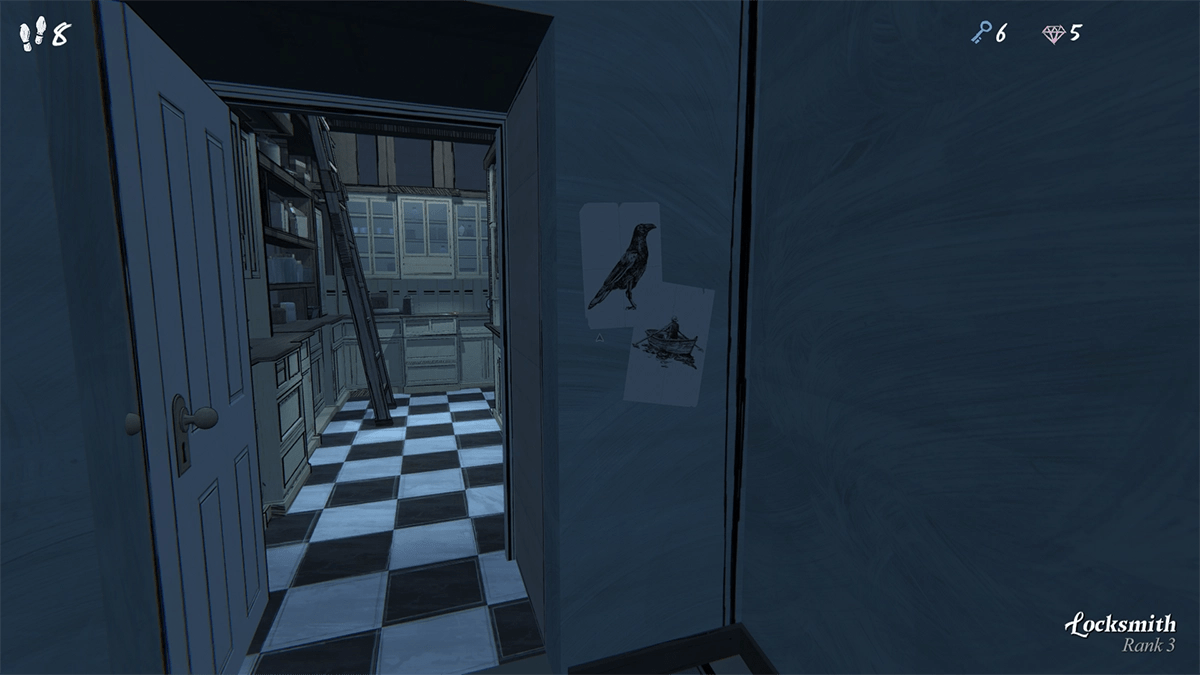
The two pictures in Blue Prince appear in various rooms throughout the mansion. Each room features two images displayed side by side. Your task is to figure out what each image represents as a word.
For example, one image might show a flan and the other a dessert. The words here are DESET AND DESSERT. They differ by the letter S. Subtract the common letters to get the remaining letter, and this is your answer.
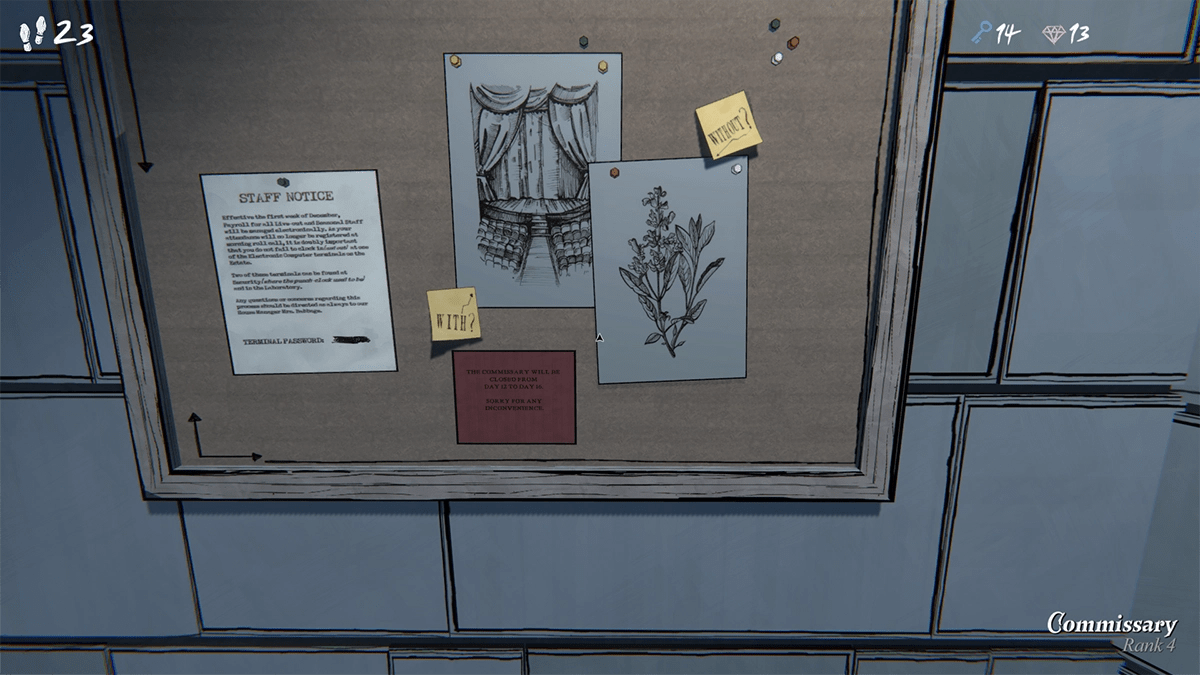
Now, one single picture may have multiple meanings, so consider synonyms or alternate interpretations. For example, a tree could represent either “PINE” or “FIR”. Some rooms may not have this puzzle, and the images can change daily. You can use the Study’s chalkboard and the Commissary bulletin board for hints.
Once you have the letter, record it in the correct spot on the mansion’s five-by-nine grid. Each room corresponds to a specific grid position, which you can reference from the Study chalkboard. Continue filling in the grid with the letters you find in each room. These letters will eventually form a secret phrase.
Here’s every pair of pictures and the letter you should substract from them on a grid:
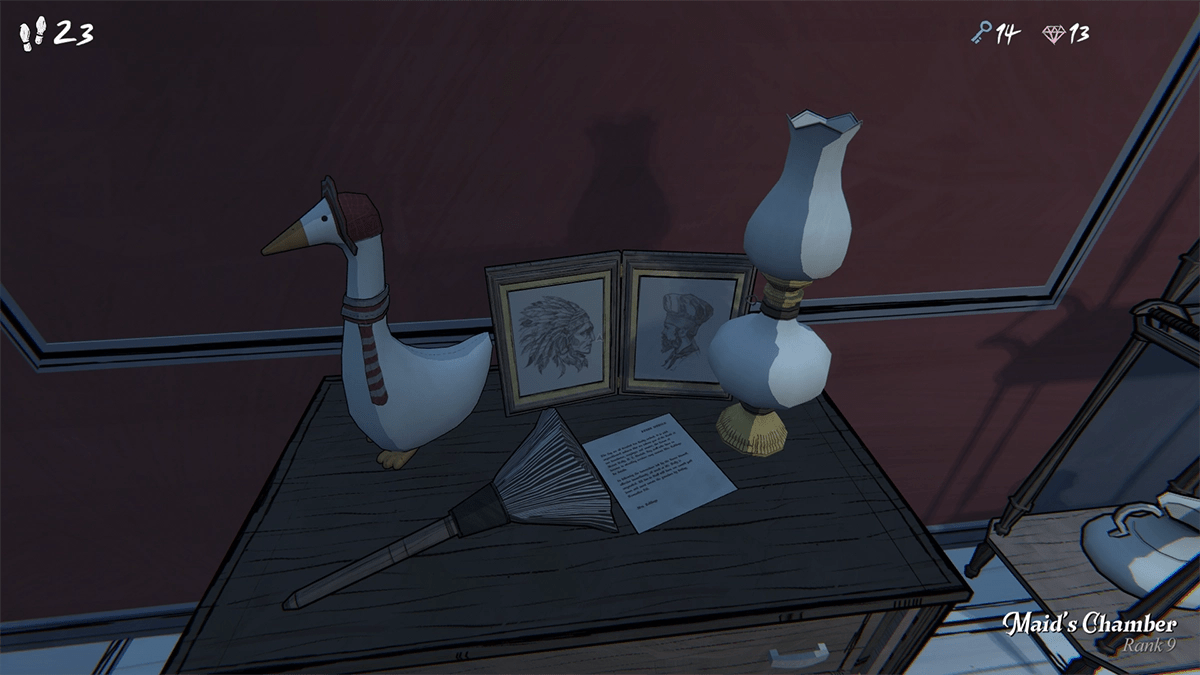

CHIEF
– CHEF
=
I
FLIGHT
– LIGHT
=
F
WHEAT
– HEAT
=
W
CREATE
-CRATE
=
E


CRATE
– RATE
=
C
BOAT
– BAT
=
O
HOUSE
– HOSE
=
U
CROWN
– CROW
=
N
STAGE
– SAGE
=
T


SPINE
– PINE
=
S
TIME
–
TIE
=
M
PAINT
– PINT
=
A
FLAN
– FAN
=
L
PLANE
– PANE
=
L


GRAIN
– RAIN
=
G
COAT
– COT
=
A
PLANET – PLANE
=
T
STAGE
– STAG
=
E
COAST
– COAT
=
S


TUBE
– TUB
=
E
PILOT
– PLOT
=
I
TIGER
– TIER
=
G
CHART
– CART
=
H
PLANT
– PLAN
=
T


CARD
– CAR
=
D
COAST
– COST
=
A
TEN – TENT
=
T
FIR
– FIRE
=
E
AND – SAND
=
S


CROW
-ROW
=
C
TIER
–
TIE
=
R
ROAD
– ROD
=
A
CLOCK
– LOCK
=
C
PEAK
– PEA
=
K

PLANE
– PLAN
=
E
STAIR
– STAR
=
I
BRIDGE
– BRIDE
=
G
BATH
– BAT
=
H
CART
– CAR
=
T


DESSERT
– DESERT
=
S
PRAY
– PRY
=
A
FACE
– ACE
=
F
PINE –
PIN =
E
STAG
– TAG
=
S
When you finish filling in the grid, the letters will reveal a secret phrase. This phrase helps with other puzzles in the mansion, like unlocking safes. For example, the phrase might be: “If We Count Small Gates, Eight Dates Crack Eight Safes”.
How to solve the Observatory puzzle
Here’s how you can solve the Observatory puzzle in Blue Prince:

The telescope has two wheels you’ll need to adjust. The first is at the base of the telescope. Turning this wheel rotates it horizontally, letting you swing it left or right.

Then, go up the stairs to the upper platform, where you’ll find a second wheel. This one controls vertical movement, so you can tilt the telescope up or down.

You’ll know you’ve got it right when a glowing eye icon appears on the telescope. Once it shows up, you can interact with the telescope to look into the night sky. The first time you do this, you’ll see a single star.

In later runs, using the Observatory again adds more stars and unlocks constellations. These unlock permanent rewards – like extra Trunks, Steps, or Gems – that carry over into future runs, making the Observatory a great long-term investment.

There’s also a hidden bonus. After aligning the telescope, look closely near the lens for a secret compartment. Inside, you’ll find the Planetarium floor plan, which adds a new draftable room.
How to solve the Security Room puzzle
Here’s how you can solve the Security Room puzzle in Blue Prince:

Start by examining the staff notice on the bulletin board in the room. At first, the terminal password looks scribbled out, but if you use a magnifying glass on it, you’ll reveal the password: SWANSONG

Once you’ve got the password, head to the terminal and log in. From here, you can change two key settings: the Security Level and Offline Mode.
Then, switch Offline Mode to UNLOCKED. With that setting, if you shut off power to the security system later (via the Utility Closet), all keycard doors will open even if you don’t have the card. This combo lets you access more rooms with fewer limitations.

After logging in with SWANSONG, type in a second code: swansonghss. This unlocks a secret video archive. You’ll be able to browse old security footage by year. Most clips are corrupted, but some — especially from 1987 — still work and show CCTV footage from rooms like the library.
How to solve the Boiler Room puzzle
Here’s how you can solve the Boiler Room puzzle in Blue Prince:

First, head down the stairs to the first green boiler and turn its valve to start the process.

Next, you’ll need to rotate the red pipe to direct steam to the second boiler and the conveyor. This pipe helps guide the steam, so don’t forget to tweak it for the right flow

For the second green boiler, its valve is blocked by a moving conveyor. You’ll need to time it right to stop the conveyor at the perfect moment so you can access and turn the valve.

After that, hop in the elevator powered by steam (using the blue lever), head up to the upper floor, and turn the valve for the third green boiler. Then, flip the nearby blue lever to send steam to the control panel.

Now, use those blue levers and red pipes to guide the steam from all three boilers to the control panel on the upper floor. This will make sure everything is connected.

Once the steam is flowing, press the activation button on the control panel. You’ll also need to use the slider or lever to decide which room should receive power first.
Finally, with the Boiler Room powered up, you can direct steam to adjacent rooms with compatible ducts, unlocking more puzzles and progression routes.
How to solve the Utility Room fusebox puzzle
Here’s how you can solve the fusebox puzzle in Blue Prince:

Found in the Utility Closet, this puzzle uses six V.A.C. indicator lights and ends with a hidden lever behind the panel.

Start by turning all six lights green — click each light once.

Next, click 1st, 3rd, and 5th lights again to turn them blue, and 2nd, 4th, and 6th lights again to turn them red.

Now create purple lights by clicking any blue light that’s next to a red one — this turns both into purple. Repeat until all lights are purple.

After all the lights turn purple, press the fourth button to change it to white, then press the appropriate buttons to match the final color configuration.
Final sequence should be:
Off – Blue – Green – White – Red – Purple

When correct, the wall slides open, revealing a hidden lever that unlocks the Gemstone Cavern (+2 starting gems permanently).
How to solve the Cloister puzzle
Here’s how you can solve the Cloister Room puzzle in Blue Prince:

To solve it, draft a Green Room card or use the Greenhouse to increase your chances of finding it, and enter the room, which usually costs 3 gems unless you’ve unlocked the Terrace, in which case entry is free.

Once inside, you’ll see an angel statue surrounded by a barrier and dirt patches you can’t reach yet. Stand in front of the statue, and look at the two pillars on either side for hidden switches at their bases.

Your cursor will change when you hover over them. Activate the switch on the right pillar first, then the left. After both switches are pressed, the barrier will drop, allowing you to reach the statue.

Behind it, you’ll find an Allowance Coin (Allowance Token), which grants you a permanent bonus of +2 coins each day. There’s also a note from Mrs. Babbage for some extra lore.
How to activate all blue flames
You’ll find all blue flame levers in the following location


Apple Orchard behind the campsite.
1. Look for a white picket fence near the Campsite.
2. Find the code “1128” using the Magnifying Glass in the Dark Room (look for a heart on a tree in a photo).
3. Enter the code at the gate to unlock it.
Go inside, find the gas valve near a small shack, and turn it on.


Gemstone Cavern left of the Campsite
1. Solve the Utility Closet Breaker Box puzzle (fuse box).
2. This clears the entrance to the cavern.
Enter the cavern and look to the right – the gas valve is there. Turn it on.

Hovel, a randomly available Outer Room
1. Unlock the West Gate Path and outer rooms by going through the Garage Door.
2. Draft the Hovel as one of your Outer Rooms. Keep in mind that room selection is random – might take a few tries.
Inside the Hovel, find the gas valve near the stove and turn it on.

Schoolhouse, another randomly available Outer Room
1. Like the Hovel, unlock the West Gate.
2. Draft the Schoolhouse as an Outer Room (random each run).
Enter the room and turn the gas valve behind the heater.
After lighting all four flames, an elevator appears down the stairs behind the Fountain (south of the entrance).
Ride the elevator to reach The Precipice, where the Chess Puzzle and secrets await.
How to unlock the Reservoir boat & Safehouse
To ride the Reservoir Boat in Blue Prince, you’ll need to adjust the water levels using the Pump Room.

First, make sure you’ve unlocked access to the Underground. You can get there through the Fountain, the Tomb, or the Blue Flames Elevator.

Once you’re down there, go past the Red Door (make sure it’s powered via the Boiler Room)and look through the window beyond the gear puzzle.
You’ll see diagrams showing key reservoir water levels: 13 to dock the boat, 6 to ride it, and 0 for fully drained. The reservoir starts at 14.

To move the boat into position, go to the Pump Room and drain the reservoir once to lower it from 14 to 13. This sets the boat at the dock on the Foundation side, and its position is saved, so you don’t need to repeat this.

Now, to actually ride the boat, you’ll need to drain the reservoir further: from 13 to 6. This takes a few pump steps: first, drain with Tank 1 to drop the level to 9.

Then, fill the Fountain using both tanks to empty them.
Drain the Kitchen with Tank 2, then switch Tank 2 to the Reservoir and drain it to bring the level to 8. Refill Tank 1 by 2, then drain it again to finally bring the reservoir to level 6.

With the water at level 6, head back to the boat and interact with it to ride across to the hidden beach and reach the Safehouse. There, you’ll find key items like the Sanctum Key.
How to solve the Music Sheet puzzle
Here’s how to solve the music sheet puzzle in Blue Prince:
Sheets 1 – 4


Found on the piano in the Music Room.
Sheet 5

On one of the tables near some of the Greenhouse plants.
Sheet 6-7


On the Ballroom’s piano.
Sheet 8

On the Workshop by the stone letter slab.
Once you’ve found all sheets, follow these steps:
- Look at the bolded word on each page.
- Line them up in order from Page 1 to Page 8.
- When you do, the bold words spell this hint:
“First words on the sheets are true message.” - Now, look at the very first word written on each page (not the bolded one this time). and write them down, again in page order.
- They’ll form the real secret message: “Find among the white trees under two stones.”
You’ve got your secret message — now let’s track down the loot!

Head outside the manor, to the back of your campsite (where Simon’s tent is).

Look for a grove of white trees (they look like aspens).
In the middle of the grove, you’ll see a patch of dirt with two stones sitting on it.

Equip your shovel and dig right between those two stones. You’ll uncover the Conservatory floorplan — a powerful upgrade that lets you change the rarity of three random floorplans during future runs.
How to melt ice in the Freezer
Here’s how to solve the Freezer puzzle in Blue Prince:

When you enter the Freezer room, your coins and gems will be frozen, meaning you can’t spend or collect more currency until they are thawed. The room also contains frozen loot and a locked ice chest, but everything is inaccessible at first.

Option 1: Use a Burning Glass or a Torch.
Burning Glass: Crafted in the Workshop by combining a Magnifying Glass and Metal Detector. Use this to melt the ice on items, the chest, and the frozen door.
Torch: Acquired from the Armory after completing the chess puzzle and gaining the Knight’s power. It works like the Burning Glass but doesn’t require crafting.

Raise the room temperature with the Furnace or Sauna.
Draft one of these rooms next to the Freezer. When you re-enter, the ice will begin to melt.
Once thawed, the Freezer gives you the Prism Key for drafting special rooms, a Letter from the Baron with puzzle hints, an Upgrade Disk, and a clue for the Admin Key.
You can also collect any frozen currency for future runs.
How to solve the Laboratory puzzle
Follow these steps to solve the Laboratory puzzle on your own:


To start the Laboratory puzzle, you first need to power the room. Build a Boiler Room close to the Laboratory and make sure the connecting rooms have visible blue power conduits.


Once built, activate the Boiler Room and set the power direction to flow toward the Laboratory.


Inside the powered Laboratory, you’ll find two periodic tables: one standard and one mostly blank with numbers in certain spots.
Match the numbered spaces on the blank table to the correct element symbols on the full table. These symbols spell out a message: “Push three up after nine”.

Now go to the machine with levers in the same room. Flip lever 9 up first, then lever 3 up—in that exact order. This is the only correct sequence to trigger the puzzle completion.

If you’ve done everything right, a short cutscene will play, unlocking the Blackbridge Grotto permanently.
How to solve the Gallery puzzle
The Gallery Puzzle is a clever little word game tucked inside the Inner Sanctum. You’ll see four abstract paintings, each hiding a single word related to thinking or deep contemplation.

THINK
This painting shows the word “THICK”, but the final letter, K, is oddly thin. The real clue is in the visual wordplay—“thin K” turns “thick” into THINK

PONDER
Here, you’ll see two wagons, mirrored, and both loaded with red objects. One wagon has a big letter “P”, also mirrored. The key is that the “P” is literally “on red,” giving you P + on red = PONDER

REALIZE
This painting is covered in eyeballs and words like “ACTUAL,” “GENU,” and “VER”—all pointing to truth and perception. Put it together, and the answer is REALIZE.

RUMINATE
You’ll see a room, a sideways 8 (infinity), and lots of “in” words and repeated ideas. Put it together—room + in + eight—and you get RUMINATE.
Entering the first two words correctly unlocks Chest #1 with coins and gems, but entering all four words opens Chest #2, which contains Key 8 – used to unlock Room 8, a special reward room.
How to solve the Tomb puzzle
Here’s how to solve the Tomb puzzle in Blue Prince:
Look for the seven statues scattered throughout the Tomb. Each one is unique, so pay attention to their headwear and what they’re holding.


The Chapel has stained glass windows that show each of the statues, and they’re numbered to tell you the order in which you need to interact with them. This is where you’ll find the key to the puzzle.
| Order | Statue Identity | Appearance | Distinguishing features |
|---|---|---|---|
| 1 | Gardener |  | Rimmed, round hat; holding a hoe or plow |
| 2 | Chef/Cook |  | Chef’s hat; holding a pan or pizza peel |
| 3 | Farmer |  | Wide-brim or cowboy hat; holding a rake |
| 4 | Butler |  | Top hat; holding a brush or feather duster |
| 5 | Maid |  | Bonnet or headdress; holding a broom |
| 6 | Jockey |  | Riding helmet or cap; holding a whip or crop |
| 7 | Ruler |  | Crown; holding a scepter |
After you’ve interacted with all seven statues in the correct order, a secret passage will unlock. This leads you to the Catacombs or Underground area.
In the new area, you’ll find an ominous angel statue (it looks like the Angel of Death or a reaper). Interacting with it opens new paths, including the Abandoned Mine or the Reservoir.
How to Solve the Chess Puzzle
To solve the chess puzzle in Blue Prince, find which rooms in your current mansion contain each of the six chess pieces, then place those pieces on the corresponding squares of the puzzle board based on the rooms’ positions on your mansion’s grid.
Woof. That’s a lot; let’s go step by step.


Inside the Precipice, you’ll find a large chessboard laid out in a 5×9 grid. This grid is actually a mirror of your current mansion’s layout, based on the rooms you’ve drafted during your run. On a table nearby, you’ll see six chess pieces waiting to be placed: the Pawn, Knight, Bishop, Rook, Queen, and King.
Your job now is to figure out where each of these pieces should go. As you explore the mansion, keep an eye out for rooms that have a chess piece somewhere in their decor – this could be a statue, a painting, or something built into the furniture. Each type of chess piece is always tied to specific room types.
Room piece cheattable
| Room | Chess Piece |
|---|---|
| Armory | Knight ♞ |
| Attic | Bishop ♝ |
| Bookshop | Bishop ♝ |
| Bunk Room | Pawn ♟ |
| Chapel | Bishop ♝ |
| Clock Tower | Rook ♜ |
| Conservatory | Rook ♜ |
| Den | Pawn ♟ |
| Dining Room | Pawn ♟ |
| Dormitory | Pawn ♟ |
| Drawing Room | Pawn ♟ |
| Freezer | Pawn ♟ |
| Guest Bedroom | Pawn ♟ |
| Ladyship’s Chambers | Queen ♛ |
| Lost and Found | Pawn ♟ |
| Nook | Rook ♜ |
| Observatory | Knight |
| Office | King ♚ |
| Parlor | Pawn ♟ |
| Rumpus Room | Bishop ♝ |
| Secret Passage | Pawn ♟ |
| Security Room | Knight ♞ |
| Solarium | Pawn ♟ |
| Storeroom | Pawn ♟ |
| Study | Queen ♛ |
| Throne Room | King ♚ |
| Treasure Trove | Knight ♞ |
| Vault | Rook ♜ |
| Walk-in Closet | Pawn ♟ |
However, which of these rooms appear in your mansion, and where they’re located on the grid, will change with each playthrough.
Here’s what you need to do:
- Identify where each piece appears.
- Open your mansion’s blueprint to see where those rooms are placed on the grid
- Match each chess piece to the correct grid square based on that location.
If you’ve placed a piece correctly, the square will light up. Once all six chess pieces are in their proper spots, the puzzle will be solved automatically, and you’ll receive your reward.
If you pick the Knight, you’ll unlock the Armory.
Keep in mind that the mansion’s layout and room availability are randomized each time you play. Also, taking notes or screenshots of where you find each piece can save you a lot of backtracking later on.
How to solve the Closed Exhibit puzzle
Here’s how to solve the Closed Exhibit puzzle and get the Paper Crown in Blue Prince:

When laying out your rooms, place the Closed Exhibit so that one of its walled-off sides is connected to another room—yes, even though it looks like there’s no door there.
The adjacent room must have a door that faces the sealed side of the Closed Exhibit. It might look blocked, but that’s okay. It still works.

Enter the room next to the Closed Exhibit. Peek through the window—you should see a security panel that controls the exhibit.

The panel has three buttons: Reveal Tripwires (shows the laser grid), Lower Barrier (removes the rope around the Paper Crown), and Reset Alarm (disables security for 10 seconds). To disable the alarm, press the Lower Barrier button first, then quickly press Reset Alarm. You can press the Reveal Tripwires button if you want, but it’s not necessary.

After resetting the alarm, you have 10 seconds to run into the Closed Exhibit and grab the Paper Crown from the pedestal before the security system reactivates. If you fail, just repeat the steps—there’s no penalty.

The Paper Crown allows you to redraw floorplans if your first three choices don’t include a Red Room
How to Solve Room 8 puzzle
Room 8 in Blue Prince presents a fun logic puzzle where you need to place eight animal statues into bins labeled with different sins.
Each statue comes with a riddle to guide you toward the right bin. Follow these steps to get everything in the correct place.

Penguin
The correct bin is Gluttony.
The riddle says, “The sum of my sin as it is penned is a number within the room.” This refers to Gluttony, which has 8 letters, matching Room 8’s number.

Lion
Envy bin
The riddle states, “Place me in a bin with an ‘N’ within its sin.” Envy is the only bin with an ‘N’ left after other placements

Swan
Lust bin
The riddle says, “Think again if I am ever in a bin far from the fin. This means the Swan should go in the Lust bin, which is near the painting of the fin.

Dog
Mundanity bin
The riddle says, “I deserve to be in a bin down on the end.” Mundanity is the sin at the end of the row.

Elephant
Wrath bin
The riddle states, “My neighbor’s sin is written thin to fit it all in.” Wrath is next to Gluttony, which is written thin.

Rabbit
Avarice bin
The riddle says, “I share a trend with my neighbor’s sin: a letter and its twin appear on each bin.” Avarice has double A’s, and the neighboring Mundanity has double N’s.

Bear
Sloth bin
The riddle says, “Lounging in the den,” which fits with the sin of laziness, Sloth.

Monkey
Hubris bin
The riddle says, “Bin near the bend in the tail of the skin.” Hubris is the closest bin to the bend in the tail.
Once you’ve placed all the animals correctly, a panel will open, giving you two allowance tokens (boosting your daily allowance by four coins) and the 8 Trophy (with an achievement).
How to solve the Secret Garden puzzle
Here’s how to solve the Secret Garden puzzle in Blue Prince:

Before anything else, you’ll need the Secret Garden Key. Its location changes every playthrough, but here are your best bets:
– Billiard Room’s dart puzzle
– Music Room
– The Locksmith
Once you’ve got the key, look for a locked door on the far left or right side of the mansion (columns 1 or 5).


Use a sledgehammer on the slightly broken wall to reveal a valve.
Turn this valve until its arrow is pointing west or east.


In the center, there’s a fountain with a wind vane, and nearby you’ll find two valves.

Turn both valves so the second and third arrows are pointing west—that’s toward the brick wall or moon statuette at the back of the garden, or east.

Pull the lever to unlock the western or eastern Antechamber door.


By having them all point south, you’ll get to see one of the Sigil combos for the Inner Sanctum.
How to open the Ladyship Chamber Diary
Follow these steps to open the diary:

To open Her Ladyship’s Diary in Blue Prince, start by getting a burning tool. You can craft a Burning Glass in the Workshop (combine a magnifying glass and a metal detector) or buy a Torch from the Armory after solving the chess puzzle and choosing the Knight’s power.

Next, wait for the Tomb to appear as your Outer Room. Inside the Tomb, light two sets of magic candles—one near the entrance and one in the back between two statues.

This reveals a secret passage. Go inside and move the photo on Lady Epsen’s coffin to find the Diary Key.

Now, wait for Her Ladyship’s Chamber to become available. It only appears on the west side of the house, facing south. Once you have it, open the diary.
How to solve the Clocktower puzzle
Here’s how to solve the Clocktower puzzle in Blue Prince:

Draft the Clocktower room and make your way to the top floor. You have to be there at exactly 1:30 PM in-game time.

Not sure what time it is in-game? Check any analog clock inside the mansion or on the tower’s exterior. Time moves slowly—about 5 in-game minutes pass per real-world hour.

Once you’re at the top of the Clocktower at the designated time, a cutscene will trigger, revealing a hidden passage leading to the puzzle room

Once you’re inside and the puzzle is triggered, you’ll see a large central clock and eight grandfather clocks lined up nearby. Around the room, you’ll also find a series of notes in either blue or red.


Here’s the trick: blue notes are truthful, and red notes are lies. The notes will reference different clock settings and try to mislead or guide you depending on their color. There’s also a poem on the desk that looks like a hint, but it’s intentionally misleading and best ignored.

The actual solution comes down to setting the eight grandfather clocks to very specific times. From left to right, the correct times are: 5:00, 5:08, 5:57, 6:00, 7:00, 8:00, 8:05, and 9:00.
All Microchip hunt locations
Here’s how to solve the Microchip puzzle in Blue Prince:


Microchip 1:
Once you solve the Laboratory puzzle and unlock the Blackbridge Grotto, you’ll see the first Microchip already installed in the central pedestal.


Microchip 2:
Head to the Entrance Hall inside the mansion. Bring a Sledgehammer with you and break the vase on the left side as you walk in. The Microchip is hidden inside or beneath the shards.


Microchip 3:
Go outside the mansion through the West Gate and stop before crossing the small wooden bridge. To the right of the bridge, you’ll find a patch of grass. Use a Shovel to dig at this spot to reveal the final Microchip.

Once you have all three, return to the Grotto to fully activate the vault. Here, you’ll find the Throne Room blueprint.

Secret: Once you’ve found all three Microchips, bring them to the scorched sundial in the Apple Orchard.

Equip a fuse-lighting tool (like a Torch or Igniter) and interact with the sundial.

This reveals Microchip-shaped indentations. Place all three Microchips into the indentations.
Doing this unlocks a permanent Satellite Dish perk.
How to solve the Castle puzzle
Here’s how to solve the Castle puzzle in Blue Prince:


To start the Castle Puzzle, go to the Chess Chamber in the Underground and bring a Power Hammer. Smash the weakened wall to reveal a cipher with the letters C _ , A , S , T , L , E _. You’ll need to find clues around the mansion to fill in the blanks.


Return to the Chess Chamber and solve the Chess Puzzle twice. Once for the Rook power and once for the King. Get both powers in any order. This unlocks a hidden passage with Mora Jai color boxes (See solutions below).

Start a new run without picking up any items, gold, tools, or keys. Spend your gems by drafting rooms until you’re empty-handed. Draft an Observatory and activate the Southern Cross constellation by ending up with a star total like 5, 9, 13, 25, or 105.

Be in the Unknown chamber with the statues before 1:30 PM in-game, known as the Sacred Hour. Wait there until the clock strikes. At 1:30, the tomb rises, revealing a clock puzzle.

Set time to 01:09 and press the button. Move the minute hand 6 times clockwise (01:15) and press again

Rewind counter-clockwise until the hand lands on the word “EAST” (not the Roman numeral) and press once more. This reveals the Key of Aries.

Donate 30 coins to the Shrine to get the Monk Blessing and to open a sealed chest inside the Treasure Trove room to claim the Royal Scepter.


Make sure you’ve unlocked the Treasure Trove room. If this room isn’t available to you, make sure you’ve completed the Laboratory Puzzle and the Microchip Hunt.
Use the key here to open the chest and get the Royal Scepter. Note that you may not always get this chest.
Mora Jai boxes
Statue 1
Statue 2
Statue 3
Statue 4
Statue 5
Statue 6
Statue 7
Statue 8

Press the bottom right button five times

Press the bottom center button once

Press the bottom left button twice

Press the bottom right button once and bottom left button again twice

Press bottom right button three times

Press the bottom center button twice

Press the top center button twice

Press the outer symbols starting from top left and rotating clockwise

Press the center right button twice

Press the center left button

Press the center button

Press the top right button twice

Press the center left button

Press the top left button

Press the center left button

Press the center button and the top right button

Press the top center button

Press the bottom center button twice

Press the outer button on the bottom left and rotate clockwise

Press the bottom left button once

Press the left center button twice

Press the center button

Press the center right button thrice

Press the center button

Press the center right button

Press the center button three times

Press the outer button on the top right corner and rotate counterclockwise

Press the center left button

Press the bottom left button and the center left again, but twice

Press the center button twice and the top center once

Press the center right button

Press the center left button twice

Press the bottom left button

Press the center button

Press the bottom right button

Press the center button

Press the center right and bottom right buttons

Press the bottom left button

Press the center left button

Press the center button

Press the bottom right button and the bottom center button

Starting from the top right, press the outer buttons and rotate clockwise.

Press the top right button twice

Press the top left button

Press the center left button

Press the center button

Press the top center button

Press the bottom left button twice

Press the center right button

Press the bottom left button

Press the top center button

Press the bottom center button twice

Press the top center button twice

Press the center button

Press the top center button three times

Press the top left button

Press the top right button three times

Press the top center button

Press the top left button

Press the top center button

Press the outer buttons and rotate clockwise, starting from the top left corner one.

Press the bottom center button

Press the top center button twice and the top left once

Press the top left button, then the bottom center button twice

Press the top center button

Press the bottom right button twice

Press the bottom center button

Press the top left button twice and the bottom center button three times

Press the top center button and the bottom right button

Press the top center button and the bottom right button again

Press the bottom center button three times

Press the top left button

Press the bottom center button twice

Press the outer button on the bottom right and rotate counterclockwise.

Press the bottom center button twice

Press the center left button

Press the top left button once and top center button twice

Press the top left button again

Press the center left button and the center one too

Press the top right buttons

Press the center and the top center buttons

Press the bottom center button

Press the top right button

Press the center right button

Press the top center button

Press the top left button twice

Press the bottom right button

Press the bottom center button

Press the top center button

Press the outer top right button and rotate counterclockwise

Press the top center button

Press the top left button

Press the top center button again but twice

Press the bottom center button twice

Press the top right button

Press the center button

Press the bottom left button

Press the top right button and the bottom center one

Press the center left button

Press the bottom center button

Press the top left button

Press the top center button

Press the bottom center button

Press the top left button

Press the center button

Press the center left button and the bottom center one

Press the bottom left button three times

Press the bottom center button and the top right one

Press the bottom right button and the bottom center one

Press the bottom center button once, the bottom right one once, and then back to the bottom center one.

Press the outer button on the upper left corner and rotate clockwise
How to solve the Inner Sanctum puzzle
The Inner Sanctum has eighty doors to open, eight dials to configure, and eight Mora Jai boxes to solve.
All 8 Inner Sanctum key locations
1
Room 46

Just pick it up from the desk in Room 46 and use it to unlock the first door in the Inner Sanctum.
2
Vault

Find Deposit Box Key #370 (can be hidden in trunks, Lost & Found, or with the Locksmith)open the box in the Vault, grab the Sanctum Key, and use it on the second Sanctum door.
3
Clock
tower

Enter the Clocktower at 1:30 (in-game time), solve the clock puzzle, and the key will appear. Use it on the third Sanctum door.
4
Reservoir

Drain the Reservoir completely, find the key in a black chest behind rocks, and unlock the fourth Sanctum door.
5
Throne Room

Finish the Microchip puzzle in the Laboratory, draft the Throne Room, and pick up the key from the table. Use it for the fifth door.
6
Safe
house

Adjust the water level so you can sail to the Safehouse, then grab the key from a crate by the sofas. Use it on the sixth door.
7
Music
Room

Draft the Music Room late in your run—look for a “major key” among the instruments! That’s your seventh Sanctum Key.
8
Mechana
rium

Draft the Mechanarium, solve the gear puzzle, and the key will appear on a pedestal. Use it on the last Sanctum door.
All Inner Sanctum dial puzzle solutions
Each puzzle has four dials you need to adjust:
- Top Dial: The inner symbol (these are usually different shapes or patterns like motes or chips)
- Second Dial: The divider symbol (these are often rays or other shapes separating parts of the dial)
- Third Dial: The number of rays or motes (this represents how many rays or symbols are on the dial)
- Fourth Dial: The border symbol (the outer ring, which is often a more complex shape)
You’ll find clues scattered around the mansion—on postcards, notes, and sometimes even in the environment itself (like paintings or architectural details). However, you can bypass the clue hunting and directly enter the solutions if you prefer.
Orinda Aries
/Plate sigil

- Inner: 4 chips
- Middle: 3 Byzantine crosses
- Outer: Small and large dots
Fenn Aries
/Pentagon sigil

- Inner:8 double pines
- Middle: 4 Byzantine crosses
- Outer: Squiggly lines
Arch Aries
/Mountain sigil

- Inner:5 boxes with a dot
- Middle: 3 Spiky lines
- Outer: Spiky lines
Eraja
/Hourglass sigil

- Inner:5 flowers
- Middle: 3 triple lines
- Outer: intervaled horizontal and vertical lines
Corarica
/Heart sigil

- Inner: 8 times roman number 3 (III)
- Middle: 4 dotted lines
- Outer: reversed triangles
Mora Jai
/Arc sigil

- Inner: 8 traffic sign
- Middle: 8 straight lines
- Outer: empty circles
Verra
/Jigsaw sigil

- Inner: 8 circles with a dotted X
- Middle: 5 wavy lines
- Outer: short tower
Nuance
/Diamond sigil

- Inner: 4 double pines
- Middle: 5 wavy lines
- Outer: Shaded squares
All Mora Jai box puzzle solutions
The Mora Jai boxes are colorful tile puzzles found in each Inner Sanctum room.
Your goal is to turn all four corners of the box into the Realm’s color, which you can spot by looking at the box’s dominant shade or the corner symbol (it lights up when correct).
Each tile has a unique effect—some move, flip, or copy others—so solving the puzzle is all about experimenting and thinking a few steps ahead. Don’t worry if you mess up—just hit reset and try a new strategy. Complete them to earn Allowance Tokens for bonus gold.
Tile effect cheatsheet
- Gray: Empty space, does nothing
- Black: Shifts all tiles in the row one position to the right
- Red: Flips all white tiles to black and black tiles to white
- Green: Swaps places with the tile directly opposite it in the grid
- Yellow: Moves up one position if possible
- Pink: Rotates all adjacent tiles one position clockwise
- Purple: Moves down one position if possible
- Orange: Changes to match the most common adjacent color (stays the same if tied)
- White: Expands into nearby gray tiles; disappears if not touching gray
Orinda Aries
Fenn Aries
Arch Aries
Eraja
University
Mora Jai
Verriation
Nuance

Press the yellow button on the bottom center.

Press the black button to the yellow button’s right twice to move it to the top right corner.

Press the bottom left corner button twice

Press the center left button once

Press the bottom right button

Press the bottom center button thrice

Press the top left button

Press the bottom center button twice

Press the top center button twice

Press all the tiny buttons on the border of the box, starting from, the top right one and following a clockwise rotation.

Press the bottom right corner button.

Press the top center button twice.

Press the bottom left corner button twice.

Press the center left button

Press the bottom right corner button.

Press the top right corner button

Press the center right button

Press the bottom center button

Press the top left button twice.

Press the top center button, then press the top left button again.

Press the center left button, then the top left one, then the center left again

Press the top right button, then the top left one.

Press the bottom right button, then the center right one, then back to the bottom right.

Press the center right button, then the top center one.

Press the center button twice. Then press the outer button on the bottom right, and rotate counter clockwise.

Press the top left button.

Press the top center button.

Press the bottom center button.

Press the center button.

Press the bottom left button.

Press the bottom right button twice.

Press the bottom left button.

Press the top left button.

Press the center left button.

Press the bottom right button.

Press the top right button and the top left button.

Press the center right button and press the top right pine button and rotate clockwise.

Press the center right button.

Press the top center button twice.

Press the center left button and then the top center one again.

Press the bottom center and the top center buttons.

Press the bottom right button twice.

Press the bottom left button.

Press the top left button twice.

Press the bottom center button twice.

Press the bottom right, bottom left buttons, then back to the bottom right one.

Press the bottom center button, then back to the bottom right one.

Press the top left button.

Press the bottom left button twice.

Press the bottom center button.

Press the center right, then the top right, then the center right button again.

Press the center left, then the top right, and finally, the top left button.

Press the top left hourglass button and rotate clockwise.

Press the top center button.

Press the bottom center button.

Press the top right button twice.

Press the top left button and the top center button.

Press the bottom left button twice.

Press the top right button.

Press the bottom center button and the bottom right one twice.

Press the bottom left button and the bottom center button.

Press the top left button thrice.

Press the top right button

Press the bottom right button.

Press the top center button and the top right button.

Press the top left button.

Press the heart button on the upper left then rotate clockwise.

Press the center right button.

Press the bottom right button.

Press the bottom center button.

Press the center button thrice.

Press the center right button.

Press the bottom right and bottom left buttons.
Press the arc icons on the border and rotate counterclockwise.

Press the top left button twice.

Press the center left button.

Press the top left button, center left button, and top center button again.

Press the center button twice.

Press the top center button and the center one again

Press the left center button and the center one again, but twice.

Press the bottom left button.
Press the top center button four times.

Press the bottom left corner button.

Press the center top button.
Press the outer icons starting from the top left and rotating clockwise.

Press the top left button.

Press the center right button.

Press the bottom center button.

Press the bottom right button.

Press the top right button twice.

Press the center button.

Press the top center button.

Press the top left button and the top center button again.

Press the bottom left button twice.

Press the bottom center button.

Press the center button.

Press the bottom right button.

Press the bottom left button.

Press the top right button twice.

Press the diamond buttons starting from the top right and rotating clockwise.
How to solve the Eight Realms in Eight Months puzzle
If you want to solve this puzzle on your own, find clues in the eight postcards of the Sigil puzzles in the inner Sanctum, the books from the Bookshop, and the classrooms you can draft.
If you just want the correct Pin Placement, here we go:

- Fenn Aries: Middle region on the far right (starting point)
- Eraja: South of Fenn Aries
- Arch Aries: North of Fenn Aries
- Mora Jai: Center-north, across the ocean from Arch Aries
- Verra: Medium circular island below Mora Jai
- Corarica: Large landmass on the far left (west)
- Nuance: Scotland-shaped landmass left of Fenn Aries and Eraja
- Fenn Aries: Back to the starting point
All Shrine blessings
Here’s every Shrine blessing you can get at the Shrine:
| Coins Donated | Blessing Name | Effect |
|---|---|---|
| 1 | Dancer | Allows you to draft floorplans using a spinning wheel for 1 Gem. |
| 3 | High Roller | Increases all Shop Rooms by +1 die; every die roll in shops gives you +5 Coins. |
| 5 | Gardener | Adds 8 Courtyards to your available draft pool. |
| 7 | Chef | Each type of spread now adds an additional dish to the Dining Room. |
| 9 | Red General | If you have six Red Rooms in different ranks, gain 5 Gems. |
| 11 | Tinkerer | Every time you draft a Mechanical Room, it triggers your current experiment in the Laboratory. |
| 13 | Monk | Ending the day in certain rooms may cause them to reappear on the Grounds for drafting. |
| 15 | Berry Picker | During drafting, you can pick a Berry and receive a random floorplan, ignoring rarity. |
Now, this doesn’t mean you shouldn’t donate more than 15 coins. Each blessing lasts for 3 days by default, but if you donate more, here’s how long they can last:
- At 17 coins: Blessings last for 4 days.
- At 33 coins: Blessings last for 5 days.
- At 49 coins: Blessings last for 6 days.
- At 65 coins: Blessings last for 7 days.
Each donation tier adds 1 extra day, up to a maximum of 7 days
All Upgrade Disk locations
Upgrade Disks are rare but powerful collectibles in Blue Prince. Each one lets you permanently improve a room with benefits like extra gems or fewer step consumption, just to name a few.
You’ll find them in secret spots all around the estate – some hidden, some locked away, and some even for sale if you’re lucky.

Abandoned mine
Look for the disk in the underground Torch Chamber.

Archives
Use the Patio File Cabinet Key to open a drawer and grab the disk.

Commissary
Occasionally stocked for sale; check back often if it’s not there.

Foundation
Sitting on a box near where the elevator lands underground.

Freezer
Melt the frozen entrance (using the Furnace or Sauna), then look on a crate.

Garage
Open the car trunk (you’ll need the Car Keys); the disk is inside

Great Hall
Tucked away behind a locked door. Bring keys or a lockpick

Her Ladyship’s Chamber
On the dresser by her diary. Only appears when the room is drafted along the far-left side of the mansion.

Lost and Found
Sitting casually on a table inside.

Mechanarium
Hidden behind the intercard door.

Morning Room
On a shelf or counter near some condiment jars.

Office
Either on the main desk or tucked in a drawer. Bonus: there’s a terminal nearby too.

Tomb
Light two candlesticks with ruby sockets (using a Burning Glass or Torch) to unlock a secret area with the disk.

Vault
Use Vault Key 304 to unlock a secure deposit box.


Trading Post
Light dynamite with a Burning Glass or Torch to reveal a hidden distillery. The disk is on a barrel inside.
Occasionally offered as a reward when you trade high-value Showroom items.
Using Upgrade disks
Follow these steps to use an upgrade disk to improve a room:
- Find a Terminal in the Office, Security, Laboratory, and Shelter rooms.
- Use the terminal to install the Upgrade Disk. It’ll randomly choose one of your rooms to upgrade – no picking allowed here.
- Once the room is selected, you’ll be given three upgrade options. Pick one that fits your strategy or playstyle.
All tools & what they do
| Icon | Item | Description | Found in |
|---|---|---|---|
 | Shovel | Lets you dig through dirt piles to find hidden treasures like coins, gems, and keys. | Utility Closet, Parlor, or hidden in drawers |
 | Sledgehammer | Breaks open locked trunks and drawers without needing any keys. | Utility Closet and Workshop |
 | Lockpick Kit | Tries to open doors and chests without using keys (won’t work on keycard-locked doors). | Security rooms, the Office, or inside desks and drawers |
 | Running Shoes | There’s a chance it’ll reduce the step cost of entering a new room. | Wardrobes and bedrooms |
 | Magnifying Glass | Helps you zoom in on documents to spot hidden details and secret messages. | Study, Library, Desk rooms, or in various drawers and tables |
 | Metal Detector | Beeps when metal objects are nearby, making it easier to find keys and coins. | Mechanical rooms, the Workshop, or as a rare find in storage areas. |
 | Compass | Increases the chance of finding rooms with a North-facing door. | Library, Map Room, or found in drafting rooms on rare occasions. |
 | Coin Purse | Gives you an extra coin for every three coins you collect. | Shop or Parlor |
| Lucky Rabbit’s Foot | Boosts your chances of finding items in rooms. | Bedrooms or Cloakrooms | |
 | Battery Pack | A key item used to craft more advanced tools. | Mechanical rooms & the Workshop |
 | Broken Lever | Used to activate certain devices or can be part of a crafting recipe. | Mechanical rooms & the Utility Closet |
 | Watering Can | Spend one water droplet in a green room to gain one gem | Found in green rooms |
| Salt Shaker | Grants you an extra step whenever you eat food | Can be found in the Commissary | |
 | Coupon Book | Gives you a one-coin discount when buying items in shops | Can be found in the Nook |
 | Repellent | Temporarily removes a specific room from the drafting pool for a week | Obtained by relocating the Foundation or inn Lost and Found |
All Workshop item combinations
| Icon | Contraption | Recipe | Effect |
|---|---|---|---|
 | Burning Glass | Magnifying Glass + Metal Detector | Lights torches, candles, and fuses. |
 | Power Hammer | Sledgehammer + Battery Pack + Broken Lever | Smashes weakened walls and clears passages. |
 | Jackhammer | Shovel + Battery Pack + Broken Lever | Digs deeper and finds higher-quality items than the regular shovel. |
 | Detector Shovel | Shovel + Metal Detector | Greatly increases the chance of finding gold and keys while digging. |
 | Dowsing Rod | Shovel + Compass | Points toward rooms that are likely to contain more items. |
 | Pick Sound Amplifier | Lockpick Kit + Metal Detector | Improves your chance at successfully opening high-sensitivity locks. |
| Lucky Purse | Coin Purse + Lucky Rabbit’s Foot | Doubles all the gold you find. |
 | Powered Electromagnet | Compass + Battery Pack | Draws gear-type rooms more often; auto-collects gold and keys when entering a room. |
All permanent upgrades
Apple Orchard


- Head to the campsite near Simon’s tent, outside the manor.
- Look for a locked gate to the Apple Orchard.
- Use the code 1128 to unlock it. (Hint: You can find this code on a photo in the Darkroom, but it works everywhere!)
- Open the gate and boom – 20 extra steps every day.
West Gate Path


- Draft both the Utility Closet and the Garage in the same session.
- Restore power in the Utility Closet to make the Garage door functional.
- Set the lights in this order: OFF, BLUE, GREEN.
- Head outside via the Garage, take a left, and walk down the path to the West Gate.
- Unlock it for permanent access to the West Path and Outer Room, where special rooms await you every day.
Blackbridge Grotto


- First, draft and connect the Boiler Room and Laboratory (you can do this directly or with ducts).
- Get power running in the Boiler Room.
- Solve both puzzles in the Laboratory – including the periodic table one! (Hint: “Push Three Up After Nine” means interact with Lever 9, then Lever 3).
- Once done, you’ll get the password for the offline terminal.
Gemstone Cavern


- Find your way to the Utility Closet.
- Look for the Breaker Box puzzle inside.
- Set the lights in this order: OFF, BLUE, GREEN, WHITE, RED, PURPLE.
- Pull the lever that pops out to activate the Gemstone Cavern and start with 2 Gems each day
Satellite Dish


- Collect microchips scattered across the game.
- Head to the scorched sundial in the Apple Orchard.
- Use a fire source to scorch the sundial, revealing hidden slots for microchips
- Insert the chips to unlock the Satellite Dish
All Classroom Exam answers
To unlock and take the Classroom Final Exam, follow these simple steps:
- In the Drafting Studio, unlock the Classroom. Without it, you can’t draft or place any Classrooms.
- Draft the Schoolhouse as an outer room. It adds eight Classrooms to your draft pool for that run.
- With the Schoolhouse’s eight and one additional from the floor plan, you can reach the required nine drafted classrooms. They don’t need to be in a row, just present by the end of the draft.
- Placing the ninth Classroom activates the Final Exam: 46 multiple-choice questions on topics like Art, Science, History, Math, and more.

| Question number | Question | Correct answer |
|---|---|---|
| 1 | Sam left his house at 6 a.m. and drove five hours west and passed 8 flags. He then turned north at Tanner Fork and drove two hours north and passed 4 flags of the same color before arriving at Trinsdale at noon. What color were the flags? | RED |
| 2 | In the scenario above, where does Sam live? | ORIS |
| 3 | What color ismost often associated with Hallways? | ORANGE |
| 4 | Which of the following would be the least patriotic room pairing? | A GREENHOUSE IN CORARICA |
| 5 | What color is the fruit that gives you +3 steps when consumed? | YELLOW |
| 6 | Solve the following problem: 5(blue) 5(yellow) 2 (pink) | 0 |
| 7 | Solve the following problem: 5(blue) 2 (pink) 2 (blue) 2 (pink) | 24 |
| 8 | Solve the following problem: 6 (blue) 2(yellow) 5 (pink) 1 (blue) 5 (yellow) | 11 |
| 9 | Solve the following problem: 1 (Blue) 0 (Yellow) 4 (Purple) 5 (Blue) 4 (Yellow) | 4 |
| 10 | Solve the following problem: 1 (Blue) 4 (Yellow) 2 (Pink) 7 (Blue) | 1 |
| 11 | Solve the following problem: 3 (Blue) 4 (Yellow) 8 (Pink) 2 (Purple) 5 (Blue) | 1 |
| 12 | Which element on the periodic table is represented by the symbol C ? | CARBON |
| 13 | Which element appears in the periodic table directly below Helium (He)? | Ne |
| 14 | Which of the following is not a real element found on the periodic table? | Ll |
| 15 | Which element on the periodic table is represented by the symbol Ag ? | SILVER |
| 16 | Which element could not be used in the spelling of the word CLUES? | RADON |
| 17 | How many elements are on the top row of the periodic table? | 2 |
| 18 | The city of Fenn is south of which small body of water? | MORNING BAY |
| 19 | How many cities in Fenn Aries are larger than Reddington? | 2 |
| 20 | . Which of the following realms is not near Fenn Aries? | CORARICA |
| 21 | Which sigil core denotes the realm of Arch Aries? | A (Mountain) |
| 22 | What realm is directly north of Eraja? | FENN ARIES |
| 23 | Where are you right now as you take this exam? | MT. HOLLY, REDDINGTON, FENN ARIES |
| 24 | Which two pieces of art would be best paired to depict the letter “B”? | HAY BALE & MUG OF ALE |
| 25 | Which of the following pieces of art was not displayed in the Grade 5 Classroom? | JUNGLE |
| 26 | Which of the following pieces of art is not displayed in Mt. Holly’s Entrance Hall? | REALIZE |
| 27 | Can you find the difference? | I |
| 28 | Who was the first crowned ruler of Fenn Aries? | GENERAL TESKIN |
| 29 | In which era were the railways of Fenn Aries destroyed? | SIXTH ERA |
| 30 | How long did the “War of the Fifth Era” last? | TWENTY-TWO YEARS |
| 31 | What was the first capital city of Fenn Aries? | GRAND CITY OF FENN |
| 32 | Which realm gifted Fenn Aries a dirigible to headway their victory parade at the conclusion of the war? | NUANCE |
| 33 | The deciding battle of the War of the Fifth Era was fought near what famous landmark in 1836? | COLOSSUS ORINDA |
| 34 |  | 36 |
| 35 |  | 6 |
| 36 |  | 21 |
| 37 |  | 4 |
| 38 |  | 14 |
| 39 |  | 200 |
| 40 | What is the Erajan word for House? | HEW |
| 41 | What does “NEVYAIT” mean in Erajan? | NEW GATE |
| 42 | The phrase “Treivenle” can be translated in several different ways. Which of the following is NOT an acceptable interpretation of this phrase? | My tree is not very old. |
| 43 | How would you say the following phrase in Erajan, “You have a very, very long name.” | ULRAAJORAM |
| 44 | How would you tell an Erajan “Count me out.” | LE |
| 45 | Using the provided Erajan terms for cardinal directions above, what would be the clearest way you could give directions to someone at point A to get them to point B. | AJINN ETT OVTREI ISSJA TREIVO |
| 46 | In ancient Orindia, the Number 8 was considered by Ajeran scholars to be mathematically “near-perfect”. Though many in the secular sphere held that only this advanced form of 8 was worthy of numerical perfection. | D |
You get 30 minutes, and once you select an answer, it’s locked in. You can explore your manor during the exam to find helpful clues. Score an A (miss no more than 2–3 questions) to win the coveted Diploma Trophy.
How to solve A New Clue book puzzle
The A New Clue puzzle is a layered book-based mystery that leads to a secret item unlock. Here’s how to solve it, step by step:
Get the book

Draft the Library, then connect it to a Bookshop. Then, buy A New Clue from the Bookshop (50 Gold).
Decode the Cipher


Read through A New Clue and look for signs. Literal signs; they actually spell out a secret message:
“Route 8 Depart, Keep Left to Tanner Fork, Right, Dead End. Record Each Stop On The Way.”
This refers to a Metro Station map in the Safehouse.
Access the Safehouse Metro Map

Draft the Pump Room and drain the Reservoir to six blue bars.
Enter the Underground and look for the boat near the gear puzzle.
Inside the Safehouse, find the Metro map.
Use the Route Code

Recording the stops you made in the secret route and matchinng them to the Metro map gives these numbers: 8, 7, 3, 10, 1, 13
Check out the page in a A New Clue that matches letters to numbers.
Match numbers to letters, then letters to numbers again

| 8 | 7 | 3 | 10 | 1 | 13 |
|---|---|---|---|---|---|
| X | Y | Z | A | B | C |
Use the Route Code

Another page matches the letters to colors, which link to specific books. The letters also act as a code for page and word numbers we need to find. So, we convert the letters back into numbers to locate the exact pages and words.
Match letters & colors to books

| Color | Page, Word | Book |
|---|---|---|
| Red | 10,8 | The Red Prince |
| Green | 13,10 | Realm and Rune |
| Violet | 1, 7 | A New Clue |
| Blue | 3, 8 | The Fixed Stars |
Find the Books and Extract Words

Borrow the books from the Library and extract the words.
Note: Page count starts from title pages.
Turn (The Red Prince, p10 w8)
Scorched (Realm and Rune, p13 w10)
Sundial (A New Clue, p1 w7)
Base (The Fixed Stars, p3 w8)
“Turn Scorched Sundial Base”
Final step


Go to the Apple Orchard in the east Grounds and find the sundial. Scorch the rings at its base with the Burning Glass, then insert the Grotto microchips to unlock the Satellite Dish.
How to solve the Atelier puzzle
How to unlock the Atelier
Unlock the Holly-Shaped Blue Doors

After unlocking the throne, draft eight Blue Rooms in a row to unlock the holly-shaped blue door.
Open the Boxes

Open the the blue Parlor box behind the door. There’s a book telling you to find still water to water empty books.
Prepare the Watering Can

Blow up the dynamite at the trading post with a torch or burning glass. Empty your watering can in three green rooms, then fill it with still water behind a broken wall. Coat check the can.
Get the Monk’s Power

Draft the shrine to get the monk’s power. End the day in the secret passage.
Water the Book

Next day, draft the coat check, take your watering can, and enter the secret passage. Water a book in the library to reveal a maze.
How to navigate the Atelier
Though many loose ends remain, the way to reach Room 46 in the Atelier is twofold: first, complete all Mora Jai puzzles to obtain the letter cipher that explains how the lanterns work; second, follow those instructions to navigate the maze and reach Room 46.
By solving all the Mora Jai puzzles in this room, you’ll get the following clue:
“THROUGH LANTERN LIGHT IN SKETCHES
CAST A TINT OF TRUTH
TO FIND OUR PATH A
HUE OF WISDOM TO TURN
US RIGHT A SHADE OF
RAIN TO PASS THE LIGHT
THROUGH LANTERN LIGHT IN SHADOWS
PAST WE SEEK WHAT’S LEFT
OF THE LIES WE CAST”
In plain English, this means:
- Blue lanterns, much like Blue memos, are the truth. There’s only one: the start of the maze.
- Orange lanters indicate you must turn right.
- Purple lanters indicate you must go straight ahead.
- Red lanterns are lies, so you must turn left.
Following these instructions, you should start in the Atelier and follow this map to reach Room 46:

- Start at the blue lantern.
- In the Pantry: see red → turn left.
- See orange → turn right into the Gallery.
- Another orange → turn right.
- Another orange → turn right into Library.
- See red → turn left.
- Another red → turn left into Observatory.
- See violet → go straight through the Music Room.
- Two orange → right, then right into Ballroom.
- Violet → go straight through Spare Room.
- Red → turn left.
- Violet x2 → keep moving forward.
- One more red → check the left: it’s Room 46
Inside, you’ll find the real will and testament and, of course, one more Mora Jai box that reveals the word BLUE.
There is, as you might’ve guessed, a painting puzzle much like the one you solved earlier in the game. This one reveals the message “THESE VYING PLANS FORGE BARON CREST AMONG HEWAM BLEST.” However, we’ve not found out what this clue is pointing to.


Leave a Reply