Within these modest lines concerning OFF lies a lantern against the murk of uncertainty, a paw to steady your trembling hand as you stumble through puzzles, codes, and spectres.
(It’s a walkthrough, if you must force the notion through your oft-overburdened cerebral apparatus)
Do not mistake, however, my generosity for magnanimity. You will falter, yes, you will flounder like a carp upon a dry riverbed. And yet, with my guidance, and a touch of your own dim perseverance, you shall persist.
ZONE 0

Puzzle 1


Puzzle 2

Ah, we arrive now at the second puzzle, my ephemeral companion. The cubes before you are but humble digits made solid: one through four above, five through eight below.
1. The cube at the top left
2. The one beside it to the right
3. Bottom center left
4. Bottom right
5. Top center left
6. Top center right
Puzzle 3
The wall offers no aid, no guiding digits to stroke your weary mind.
Instead, you must step through the door in the bottom right corner and out into the world.
Within the nearby house, scrawled upon the wall, the answer reveals itself: 448287C. 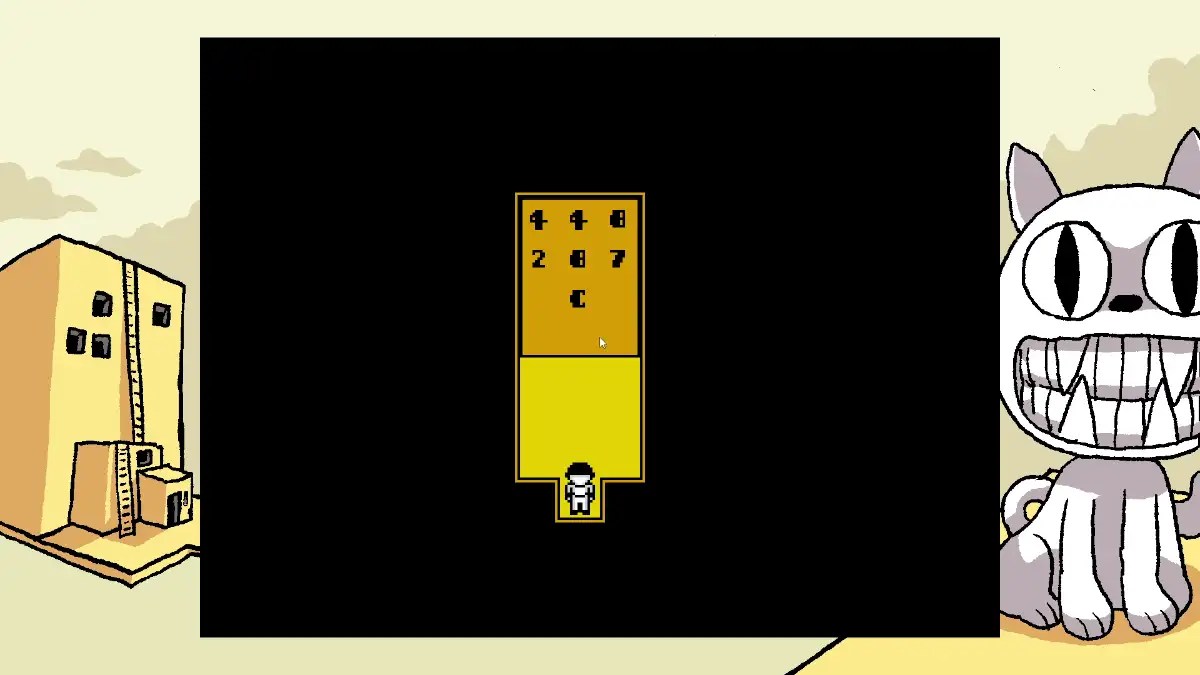
The cubes in this room are not scattered whims, but laid out as though upon a calculator’s face. 
You must press them in the following precise order:
1. Middle left
2. Middle left again
3. Middle bottom row
4. Middle top row
5. Middle bottom row once more
6. Left bottom row
7. The bottom-most cube
ZONE 1

Damien
Make use of the monorail, that dutiful iron serpent, and let it carry you to Damien. 
There, speak with the Miner, and by no means neglect the chest resting quietly inside the house.
Descend the stairs below to obtain Add-On Alpha.
Damien chests
Within the mines themselves you will encounter two more chests.
In the lower right corner, you shall find a door that obstinately claims to be “locked from the inside.”
Do not despair. Cast your eyes upon the lamps lining the wall. One of them is not like the others.
That is no mere lamp, but a hidden switch. Press it, and the door shall yield, revealing several Miners and yet another chest.
Barn Stone Puzzle
Step outside once more, where a man will plead for aid in the barns. Head rightward, and there vanquish the five spectres lurking within.
To reach the last one, you must solve this puzzle of stones.
1. Move the lower stone upward.
2. Slide the stone to your right further right.
3. Press the stone above you further upward.
Back to Damien
Before plunging deeper, consider returning by monorail to Damien. 
Enter the mine through the main entrance, for the northward path is now unsealed, and there you may plunder six orbs from chests hidden in the tunnels.
Pentel mines switch

Once sated with spoils, return to Pentel and proceed into its mines to the right.
Here, in the twisting tunnels, you shall uncover three chests and a blocked path.
The switch is at the bottom right corner of the map.
Continue still further to encounter Zacharie, the merchant.
Elevator Floor values
Enter 00001 to descend meekly to the ground floor.
The codes of value are as follows:
87666: Here waits Zacharie, bearing a Taurus-orb.
02584: The Lost Property Office, keeper of two chests.
10258: The Postal Service.
Postal Service code
A clerk will block the way, demanding a code to rouse the lift.
Across these three dreary floors you will encounter scattered notes, each whispering peculiar phrases. Hidden within every message lies a number: i.e. “SIX feet under”
Each note is marked by its sequence: “first version,” “second version,” and so forth. This order dictates the placement of the numbers.
The code is 681452.
Alma correct answers
In Alma, the path forward is barred by questions most trivial, yet compulsory. The answers, mercifully, are scrawled upon the posters adorning the walls.
– Orta
– Roses
– Sixth
– 22
– Jonas
– 87
Cube code puzzle
Move left, defeat another Worker, and summon a pedalo. Sail north, then east.
Confront the next Worker, and again summon the pedalo to reach the second pool.
The puzzle here obeys this sequence:
middle left, right bottom row, middle bottom row, middle top row, middle right, middle, right bottom row, bottommost.
Or: 498256
Once solved, continue eastward, defeat the Worker, and take the pedalo downward. Do not neglect the chest resting along the way.
Labyrinth puzzle solution
Observe: if you step left, then up, the room does not change. Persist, and the path will eventually reveal itself. 
The correct route is thus: left, up, right, right, down, left, up, up.
ZONE 2

Library missing pages
On the library’s second floor you shall find books robbed of their pages. Each page bears a playing-card suit (spades, clubs, diamonds, or hearts) and each must be restored to its rightful volume.
The first three pages, obediently, can be located upon the ground of the second floor. 
Yet the page of hearts proves less docile.
For this you must venture west of the Library, where a man, insufferably insistent that you “step closer,” hoards the page like a miser. 
Relieve him of it and return it to its tome.
Mall labyrinth solution
Venture deeper into the Mall, and you will find yourself snared in endless repetition.
Persevere, and you will come upon me, the Judge, admiring a mural of my brother, Valerie. I shall confess my sorrow and ask that you deliver my greetings should you encounter him.
Leave by the northern path and the barricade dissolves. Here, at last, you may summon the pedalo and glide toward the Amusement Park.
The River Ride
To the right lies a pedalo course, the waters guided by mischievous plates upon the floor.
Avoid them, and you may gather balloons filled with trifles. At its end, a switch frees the roller coaster.
The Roller Coaster
To the left waits a statue of Zacharie, that enigmatic merchant. Shove it aboard the ride, and if you are inclined, accompany it.
At the end, an Elsen will gift you a photograph: tangible proof of your familiarity with the Park’s so-called master.
The Balloon Game
Straight ahead lies the trial of balloons. The trick is to force your opponent to strike the board when five balloons remain. 
Fail, and you are a fool; succeed, and you gain a tie, that most coveted of garments among the Elsens.
Enter The Residential District
With the tie adorning your pallid form, you may enter the Residential Area. Japhet, in his mounting fury, unleashes eight spectres.
You have four fleeting minutes to banish them, one even perched upon a rooftop of a house southwest.
Within the quarter, there are three bunkers. The codes are random, but are revealed by despaired citizens and a man hiding inside a house.
House near Yellow Cube: Code 1805
House past waterfalls: Code 1709
House in the southeastern corner: 1402
Library Code
The barricade upstairs is gone. Advance into chambers where books whisper numbers. 
Piece them together into the code: 49971640. Use it to dissolve the final obstruction.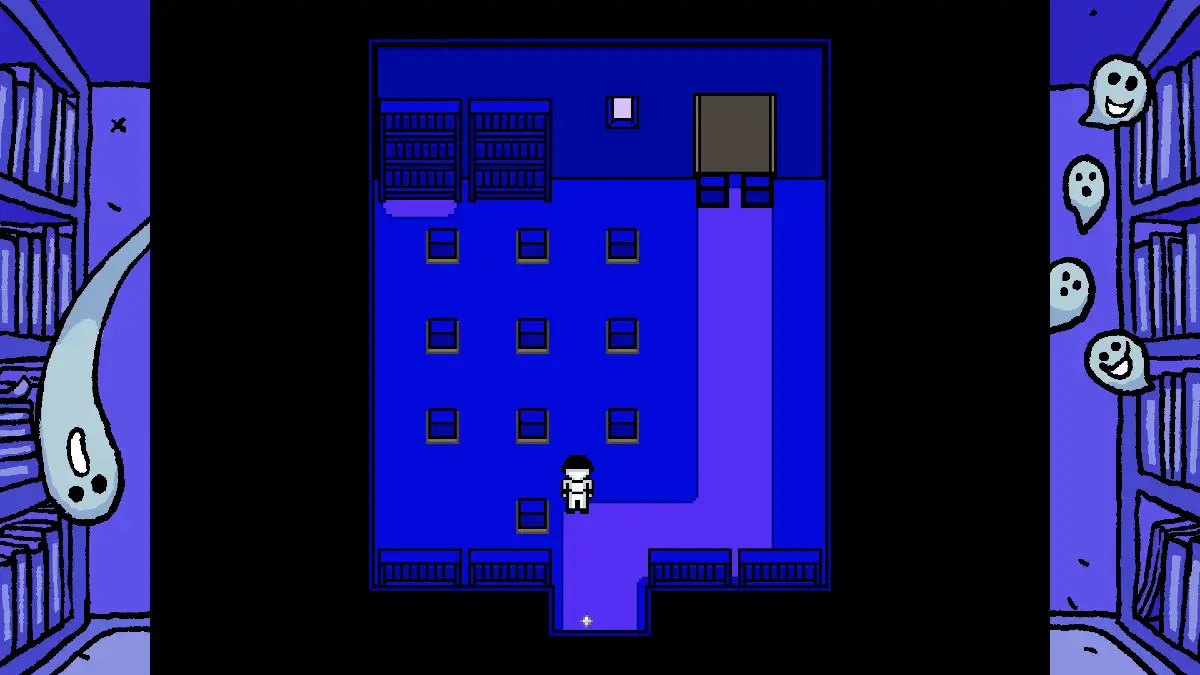
Above, Zacharie awaits with new wares, a red cube offers respite, and a ladder beckons to the roof.
There, Japhet reveals himself entire: Valerie’s body, twisted by the monstrous bird within.
ZONE 3

The Dormitory Minefield
Save your progress, for you are about to enter a minefield. Not metaphorically, but quite literally.
Observe the Stamped Note on the wall. Its numbers correspond to safe tiles. Walk only in straight lines between the marked squares, counting carefully, lest you trigger the specters.
Stamped Note correct path

The green route leads to the dormitories. Inside, you will encounter a few Elsens, some chests (do not neglect them), and ultimately a skirmish with specters attacking one of the poor wretches.
The brown route carries you to the eastern dorm, where you shall claim Add-On Epsilon, your final spectral ally, a specialist in striking all foes at once. A chest nearby offers Moloch’s Meat.
The black route brings you to Zacharie. Here he dons a mask, eerily resembling my own face. He will confess that I, Pablo yes, that is indeed my name, am unwell.
He directs you onward to Area 2. Take the monorail.
The Sugar Treatment building
Zacharie greets you upon arrival, ever insistent on playing his little roles. Three buildings await:
In the rightmost, you find him again, his shop closed. Save your progress with the Yellow Cube.
In the middle, he resumes his trade and you may replenish your strength.
In the leftmost, the true business begins.
Switches puzzle 1
Inside, switches bar your way. Manipulate them thus:
1. Disable the three switches in the bottom right.
2. Flip the lone switch by the entrance.
3. Reactivate the switch marked with a C, opening the northern door.
Switches puzzle 2
Further within lies another puzzle of switches.
Begin at the top-right, then the center, then the top-left.
This will allow you to claim a Fast Symbol from a chest.
Reset the middle switch, then the top-right, until the path to the western door is clear.
Door password
This door demands a password. Recall the enemy whose silhouette matches the white icon.
If you have had the foresight to cast Wide Angle during battle, you know its name: Von Gacy. Enter it.
Inside, Elsens slaughter specters and then, in madness, turn upon you. Defeat them. 
A chest on the right holds a Fortune Ticket.
Sugar Factory Add-On Minigame
The monorail delivers you to a hulking factory. Climb the ladder and leap into the abyss when prompted.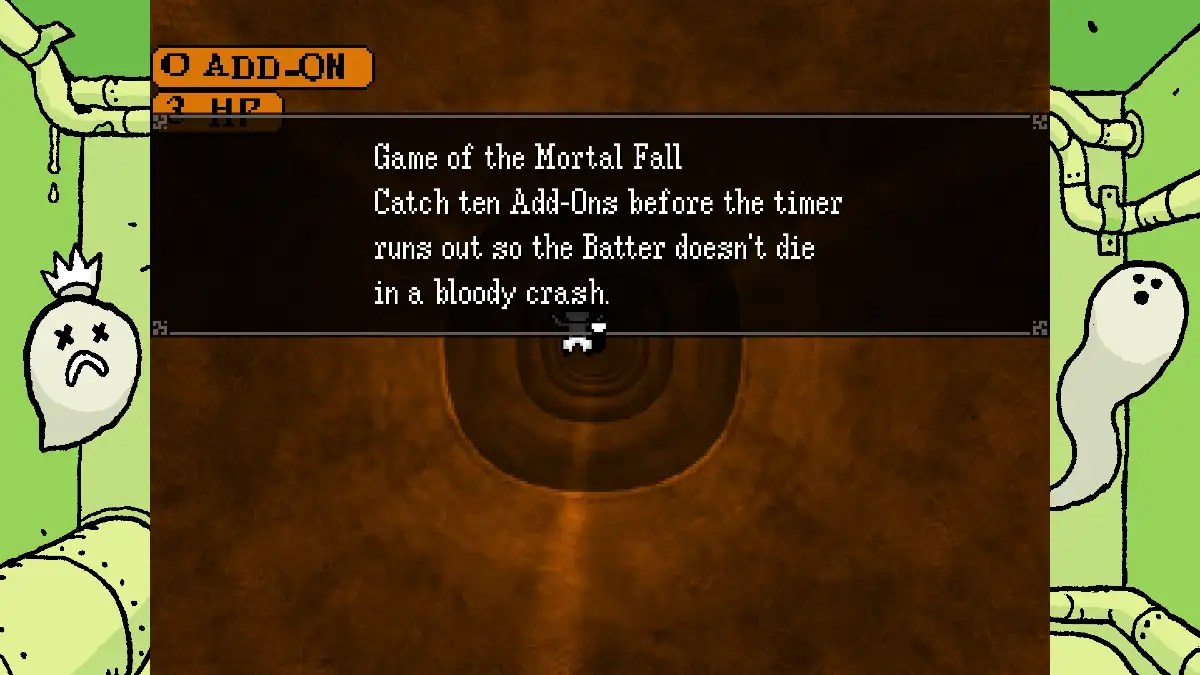
This initiates a grotesque game: you fall through a pipe, dodging specters while grasping for Add-Ons.
Collect ten Add-Ons before your health vanishes. Strike specters and you lose life; miss the center of an Add-On and you gain nothing.
The Gamepad Puzzle
Explore the corridors: many doors are sealed, some hide chests, and others Burnt Elsens who lunge if touched. 
One foe here is impervious to damage until you strike the Elsen head emerging from its mouth, which is grotesque but necessary.
Zacharie, ever the extortionist, demands it in exchange for revealing a code. Comply, and you receive a cryptic note: Down, Left, Up, Right, Z, J, B, D.
Return to the room with the game controller. Input the sequence: Down, Left, Up, Right, Z, J, B, D, B, Start.
This authorizes passage below.
Reverse Keypad code
Proceed deeper to another puzzle: a keypad with a reversed layout. The solution is written plainly on the wall.
536258C
Enter it, and the final barrier dissolves.
You arrive at last in Enoch’s lair. The corridor twists, flanked by rivers. At its end looms the massive Director himself. 
Your weapons scratch him like claws upon stone; escape is your only option. Select Flee, and you will be cast outside.
After a running section, you’ll find yourself at the monorail. At its threshold, he reappears, larger, gasping, enraged.
After he collapses, you gain the Aquarias card, granting entry to The Room.
PURIFIED ZONE 1
Chests along the rails
Return now to Zone 1, and you will find it bled of all color.
Head left for a chest holding Inspiration, an object that scalds enemies directly in combat. Then return and walk east.
On the tracks you shall meet new adversaries, the Secretaries. These creatures are durable, merciless in their blows, but their deaths spill forth extraordinary experience.
Poison, however, is their favorite trick, so cure it immediately lest you find your health unraveling like thread.
Continue east until you reach the signpost for Damien, then descend southward.
Chests in The Smoke Mines & Barns
The entrance is half-flooded, but still navigable. Inside, claim a Fortune Ticket near the Yellow Cube. Head to the barns.


The earth here is cluttered with rocks demanding to be shoved aside. Solve them carefully; should you err, leaving and re-entering resets the arrangement.
Two chests await in the north: Purified Pillar Art and two Jokers.
In the house nearby rests a Red Cube. Use it only after you go straight first, else you may lock yourself from a chest.
How to beat Source
Soon you reach a door barred by three rocks. Clear them and enter. 


Inside, climb ladders until you meet a writhing eye. Touch it and select “Fight.” Thus begins the battle with Source.
Source is not fearsome. He heals, he poisons, but he lacks the claws to stop you. Strike steadily, cure poison, and he will fall.
True Ending Weapon 1
A new signpost looms, “?????” scrawled across it. The monorail tracks press on, but first descend south into the Post Office. 
The lift no longer functions, but a chest within yields two pieces of Golden Flesh.
Farther east, at Alma, the monorail rests abandoned. 
To the right, find the Pedalo Recovery Point. Summon it, then cross westward to where it floats in the water.
Ride until you reach the area once home to a keypad puzzle. Here stands a new northern door. Before entering, disembark to the south. At the far end lies a chest with four pieces of Abaddon’s Meat.
Now enter the northern room. Inside waits a Red Cube and two great prizes: Monday and Grand Finale.
This is but one of the mighty “Grand” artifacts required to unmask the game’s true ending.
PURIFIED ZONE 2
Purified Zone 2 is now a hollow parody of the bustling city you once knew.
Only the Secretaries remain, their pale suits cutting at your flesh with 2k health and a foul love for Poison.
Strike them with Furious Homerun or Converted Chain, and cure ailments swiftly. Their suffering yields you experience in abundance.
Chests in The Library & The Amusement Park
Proceed north into the Library. Inside: emptiness.
On the second floor, you’ll find a chest, and higher still, another chest with a Vengeful Symbol.
On the rooftop you hear it: a miaow, thin and aching. I myself, the Judge, appear here, whispering to the void.
Now head west. No pedalo is needed; the path runs straight. Within the park, a chest gifts you three pieces of Golden Flesh. In the central plaza lies a Red Cube.
How to beat Maldicion
Press northward, and you confront the second of the new Purified bosses: Maldicion. This crab-like monstrosity is far less forgiving than Source.
He lashes the entire party with his pincers, inflicting heavy damage. Stock yourself with healing items; steady patience will outlast his rage. Once defeated, the park is spent, and you move on.
True Ending Relic 2
Through the left door: the chamber where once I admired Valerie’s crude artwork. Now only a chest remains, bearing the Color of Sadness.
Depart through the main door to reappear in the Residential Area.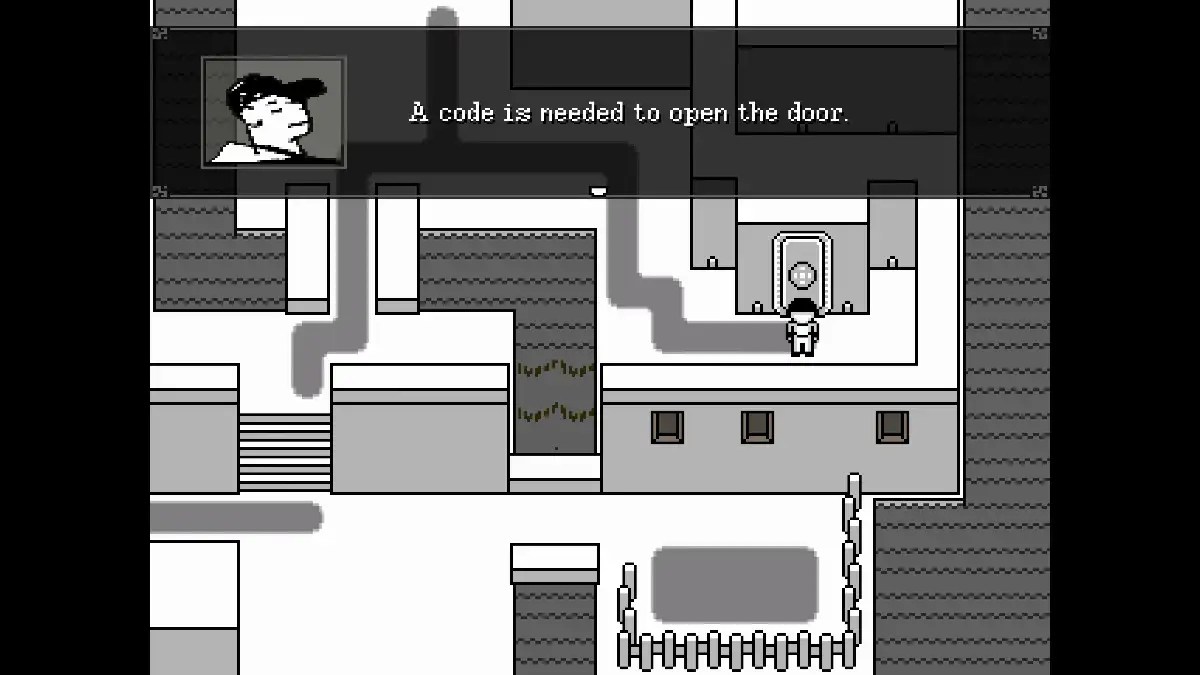
Inside the house unlocked by “1709,” you find, astonishingly, an Elsen. He mutters that he is safe now that color itself has died.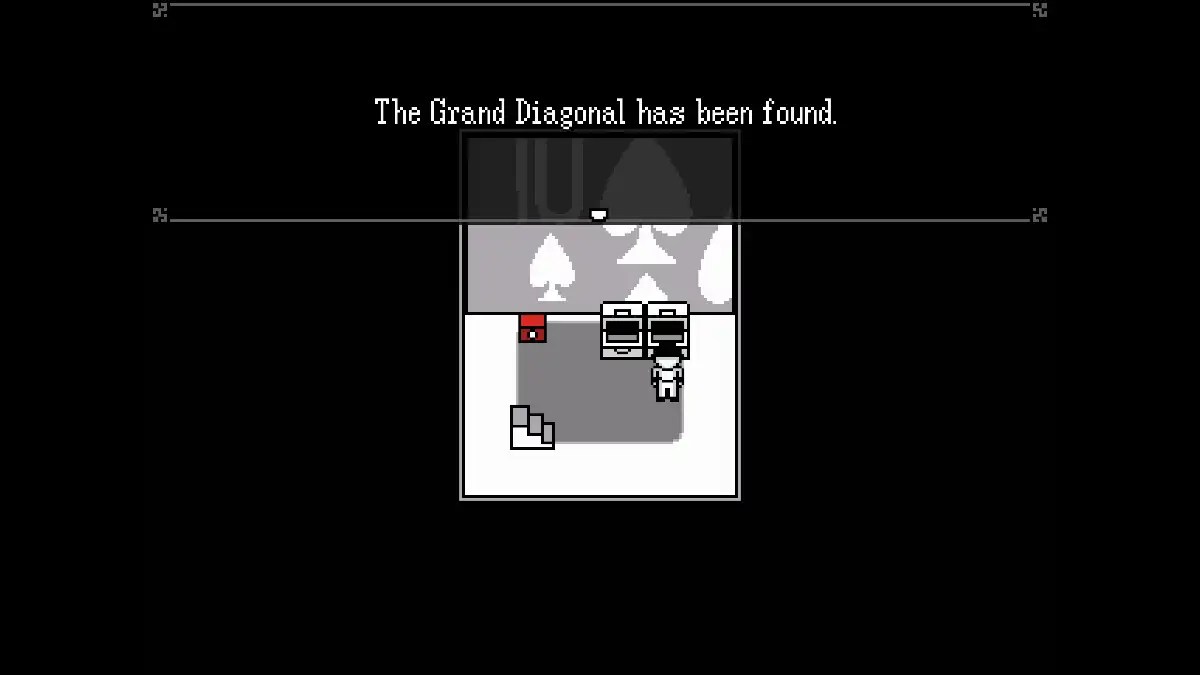
In the basement: a Red Cube and two chests: Thursday and Grand Diagonal, artifacts of great importance should you seek the true ending.
PURIFIED ZONE 3
Chests in The Dormitories & The Sugar Factory
Head left upon arrival; the monorail to the right is as dead as its passengers. The minefield puzzle is no more, so you may walk freely.
In the western room, follow the narrow path. A chest lies within: three Jokers.
Continue past the buildings to the monorail. Descend to the platform for a Silent Symbol. Then re-enter the complex: the leftmost building holds a Yellow Cube; the central laboratory conceals a chest in the piles of sugar.
Beyond, a narrow passage leads to the chimney you once leapt into. Drop through the smaller hole, and board the monorail to a new destination, marked only as “???.”
Inside, follow the halls to the room where Elsens once battled specters. Loot the chest for Tibia Epidermis. Note the new northern door. 
Enter it, and climb the ladder to the roof. Once again, leap into the chimney.
How to beat Psalmanazar & Herodotus
Unlike Source and Maldiction, this is a pair. A duo whose mechanics are cruel.
They wield Vilify, a technique that can annihilate a party member in one strike.
Guard, heal, revive; there is no clever trick here, only endurance. Victory demands patience and a fat purse of restorative items.
Once the bosses are vanquished, return to the chimney and leap down again to the monorail. This time the train is waiting. Its only destination: “???”
True Ending Relic 3
From the station, head left.
South, at the corridor’s end, lie two Expirations, objects of direct battle damage.
North, before the final door, another chest: the Yoshihiro Bat.
Proceed east and enter the southern door. You step into emptiness, white stretching in every direction. Move southwest until you discover a door indistinguishable from the one you entered. 
Here lie two final prizes: Tuesday and The Grand Spectral, one of the exalted “Grand” artifacts.
Alas, this particular corridor of our grand itinerary remains, for the present, shrouded in incompletion.


Leave a Reply