Here is the complete guide for Shin Megami Tensei V: Vengeance. This guide will lead you step-by-step through both the Canon of Vengeance and Canon of Creation routes. There are also guides dedicated specifically to the game’s subquests, demons, abilities, and more.
**This walkthrough is currently in progress. Last updated 06/26/2024**
This guide will be updated as we make our way through the game.

I’m a Flipbox
Click me to find more info.

Flip me to find out more about a boss’ weaknesses and resistances.
Table of contents
Shin Megami Tensei V Vengeance – Tips & Tricks
Shin Megami Tensei V Vengeance is a challenging game, just like others in the franchise. However, with these tips, the journey will be a bit easier.
- Save as much as possible – There is no auto-save feature for the game, which means if you die in the game and you haven’t saved in a while, you will have to redo everything. To save, press the left arrow button on consoles or 4 on your keyboard.
- Find the Chirunnupu – In each Da’at region, there is a fox demon that will reveal the locations of every Miman within that region. It will cost a good chunk of Macca but it’s worth the price.
- Don’t get attached to your demons – Demons are meant to be used in fusions to create and customize more powerful demons throughout the game. Sticking to a few for the entire game will greatly limit you.
- Always fight the Abscess – Fighting abscess will unlock more miracles, which give you extra monster slots, passive skills, and other benefits. There are a lot of miracles and each of them will come in handy. The more Abscesses you fight, the more miracles are at your disposal. They also are a great way to grind some EXP.
- Do the subquests – The subquests will give a lot of EXP, some great items, and high-level demons. They are the best alternative to grinding for EXP and there are a lot of them.
- Always have Spyglasses – Spyglasses are the best way to reveal immunities and weaknesses quickly.
Shin Megami Tensei V Vengeance – Canon of Vengeance Walkthrough
Shin Megami Tensei V makes it very clear right off the bat which route you will be playing. It will give you a choice, one you will get a chance to change before there is no going back. Once you confirm your decision, there is no going back.
Prologue

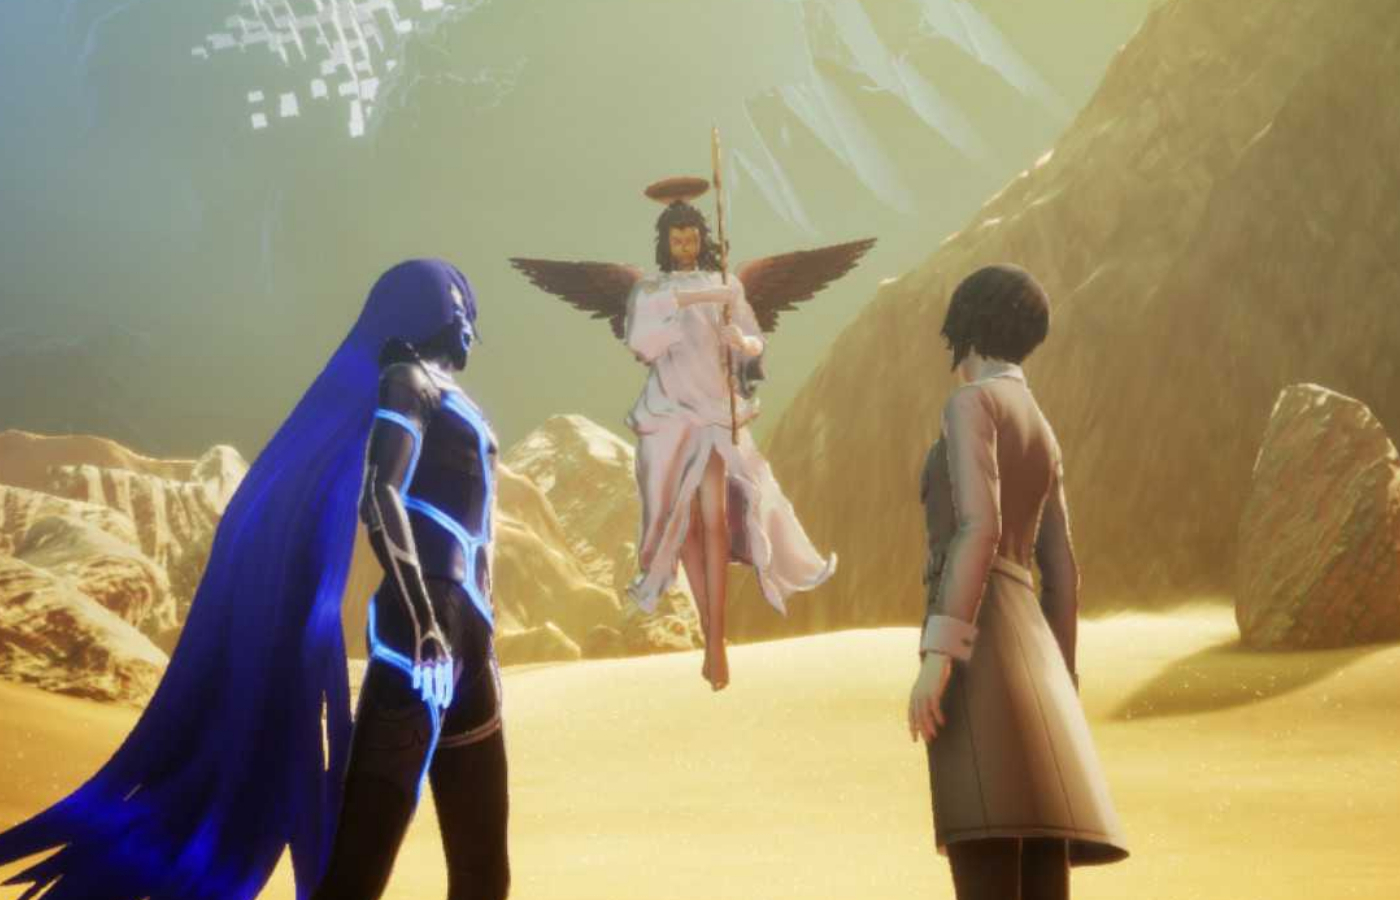
At the very beginning of the game, once the introduction cut scene finishes, players are taken to a mysterious place where a girl is floating in front of them. Players are given a choice to either take her hand or leave her alone. Take her hand to start the Canon of Vengeance route.
Once the route has been selected, the scene changes to the protagonist waking up from a dream. You will be directed to name the protagonist. After, interact with the students to find someone to go home with then follow the quest marker to trigger the next cut scene.
Players will be introduced to Yuzuru Atsuta where they are given their first alignment choice. Make your preferred choice to continue to the rest of the cut scene. The Tokyo map will then open up and direct you to the dorms.
The game shows the dorm to be across the city from the school and the fastest way to get there is through the Shinagawa Station West Exit. However, players learn that something is blocking the way in the station through another triggered cut scene.
When leaving the station, make sure to look around. Players will find the mysterious girl from the beginning of the game to the left and will have the option to interact with her.
Exit the station to return to the map screen and head north to find Yuzuru on behalf of his sister, Miyazu. This will trigger a cutscene that brings the protagonist to the Netherworld.
The first part of the Netherworld is the introduction of the battle mechanics and exploration of the game. Walking forward once players have control of the protagonist will trigger a cut scene that introduces Aogami. Here players are given their second alignment choice.
Follow along to the game’s instructions to start to first main quest.
Da’at Minato Walkthrough

Main Quest: “The Lay of the Land”
Slide down the hill to find a blue pillar of light. This is a Leyline Fount, called the Tamachi Leyline Fount, where you will be able to heal, save, and buy items from Gustave in Cadaver’s Hollow. When introduced to Gustave, he will ask that you find his lost Miman spread across the Netherworld for rewards and give you the option to start buying and selling items.
When done with Gustave, find the first Miman just up ahead by a half wall to the left and report back to Gustave to receive the first reward.
Next, make your way North, past where you found the first Miman. There will be a Pixie demon who you will be able to negotiate with and make your first party member. The Sky View feature will also be unlocked here. This will help locate items, demons, and other beings who can be interacted with.
There will be a fork in the road up ahead. To the left, there will be more demons and some Miman. At the dead end, there will be a gold treasure. Behind it is a passageway in the rock wall. Follow it and go to the left where there will be a bunch of Petra in a cave. Talk to one of them to trigger the side quest “A Preta Predicament.“
Go back to the fork in the main road and go to the right to start a cut scene with a demon in a kimono. You’ll save her but Aogami will advise the protagonist to ignore her. She will be important later on.
Farther down there will be a glowing white body. When you interact with it, Aogami will inform you that it is a husk of an Aogami type. From these husks, you can collect Essences. After a period of time, an already-visited husk can provide more Essence. Collect the Essence from the husk.
In the same area is another Leyline Fount, Mita’s Leyline Fount. Approach it to meet Sophia the Ruler of the World of Shadows. She will allow players to complete Essence Fusions and Learn Miracles. You will now be able to fast travel between different Leyline Founts.
To get to the next area, you will have to fight an Abscess. However, proceed with caution. Make sure you are leveled up and have a solid team before proceeding. There will be a few waves of demons you will have to fight before slashing at the giant Abscess.
Defeating the Abscess will give you Magatsuhi and unlock more Miracles.
Follow the trail and collect the Magatsuhi Crystals until you run into the Demon in a kimono again. She will give you a Bead that will give full HP recovery for one person.
Just past the kimono demon will be a Magatsu Rail, a red circular energy thing on the ground. Use it to reach a higher level where more demons and items can be found.
From the location where the Magatsu Rail was discovered, go right where there will be a train. Head towards the train to trigger a cut scene and the first boss fight.
Glasya-Labolas Boss Fight – Level 8

Weakness
Electricity

Blocks
Force, Dark, and Mirage
It’s the first boss fight of the game and it’s not a hard boss to deal with. The main thing to remember is to utilize the guests, Yoko Hiromine and Yuzuru Atsuta.
The demon’s weak against Electric Skills which your Nahobino and Yoko Hiromine will automatically have. These will be enough to take the Glasya-Labolas down.
Yoko can heal the party with Dia and Yuzuru will have Rakunda to lower its defense.
After the fight, follow the trail until you find the next Leyline Fount, the Shiba Leyline Fount, and the kimono demon. She’s found more stuff to give you and asks if she can tag along. No matter what you choose, she will join you. She introduces herself as Amanozako and gives you a bit of info on the demon at Tokyo Tower. She becomes your Demon Navigator who will give you tips and notify you about items nearby.
A mini cutscene is triggered and Demon Haunts are unlocked, allowing you to maintain relationships with your allied demons. They will give you items or increase their stats as you interact with them and complete quests.
From the Shiba Leyline Fount, go north and veer left until you find the giant rock-like demon. Aogami will advise you to avoid fighting it. You can challenge it later when you are at a higher level.
To the left of the giant demon behind some rocks is another Magatsu Rail.
Sneak past the giant demon and head north up the buildings. Past the buildings will be an open area with a few side quests and lots of demons to fight. At the most north point is the Hamamatsucho Leyline Fount. Reaching this point will unlock Demon Fusions.
Use this area to level up, save, and prepare for the boss fight at Tokyo Tower. This is the last area before reaching the tower. Approaching the tower will trigger a cut scene.
You are informed of the angel base at the Tokyo Diet Building where Ichiro Dazai was taken by an angel. But first, you have to take out the Hydra.
Hydra Boss Fight – Level 15

Weakness
Ice
Resists | Blocks
Resists: Confuse, Charm, Mirage, Seal, and Poison
Blocks: Fire
The best way to deal with the Hydra is to have demons that are resistant to Fire and Dark skills and at least one heavy Ice damage dealer.
Fuse the Nahobino with a Demon Essence that has Bufu to gain more turns in the fight and bring some Dark Dampeners to lessen the Hydra’s Toxic Breath. We recommend you complete the subquest “The Spirit of Love” to obtain Apsaras. If the quest wasn’t complete or you did not side with Apsaras, then Azumi is a good replacement. Both possess Bufu.
Defeating the Hydra completes the main quest “The Lay of the Land”.
Main Quest: “The Angel’s Trail”
North of the Tokyo Tower is a marker for the next main story location. Head North to trigger a cut scene where you meet Goko. He will give you are Return Pillar, an item that will transfer you to the Leyline Fount last visited from anywhere on the map.
Your next goal is to find an angel Amanozako has seen and ask about Ichiro Dazai. Head North to the next quest marker and a rundown city.
Head into the city to find the Kamiyacho Leyline Fount directly north of the Tokyo Tower. There is a lot to find in the city so take a moment to search around and save before moving on.
Go west to the quest marker to trigger a cut scene and a boss fight against Naamah of the Qadistu.
Naamah Boss Fight – Level 18


Weakness
Physical
Resists | Blocks
Resists: Fire, Ice, Electricity, Force, Sleep, Confuse, Charm, Mirage, Seal, and Poison
Blocks: Dark
Naamah is weak against physical attack but immune to most magic. She will take decent damage from Hama attacks. She has a debuff and ailment abilities, like charming an ally, so make sure you have someone with Patra. Naamah also has some heavy-hitting Dark abilities that take huge chunks of HP at a time. Make sure to at least make Nahobino immune to Dark through Essences.
Defeating Naamah completes the “The Angel’s Trail” main quest.
Main Quest: “The Angel’s Request”
Head to the Tokyo Diet Building marked on the map, northwest of the Naamah boss battle. You will find the Nagatacho Leyline Fount and two angels guarding the way. Talk to them to start the main quest “The Angel’s Request.”
The angels don’t trust that you are harmless and ask you to prove you are not a threat. You are tasked to eliminate the remnants of Lucifer’s army which is west from the Nagatacho Leyline.
Reach the area marked on the map to find a mini-boss fight with Eligor.
Eligor Boss Fight – Level 20

Weakness
Electricity
Resists | Blocks
Resists: Dark, Sleep, Confuse, Charm, Mirage, Seal, and Poison
Blocks: Fire
Eligor is joined by two Andras at level 19. All of them are weak against Zio skills. Eligor will deal Physical and Fire damage in small amounts but has a high chance to crit. This isn’t a particularly hard fight, so make sure you are topped off on HP and MP and have a couple of party members with Electric abilities.
When the boss fight is done, report back to the angels. Take the Magatsuhi Rail on the path to the left when leaving the area to get to the angels faster.
The angels are no longer blocking the path when you return. Aogami mentions you can move on. This completes the “The Angels’ Request” main quest. You will receive the Servants of Heaven Periapt upon completion.
Tokyo Diet Building
Aogami will warn you that there is a demon ahead so make sure to save before proceeding into the building.
Make sure to explore the area before going into the building. Hanging on a lamp post near the building and to the right is an Aogami Type-2 husk. Grab it.
Enter the building to trigger a cut scene. It’s time to fight the Goddess Nuwa.
Nuwa Boss Fight – Level 22


Weakness
Fire
Resists | Blocks | Reflects
Resists: Sleep, Confuse, Seal, and Poison
Blocks: Dark and Electri
Reflect: Force
Null: Charm
Nuwa is immune to Electric abilities but weak against Fire. She will deal heavy and medium Force damage with some weak Electric damage every now and then. Keep hitting her with Fire shards, gems, and other Fire skills. We suggest having demons with Fire Skills like Aitvras to gain additional turns.
You’ll fight her until you trigger another cut scene. This will introduce Shohei Yakumo and give you a chance to talk to both of them.
After the cut scene, head straight up the stairs where you will find Ichiro Dazai. After the cut scene, you can either go back to complete subquests in the Minato region or leave the Netherworld.
Back in Tokyo
Once back in Tokyo, you will have access to the terminal in Jouin University Medical Research Lab, a mini terminal in your dorm room, and the virtual trainer. The terminals work the same way as Leyline Fount and will allow you to fast travel back into the Netherworld.
Leave the Lab and head to the dorms to rest. The next bit is just a series of cut scenes and talks while getting to and from class. Make sure to do the subquest “Prince of Her Dreams ” before you leave. It is timed and not one you can go back to later in the game.
From school, head back to the dorms and up to the dorm roof to talk to Tao. After, go back to your room to end the day for more cut scenes. Make sure to take some time to level up as needed. Once you end the day, the cut scenes will lead to another boss fight.
Naama Boss Fight – Level 22
Weakness
Physical
Resists | Blocks
Resists: Fire, Ice, Electricity, Force, Sleep, Confuse, Charm, Mirage, Seal, and Poison
Blocks: Dark
Naamah is back and this time she’s a little stronger her attacks, immunities, and weaknesses are still the same. With her is a Glasya-Labolas at level 21. Hit her with Force attacks and the Glasya-Labolas with Electric skills to quickly get through the fight.
Main Quest: “Head to Jozoji Temple”
This quest is super quick, the only thing you need to do is go to Jozoji Temple. Head North to the temple. There you will see a cutscene with Goko. After the cutscene, the quest is complete.
Next head to the Jouin High School.
Main Quest: “Eliminate Lahmu”
At Jouin High, you meet up with Yoko who will join your party. The demon Lahmu has attacked the school and as the name of the quest suggests, you have to get rid of him.
There will be a Leyline Fount right in front. Use it to prepare for the fight ahead. You can fast-travel to the Netherworld to level up if needed.
Head into the school. There Sahori is captured by Lahmu and forced to give in to his demands. Head right after the cut scene to find Tao by the stairs. She will join your party. Then fight your way to Lahmu.
Continue down the hall until you hit a dead end then go up the stairs. Go down the hallway until you have to save a Jack Frost demon. It will heal you after saving it. Then take the stairs next to Jack Frost up to the next level. Ichiro is to the right.
Continue down to the end of the hallway then take the stairs up to the next floor. Go down the hall to finally reach Sahori and Lahmu.
Lahmu Boss Fight – Level 24

Weakness
Force and Light
Resists | Blocks
Resists: Fire, Sleep, Confuse, Charm, Mirage, Seal and Poison.
Blocks: Dark
It’s time to fight Lahmu. Each of its tentacles has a separate HP bar and all of them are level 24. There are 6 of them in total. They are all weak against Light skills but are resistant to Fire. It has both Dark and Ice skills at its disposal.
Have Tao in your party. She has Mahama +3 in her skill list which will do decent Light damage to all 6 tentacles in one shot. Getting rid of all tentacles will allow you to start attacking the main body. The main body has the same level and stats as its tentacles. It has a chance to Instakill when striking weaknesses.
Defeating Lahmu completes the “Eliminate Lahmu” main quest.
Da’at Shinagawa Walkthrough
Main Quest: “Save the Students”

The second area in the Netherworld is now unlocked and there are kidnapped students that need saving throughout it. But first, unlock the Tennozu Isle Leyline Fount.
There are four different student location markers on the map. Start with the northmost point and work your way south.
Take the walkway bridge straight ahead to the building at the end. Go around the building to reach the bridge on the other side. Make your way to the dead end where an Aogami Type-3 will be. Underneath the bridge is one of the students.
Continue following along under the bridge then take the first right. There will be some red blocks to jump on to reach a higher level and where the second student is located. The Tennozu Leyline Fount will also be in this area.
There is another smaller walkway nearby. Follow it then go down the cliffside to find the third student at the base of one of the building pillars.
Go right to follow along the building then turn left. If you take the Magatsu Rail, you will find an Aogami Type-B.
Go up the hill to the building where the fourth student is hiding inside.
Main Quest: “Save the Students (cont.)”
Once the four students have been located, you are instructed to find Miyazu. Go east from the fourth student’s location to the marker on the map. There will be a Magatsu Rail. Turn right at the rail then go up the hill to find Ichiro.
You’ll receive the “Infiltrate the Demon Feast” subquest. Quickly to the quest before moving on because it can only be done for a limited amount of time.
Make your way up the mountain until you find the Shinagawa Pier Leyline Fount. From the Leyline Fount head Northeast. Make your way behind the buildings on the right to find Abdiel. Watch her cut scene then make your way into a large area with giant holding containers.
In one of the containers in the Southwest corner, you’ll find Yuzuru and an injured Hayataro. This will trigger the limited-time subquest “Supply Run”. Quickly complete the quest.
From Yuzuru’s location, make your way north until you see some containers forming giant stairs. Jump your way up to find the Container Yard Leyline Fount.
Head into the giant container nearby to find Miyazu and the next boss fight against Eiseth, a member of the Qadistu.
Eiseth Boss Fight – Level 28


Weakness
Force
Resists | Blocks
Resists: Sleep, Confuse, Charm, Mirage, Seal and Poison.
Blocks: Dark and Fire
Eiseth is immune to Fire and Dark Skills, resistant to all ailments, and weak against Force skills. She will deal poison and Physical Skills in a variety of ways, being able to attack the entire party in one hit and deal heavy blows to individuals. Make sure to have demons that have Zanma and a high potential for Force skill. They should be resistant to Physical Skills.
Finishing the fight completes the main quest “Save the Students (cont.)”.
After the fight, go through the giant container and follow the path North. Keep going until you find the Konan 3rd Bock Leyline Fount. Here Amanozako will leave you for now. But, you will find an Agathion to become your navigator demon just north of the Leyline.
Make your way southwest toward the next main story marker on your map. It will lead you to the next Leyline Fount, the Mitatebashi Leyline Fount. Go to the marker to trigger a cut scene and boss fight.
Fionn mac Cumahill Boss Fight – Level 32
Weakness
Electric
Resists | Blocks
Resists: Fire, Light, Confuse, Charm, Mirage, and Poison.
Null: Sleep and Seal.
Fionn mac Cumhaill is your next boss. They are weak against Electric Skills and immune to Fire and Light Skills. They will deal a few medium-strength Force Skills your way but the most damaging ability is his Maragion +4 which will deal Fire damage to the entire party as a Magatsuhi attack.
Fionn is weak to Electric which Yoko will have and you Nahobino if you’ve kept the ability. Other demons we recommend are Lilim and Mothman.
After the fight with Fionn, continue heading West to the fairy village. You’ll be weaving in between and through buildings until you reach the Konan 2nd Block Leyline Fount. Walk up the angled building next to the Leyline Fount to reach Ichiro.
Ichiro will tell you he will search the Northern part of the area, blocking a part of the area off for now. You will be instructed to head Southwest to continue looking for Miyazu.
Follow a narrow path until you hit a forest. Continue South through the forest. You will find the Fairy Village Leyline Fount and Yuzuru. After talking to Yuzuru, head into the Fairy Village and talk to King Oberon and Queen Tatiana.
Main Quest: “A Golden Opportunity”
The king and queen inform you they need medical supplies in order to help all the students taking refuge in the village. You will need 3 Golden Apples from Idun, which can be found down the river.
Follow the river until you find Idun. She will be on the shore to the right. Unfortunately, Loki has stolen her apples. It’s time for some apple hunting.
Idun points out the direction Loki had gone after stealing the apples. Just north of her location are three spots marked on the map.
The first apple will the slightly northeast on the other side of the river. Cross the river and run past some Basilisks and Nekomata until you hit a ledge. The Golden Apple will be to the right on the ledge.
The second Golden Apple is much farther Northeast. Continue on the path Northward until you have to jump up another ledge. Jump up that ledge to find the second Golden Apple to the right.
The last Golden Apple is Southwest. Follow the train tracks South and then continue past them and the groups of Lilim floating around. The last apple will be next to a tree just before the cliff’s edge.
Once all the apples have been collected, head back to Oberon and Tatiana to complete the main quest “A Golden Opportunity.”
Main Quest: “Go to Yuzuru’s Aid”
Dazai showed up injured and informs the group that Yuzuru needs help rescuing Miyazu. It’s time to do some backtracking. You can save some time by fast traveling to the Konan 2nd Block Leyline Fount.
From the Leyline Fount, go up the angled building then turn left to the ramps in between the buildings. Follow the ramp up until you hit an open area and another angled building. Go up that building to find the Shinagawa Station Leyline.
Go past the trains to find Yuzuru and Eiseth holding Miyazu captive. It’s time for another boss fight but this time it isn’t Eiseth who you have to fight.
Yuzuru and Hayataro Boss Fight – Level 38


Weakness
Tuzuru is Weak to Fire Hayataro is Weak to Force
Resists | Blocks
Yuzuru Resists Ice, Light, Sleep, Mirage, Seal, and Poison
Yuzuru Blocks Confuse and Charm
Hayataro Resists Physical, Light, Sleep, Confuse, Charm, Mirage, Seal, and Poison.
Hayataro Blocks Electric
Hayataro can force you and your team to attack them instead of Yuzuru. Take them out ASAP so you can direct your attacks to Yuzuru who is much easier to deal with alone. You will need to do as much damage as you can before Yuzuru revives and brings Hayataro back.
Finishing this boss fight completes the main quest “Go to Yuzuru’s Aid.”
Return to Tokyo
After discovering the fairies and students being turned into salt, return to Tokyo through the closest Leyline Fount then go talk to Koshimizu at the Bethel Meeting Room.
Main Quest: “Investigate the Anomalies in Tokyo”
Coming Soon!
Shin Megami Tensei V Vengeance – All Alignment Choices

Shin Megami Tensei V: Vengeance‘s Canon of Vengeance route has two endings that the player can get. However, unlike the Canon of Creation route, the endings are dictated by the choices the player makes throughout the story. These choices can be differentiated by Law (good) or Chaos (bad) alignments. Below is a list of the choices and the alignment they represent:
| Law Choices | Chaos Choices |
|---|---|
| Sure | . . . I don’t want to |
| Take his hand | Nod |
| It seems this is the netherworld. | Maybe it’s 20 years in our future. |
| It’s a pleasure. | Bethel scares me. |
| Not feeling well today? | Who was that? |
| What’s this about? | Is this about Sahori Itsukishima? |
| Tell the teacher. | Stay with her. |
| I did. | Are you? |
| We have to help her. | We have to kill Lahmu. |
| I think it’s bright. | I can’t count on it. |
Shin Megami Tensei V Vengeance – Canon of Creation Walkthrough
Coming Soon!


Leave a Reply